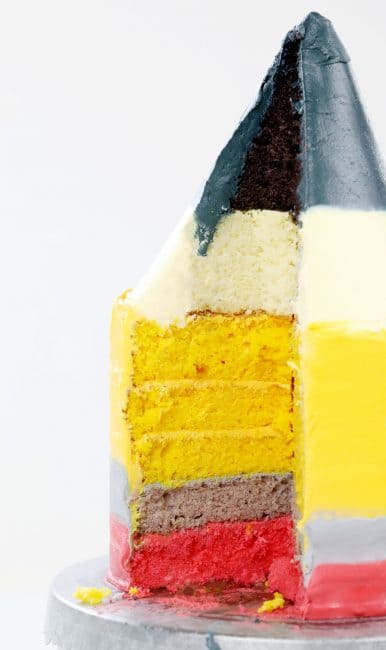
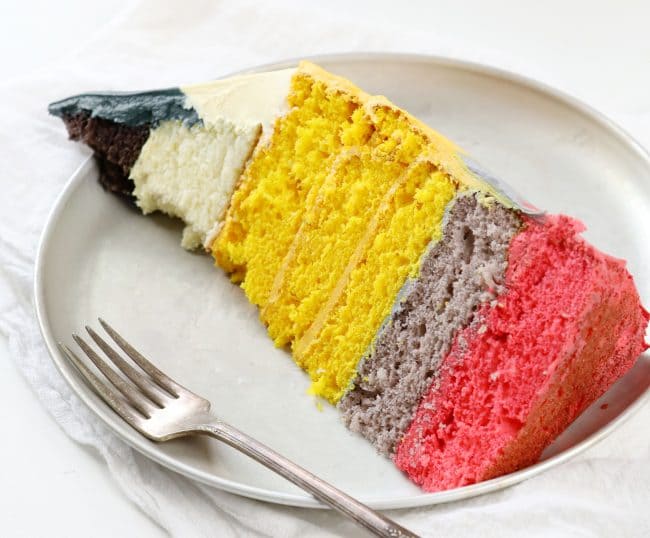
You won’t believe how easy it is to turn one of the most common school supplies into a cake… this Pencil Cake is beyond fun, from the inside out!
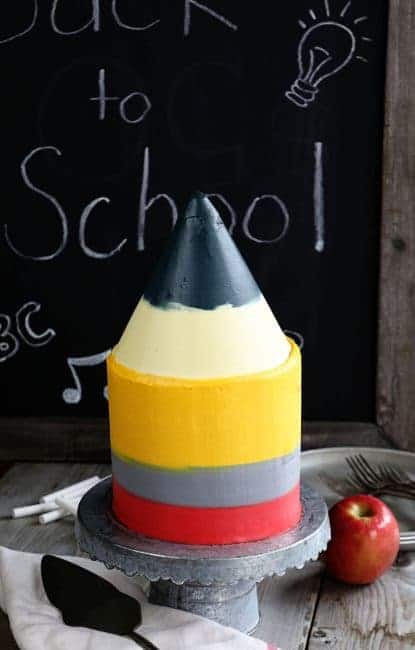
As is common in the midwest, we start school after Labor Day. However, I know that other kids have been back for at least a few weeks! No matter what day your kids return, this fun Pencil Cake is a delicious and creative way to usher in the school year.
Pencil Cake “Supply List”
white cake recipe, doubled (or 2 boxes white cake mix)
buttercream recipe, doubled
red, yellow, and black McCormick food color
McCormick Vanilla Extract
6-inch round cake pans
3-inch round cake pan
cooling rack
small offset spatula
bench scraper
sharp knife
rotating cake stand
cake stand
Being by preparing your cake batter. You will need to full white cake recipes. You can double the recipe above or you can use two boxes of cake mix. You should have at least 8 cups of cake batter. Set out four bowls.
We will start by baking the pencil and eraser portion of the cake.
Place 1 cup of batter into two bowls. (one cup in each bowl) In the first bowl, add McCormick red food color (about 1 tsp) and tint it a dark pink. This will be the eraser.
In the second bowl, add McCormick black food color (about 5 drops) and tint it light gray. This will be the “metal” portion of the pencil.
Now place 3 cups of batter into another bowl and add yellow food color. I used 2 teaspoons to achieve a deep yellow color.
To bake the cakes we will be using 6-inch round cake pans. If you only have two pans you will want to break up the baking portion of this cake over the course of a day or two days. Prepare the pans and add the pink batter to one pan, the gray batter to another pan, then the yellow batter divided between 3 pans.
Bake at 350 for about 18-26 minutes, or until the cake has pulled away from the sides and it’s slightly browned on top.
Allow to cool for 5 minutes then invert the cakes onto a cooling rack and allow to cool to room temperature. (Wash pans if necessary)
Now divide remaining batter between 2 bowls. One bowl will get about 2 drops of McCormick yellow food color (this is the cream portion of the pencil) and the other will get at least 1 tsp of McCormick black food color. (Can use more if needed.) I baked the cream batter in the 6-inch round cake pan and the black batter in a 3-inch round cake pan. The 3-inch round cake will take longer to bake and will rise significantly, this is ok as we want a tall “point” to the pencil cake. Start checking the cakes at 18 minutes.
Once the cream and black cakes are baked and cooled slightly, invert onto cooling rack and then freeze them for at least 3 hours. It is much easier to carve a chilled cake.
Now it’s time to prepare the frosting.
I made two batches of buttercream which is about 8 cups of frosting.
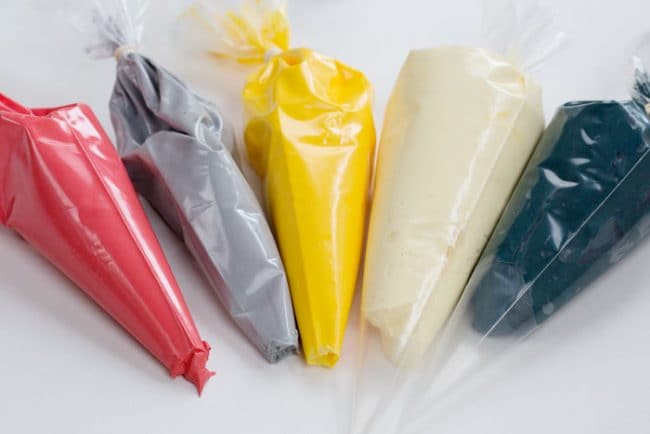
The yellow frosting was 4 cups, the pink 1 cup, the gray 1 cup, cream 1 cup, and dark gray 1 cup.
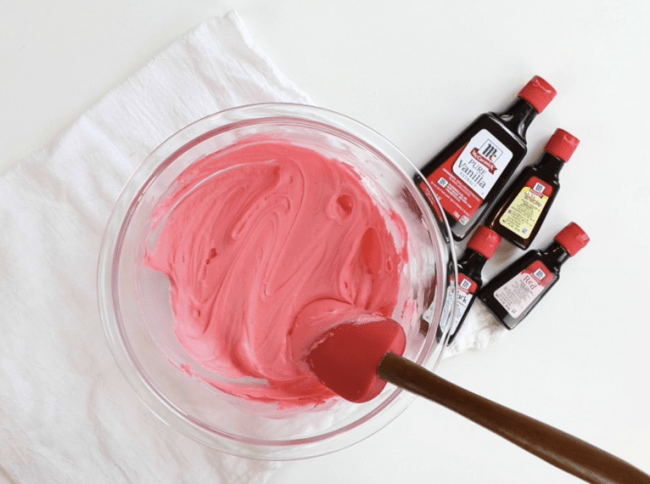
For the yellow, I added 2 teaspoons of McCormick yellow. Pink was about 1 teaspoon of McCormick red food color. Cream was 1-2 drops of McCormick yellow food color. The dark gray was 2 teaspoons of McCormick black food color. I also added McCormick Vanilla to the red and the black food color to ensure wonderfully sweet flavor!
Add the frosting to pastry bags and set aside until ready to assemble the cake.
Place cake stand on top of a rotating cake stand. Set the pink layer of cake on the cake stand. Cut off the tip of the pink frosting bag and then pipe some frosting onto the cake. Smooth out with small offset spatula. Allow the frosting to spill over the sides. (it will be smoothed out later)
Set gray cake on top of the pink and cover with some gray frosting. Smooth out if necessary.
Set yellow on top and then repeat with all yellow layers. Smooth out the frosting on the sides of the cake
Smooth out the frosting on the sides of the cake. Set the cake (that is on the cake stand) in the fridge while working on the next step.
Place the cream cake on rotating cake stand and cover with a tiny bit of cream frosting. Now set the smaller black cake on top and press gently. I inserted a long skewer into the center of the cakes to help with stability while I was carving the cakes and to act as a center guideline.
Note: the cakes should be very chilled. Now take a sharp knife and, starting at the top of the cake, start carving down and away, moving towards the edge of the cream cake. Keep in mind the shape of a sharpened pencil while carving away excess cake.
Remove cake from fridge and set back on rotating cake stand. Set the pencil tip on top of the cake and press gently. Now take the cream frosting and pipe around the cream cake. Smooth slightly with small offset spatula. Now pipe the black frosting around the black cake. Hold a bench scraper against the frosting with one hand and start rotating the cake stand with the other. Move slow and steady. Go back in and add frosting to any spots that may need more frosting and repeat smoothing with the bench scraper. If there is excess frosting on the tip feel free to use a clean small offset spatula to smooth out.
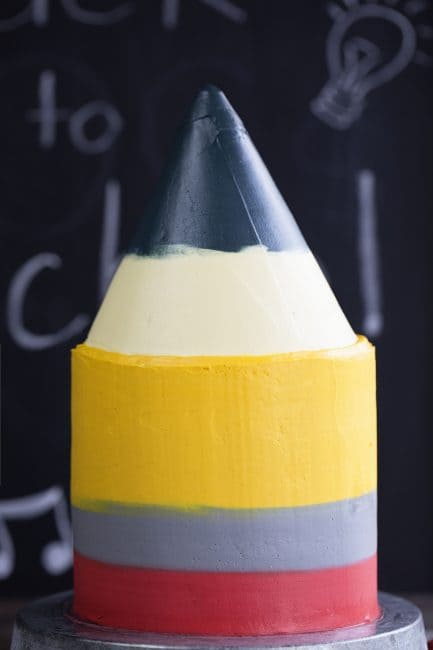
Now move to the sides of the cake. Starting at the bottom pipe 2-3 rows of pink frosting around the cake. Then pipe out 2 rows of gray. Then pipe yellow up the sides.
Using the bench scraper, smooth out the sides of the cake.
Chill until ready to serve.
Check out this video on how I put this all together:
Thanks so much for supporting iambaker. I work with McCormick and love that I am able to share my favorite products. This cake would not have been possible without them and I am so grateful for their partnership!
!


There is no video link, would love to see!! Beautiful and creative cake.
I love how the outside colors match perfectly with the inside.
Love your site!
Fixed!
Thank you thank you thank you! Awesome video.
Do you know of an frosting that is light and not real sweet?
The perfect gift cake for Teacher’s Day. Will definitely try this cake on Teachers day fest. Your color scheme is really perfect. Loved this cake completely. Thanks for sharing this awesome &b adorable cake recipe with us. Looking forward to more recipes. Best Wishes and Regards
Like the recipes