When a friend’s daughter asked for a Powerpuff Girls Cake for her birthday I jumped at the change. Blossom, Bubbles, and Buttercup are just about the cutest superhero’s in all of cartoon land!
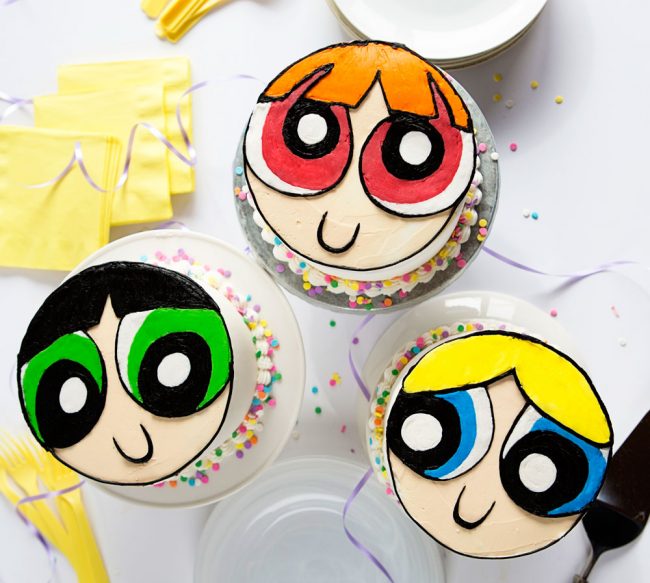
One of my friends has a daughter that is addicted to The Powerpuff Girls and was desperate to have them be the theme of her birthday party. Well, much to her dismay, she could not find a bakery that would make her a Powerpuff Girl cake for less than $100! I jumped in and volunteered to make the cakes… I mean who wouldn’t love to recreate those sweet girls?
To make these cakes you will need:
three 6-inch round layer cakes
double batch of whipped vanilla buttercream
food color – pink, green, blue, peach, black, orange (I just made my own colors using McCormick food color)
3 cake stands
toothpick
small offset spatula
pastry bags
coupler set
#3 piping tip
Bake and assemble cakes. You should have three 2-layer cakes. (You can also make these single layer cakes.) Place cake on the cake stand you will be serving the cakes on.
Prepare buttercream. Using food color, prepare the colors you will need. I made about 1 cup of each color. Place each color in a piping bag and seal it with a rubber band. When you are ready to pipe the cake you will just place the prepared frosting in a piping bag with a coupler set and #3 tip. (I call this my double bagging method and you can find out more about that here)
Cover cakes in a crumb coat. Chill.
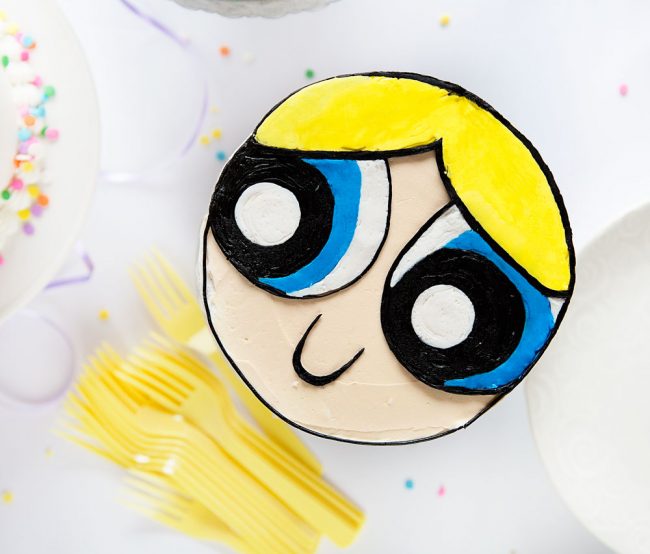
Using a small offset spatula, cover the top of the cake with peach (flesh colored) buttercream. Get as smooth as possible. Using a toothpick, gently draw out the design for the girl’s faces. If you make a mistake just use your finger to smooth out the frosting then re-write the line.
I actually made a little video on how I piped one of them:
I started with the hair, then did the eyes, then the mouth.
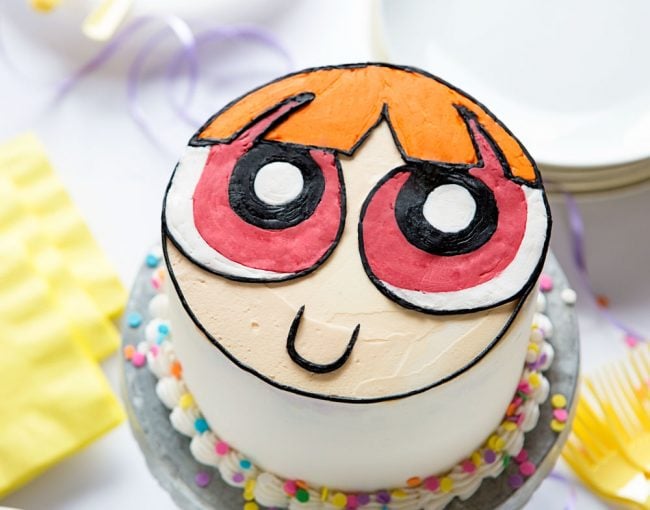
I have to tell you my trick on how I mostly smoothed out the frosting! After piping the cake I placed it in the freezer for 15 minutes. Once the frosting was well chilled and hard I remove it and placed a small piece of parchment paper over top Using a fondant smoother (you can use your fingers) I pressed evenly on the parchment. After making sure it was as even as possible, I slowly removed the parchment. If there were any spots that needed touching up, I just went back in with the color and fixed it.
So what did the birthday girl think of her cakes? Well, she LOVED them of course! She wanted to keep Blossom forever but later decided to sneak a bite. 🙂


These cakes are so sweet 😀
These are sooo cute! Can’t get over them!