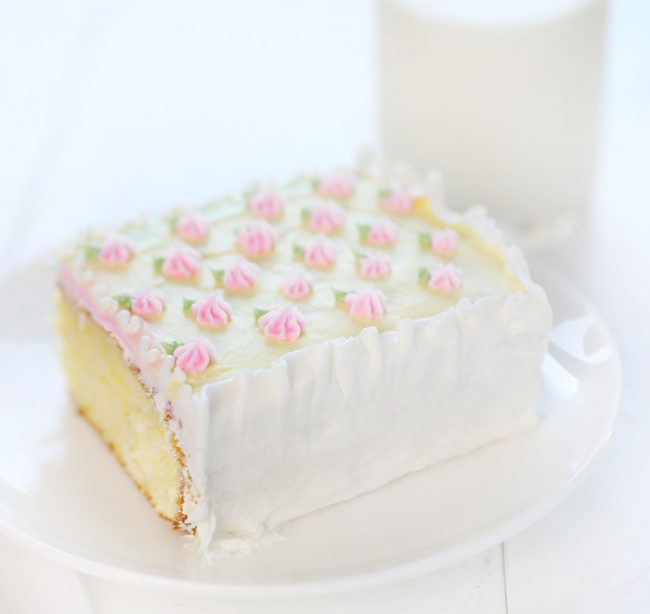
This all-buttercream Quilt Cake is a sweet little tribute to everything baby. It could be made for a pregnancy announcement, a baby shower, even a 1st birthday. Or heck, you could make it if you are over 40 and done having babies and got to hold a sweet little precious angel and now your ovaries are screaming out in protest so you bake a cake to make yourself feel better. Is that just me?
NOTE:
I searched google and Pinterest for examples of buttercream patchwork cakes and couldn’t find many. So everything I am showing here today is a “trial run” and there is definitely room for improvement. I have made this cake 3 times now and each time I get better and change something to make the process easier. If you end up making this cake and have advice/tips/tricks, please do share! 🙂
To make this cake you will need:
9×13 cake (I used this yellow cake recipe)
vanilla buttercream recipe doubled
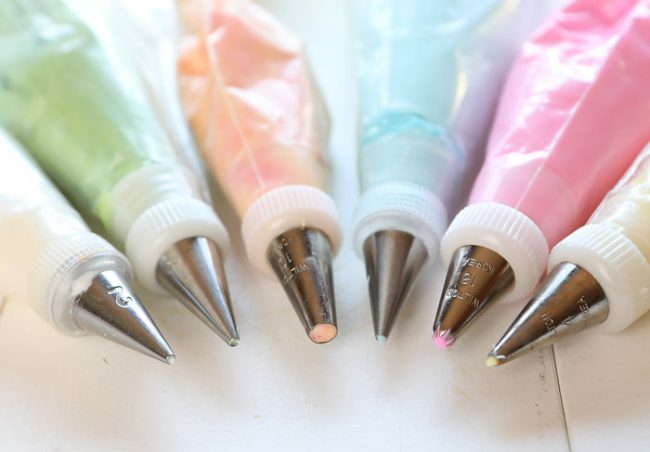
food color: red (for pink) yellow, blue, green (orange made with red and yellow)
small offset spatula
decorating tips: 2, 3, 4, 10, 18, 47, bakery craft #70 tip for edges, cake icer tip
Begin by making your 9×13 cake in the flavor of your choice. I placed my cake on a large white cutting board and then chilled it until I was ready to begin decorating.
Prepare buttercream. Reserve 3 cups plain white to cover the cake, then divide the remaining frosting into five bowls. Tint them pink, yellow, orange, green, and blue.
Frost cake using the cake icer tip. Smooth out with small offset spatula. (save any remaining white frosting for the stitching on the cake)
With a long knife or large offset spatula, mark the cake into 12 squares. This is just a guideline.
I used a coupler set in all the pastry bags because I switched from the #47 tip to the decorating tip of choice. (For instance, I switched the green from the #47 tip to the #3 tip so I could use that same green to make the mini leaves on the pink rose buds.)
All colors started out with the #47 tip. If you do not have this tips it’s ok, just spread out the frosting within the square and try to keep it as flat as possible. You will go back in with a small offset spatula to really smooth out.
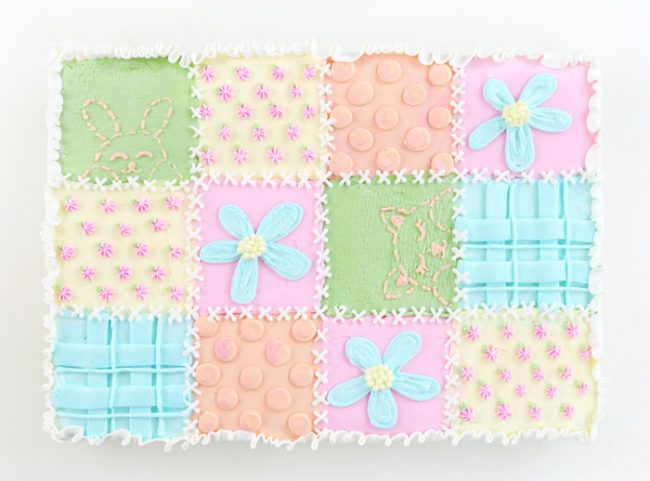
Begin by having a pattern written down or an image to work from. (image below) You can choose any color combination and pattern you want, but you definitely need the pattern established before you begin decorating.
SIDENOTE: I have done this “smoothing” method a few different ways. One was to smooth out each square after I piped it. Another was to smooth out all the squares after everything was piped. Another is to pipe out the squares, gently smooth with an offset spatula, then place the cake in the freezer to chill. After about 30 minutes, remove the cake and cover with parchment paper. Then use a bench scraper or fondant smoother to press down on the cake and evenly flatten all the layers and perfectly smooth it. This method does work, but takes a lot of extra time and preparation and futzing. If you have the time and the desire for perfection (not something that motivates my scattered brain) then I recommend this method.
This is the pattern I chose:
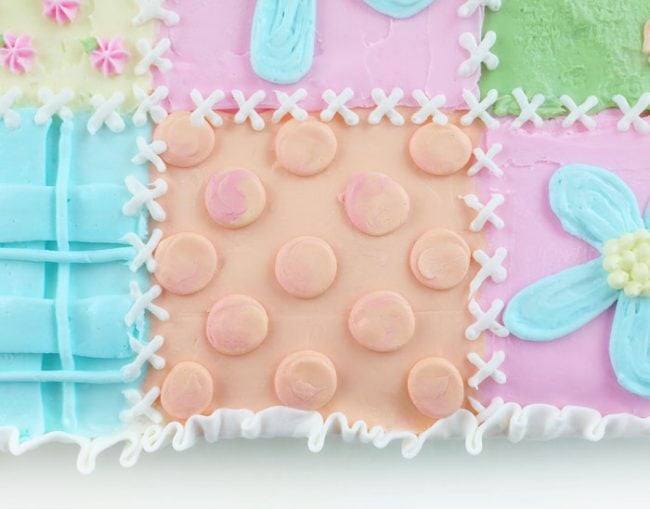
pink squares have a blue flower- #4 tip
yellow squares have mini pink flowers #18 tip with green leaves #3 tip
blue squares have a monochromatic plaid design #47 tip and #3 tip
green squares have an orange “stitched” chenille bunny and kitten #3 tip
orange squares have polka dots #10 tip (flatten with a clean finger after frosting sets a bit)
the edge was done with the #70 ruffle tip and then I just smoothed out the bottom edge of the cake with my small offset spatula
The crisscross stitch was done with white #2 tip
Here are my rough sketches of the designs I was tinkering with.
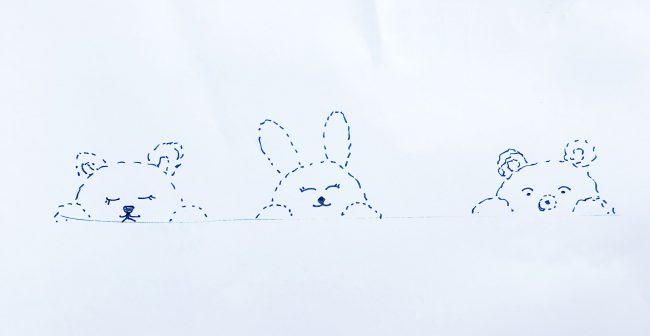
I loved the idea of adding these “stitched” animals to the quilt and decided to go for a chenille look.
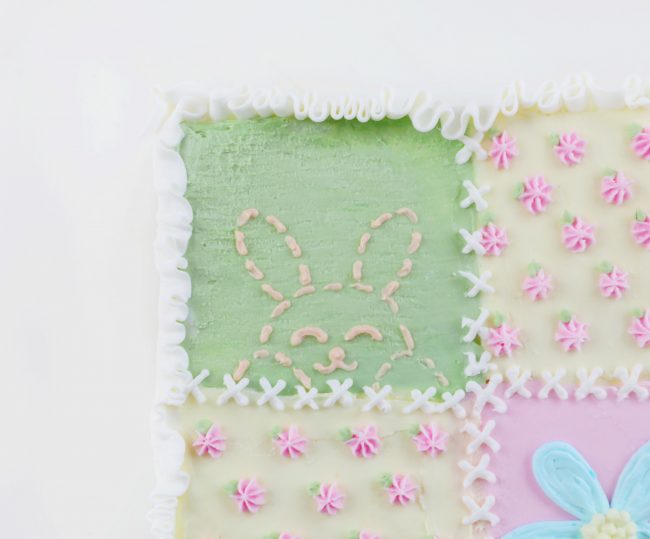
I used a small piece of Viva paper towel and pressed it into the square on the cake to try and create texture. This ended up not being the best idea and next time I may use the Viva on a different square and keep the stitched animals on a smooth colored square. I think the texture compete with each other too much, especially on the kitty square.
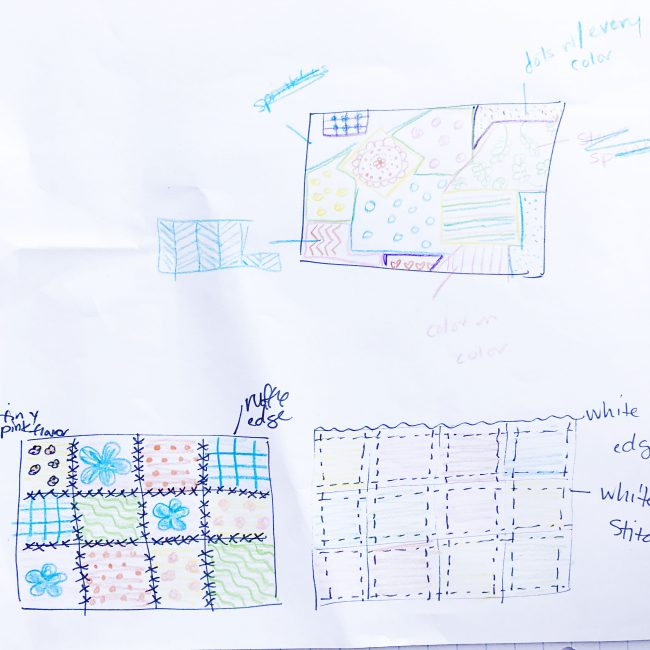
I went through a lot of options and trial runs with this cake. I found it difficult to pipe the green wavy lines with consistency, so scratched that option. I also loved the idea of the white stitching being inside each square, but that limited the designs. I think I still might try that in the future though!
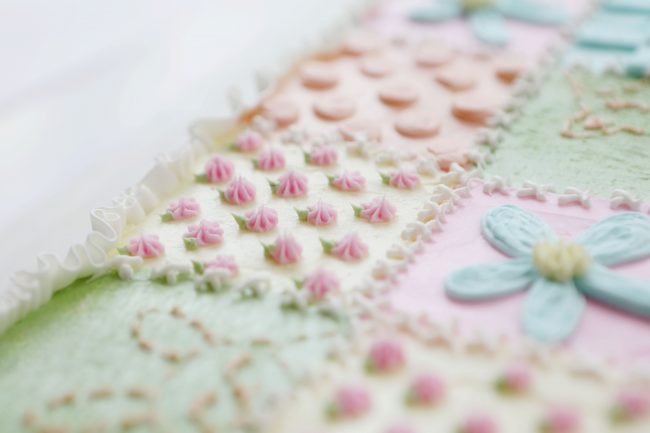
After it was all said and done, the mini flower square was my favorite. It might be fun to do an entire patchwork quilt cake with mini flowers designs, and it is a great way to add a lot of detail without needed to be a professional cake decorator!
Tips for success:
Have all your tips and tools ready to go! You could even prepare the cake and buttercream a day in advance and then do the piping work the next day.
Be flexible with your designs. Sometimes things work better than you think they will and sometimes it doesn’t work out. The beauty of this cake is that you can change your designs on the fly and still end up with a pretty cake! You can see in the video that my squares were not perfectly square, but that was covered up a bit with the final “stitching” piping.
Personalize it. If you are making this cake for a special new mom or baby shower, feel free to make the squares into alphabet letters in the babies name. Or switch the colors to fit mom’s theme. This cake has the potential to be a very special part of any celebration!
Here is a video on how I made this cake:


This is absolutely beautiful!! I love the texture with the paper towel. You have great talent, Amanda!!!!! I love your site!!!!!!! <3
This cake is so cute! You almost have me believing I can do this!!
This cake is so sweet! I was wondering what is that tip that you used (at the very end of the video) to add a
‘ruffle’ along the edge. I have never seen that before and am very curious about it 🙂
Thank you!
Do you a Your butter cream icing recipe I would love to have it
U are too good . Ur receipes are awesome. Pls give the measurements of the ingredients used in the vedio itself. Its a request.
I really love your creations. Thank you for sharing your ideas and creativity. Honestly your such an inspiration to me as a self taught baker. May God bless you!☺️
Amazing ,beautiful decoration, I wish I could learn this
I’m looking for a true butter cream frosting that has the smoothness of cream with butter. Can you tell me how to find this receipt that doesn’t have powdered sugar