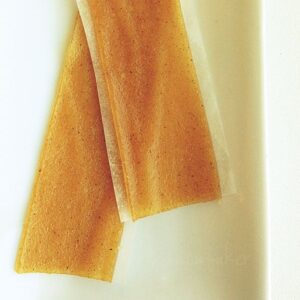
Homemade Pear Fruit Rollups
We were gifted some beautiful Harry & David treats over Christmas, and the box just so happened to include six fabulous pears. Seeing as we live in Minnesota and its the middle of the winter, that was a fabulous gift indeed!
Servings: 8 servings
Ingredients
- 4 very ripe pears
- 1/4 cup water
- 2 tablespoons granulated sugar
- 1/4 teaspoon ground cinnamon
- 1 pinch fine salt
- 2 teaspoons freshly squeezed lemon juice
Instructions
- Peel the pears, remove the cores and stem, and cut into small pieces.
- Place pear pieces into a saucepan and carefully add the water, sugar, cinnamon, and salt.
- Bring the mixture to a low boil, over medium to medium-high heat.
- Once you reach a slow boil, reduce the heat to medium-low and simmer, stirring occasionally, until the pears are knife tender. This took about five minutes since my pears were so ripe. If your pears are less ripe, just make sure you can easily pierce them with a fork and increase your cook time to about 15 minutes before moving on to the next step.
- Very slowly and carefully pour the mixture into a blender. I held a thick towel over the top instead of the lid to help any steam escape. Blend on high until the mixture is very smooth. (In my ancient blender this was about 3 minutes)
DEHYDRATOR METHOD
- Place piece of parchment on your dehydrator tray. Carefully pour mixture from blender and spread out with a rubber spatula or offset spatula. Careful to not get pear mixture to close to the edge. I started with about half the mixture and then added the remaining. We have a large dehydrator, so I could easily fit this on one tray, but you can also divide it into two.
- Following your machines directions, dry fruit until slightly tacky. Place in airtight container and enjoy!
OVEN METHOD
- Preheat the oven to your lowest oven temperature.
- Slowly pour the purée onto the baking mat, letting it spill into the middle and then slowly pushing it out to the sides using a small offset spatula.
- Gently tap the pan on the counter to get of any bubbles and make the puree as even as possible.
- Place in the oven and bake until the surface of the fruit leather is slightly sticky to the touch but, when pressed in several different places, a finger does not leave an indentation, about 6 to 7 hours.
- Remove the baking sheet from the oven, place on a wire rack, and let cool completely.8Set aside a 16-inch-long sheet of waxed or parchment paper. Starting at one short edge of the cooled fruit leather, pull it up from the baking mat and transfer it to the paper. Using clean kitchen scissors, cut through the fruit leather and paper to form desired-sized strips, shapes, or pieces and roll up, paper and all. .
- Store in an airtight container for up to 3 weeks
