Every now and then, I am lucky enough to make treats for the people I know.
This weekend I made two HUGE cakes for the folks in my hubby’s office. He works at Kraus Anderson.
This is their logo.

So I was making them a couple spring cakes but decided to do something a little different on the inside.
(shocking for me, I know) And sadly, I dont have pictures of the inside. So am going to have my oldest child to draw one for me.
And when I say oldest child, I really mean me, but I dont want anyone to know what a horrific drawer I am so I am trying to blame it on my poor defenseless child.
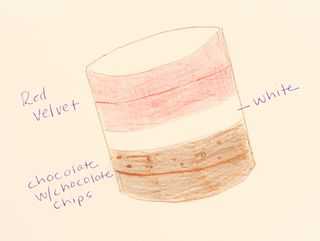
The bottom layer is devils food with miniature semi-sweet chocolate chips added, the middle layer is white cake, the top layer is red velvet. I made SIX batches of cake for this monster.
UPDATE!! They sent me a picture they took! Thank you so much KA Midwest Office!! 🙂
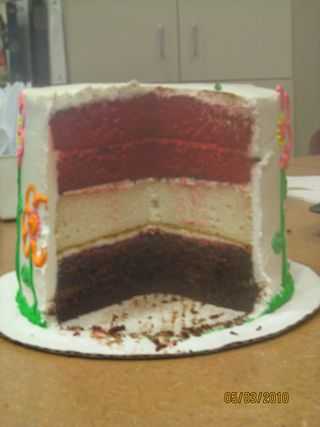
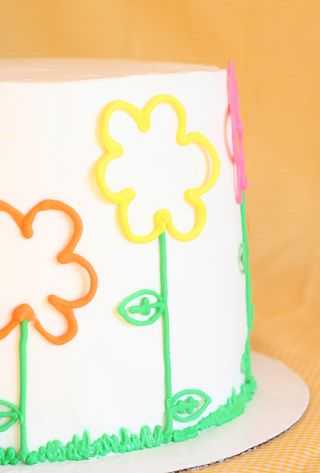
Anywho… here is the cake!
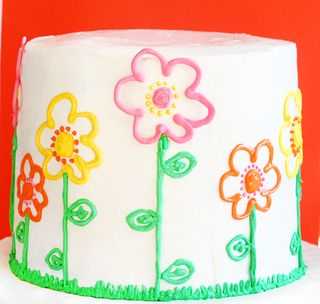
Its a happy fun super easy spring flower cake. And I thought I would share with you how I made all those flowers!
(Of course, you can totally pipe right on the cake, but I like uniformity and consistency, and I wanted every flower to look similar so I chose this method)

I started by drawing out what design I wanted on a sheet of white paper.
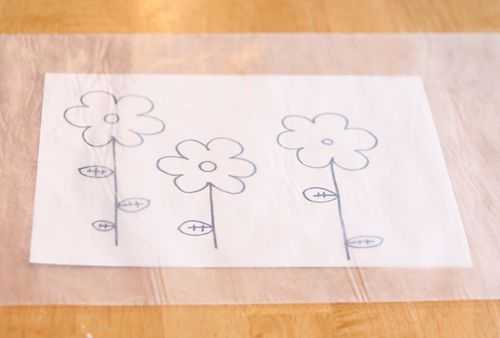
Then I slipped the drawing behind a sheet of wax paper. (you can also use parchment)
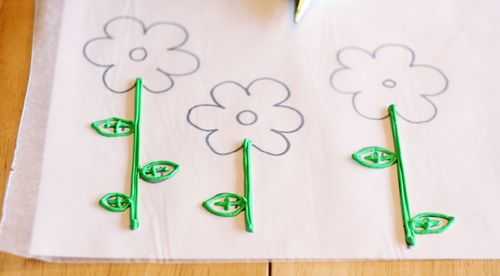
Now just start tracing! I grabbed some green royal icing (its important to use traditional royal icing, NOT my version) and piped on the stems.
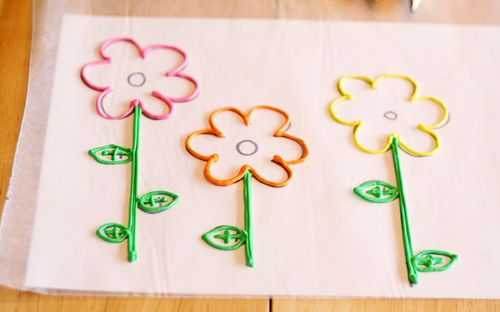
Then went back and finished with the rest of my colors!
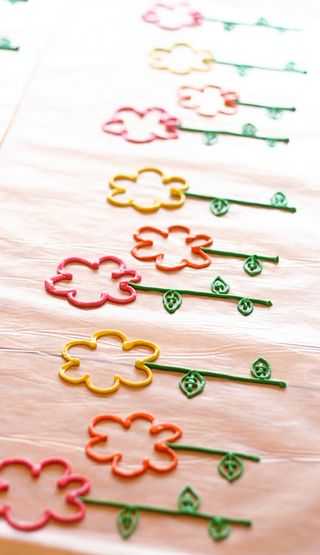
I made about three sheets of these, so I would have enough for two big cakes. After they have dried for at least 24 hours, then gently picked them up and placed them around the cake. I placed them directly onto the frosting, so no ‘glue’ was needed.
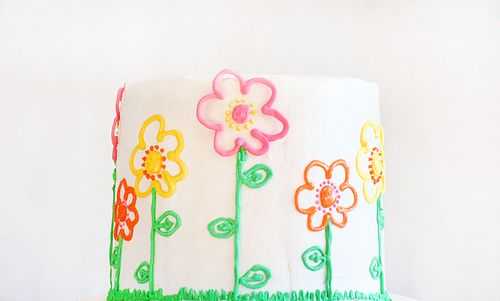
Then just go back in and add the center design with some dots. You can pipe out some grass for a neat bottom border.
If you wanted to make this special for Mothers Day, you could just write out “Happy Mothers Day To The Best Mom That Ever Walked The Face Of The Earth!” on the top of the cake.
Or Happy Mothers Day.
Whatever floats your boat.
I have ONE more big Mothers Day gift idea coming, but tomorrow is my Anniversary to my dear hubby (eight years!)… so it might be a few days before I can post it. But it will be BEFORE May 9th, promise!



Great cake for spring! You did a good job.
Bethany 🙂
What an adorable cake!:) Just want to let you know we are hosting an awesome giveaway thru CSN stores:)
I just wanted to let you know ( I just stumbled upon your blog) that we share the exact same anniversary date…down to the year! How cool is that!!!!
Your cakes are SO beautiful! A cake decorating kit (Wilton?) and some decorating lessons are on my wish list! Is it silly to have “decorate a beautiful cake” on my bucket list?
BEAUTIFUL!!!
I so wish I lived near you so I could take cake baking/decorating classes from you. You are so totally amazing. I’ve featured this tutorial on my blog and linked back to you. Great job!
sickeningly talented! (did i spell that right? NOT talented! come on Amanda! :))
This is brilliant! I will definitely try this technique very soon!
Do the royal icing flowers have to dry for 24 hours? Do you think a hairdryer would help them to dry more quickly if we needed them, say, tomorrow 🙂
Awwwww…that’s just precious!!! I would cry if I got a cake like that! 🙂
I really love the drawing your daughter did! It’s so cute! And pretty accurate too! The cake looks great!