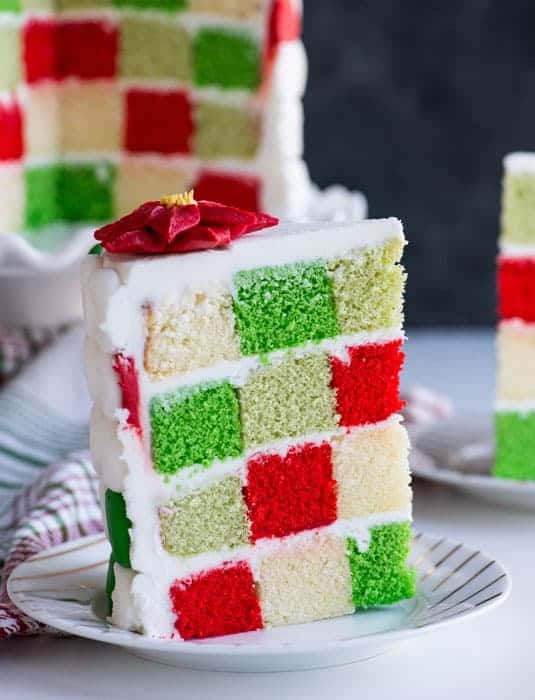
Creating a Christmas inspired Checkerboard Cake is a really fun way to delight friends and family!
To make this cake you will need:
- Four 8-inch round cakes leveled. (One red, one white, one dark green, and one light green. You can use a white cake recipe doubled or 2 boxes of white cake mix.)
- Template for making circles (6-inch round circle with center cut out)
- Whipped Vanilla Buttercream (I doubled this so I would have extra red, green, and yellow on hand)
- Food Color (red, green, yellow)
- offset spatula (and bench scraper if you want smooth sides)
- #352 leaf tip, #233 grass tip, large open round tip
- pastry bags
Make template. (You can also buy a pan that is created for checkerboard cakes or use large cookie cutters). Trace a 6-inch circle then measure 2-inches in, make another circle, and cut out the center. You should have a giant circle shaped like a donut.
Take the first layer of leveled cake and center template on top. It’s important that your cakes are very CHILLED for this process. it will make cutting and moving the cake pieces much easier. Use a sharp knife and trace around the template on the outside and then on the inside. You should now have three circles in your cake. Repeat this for all layers.
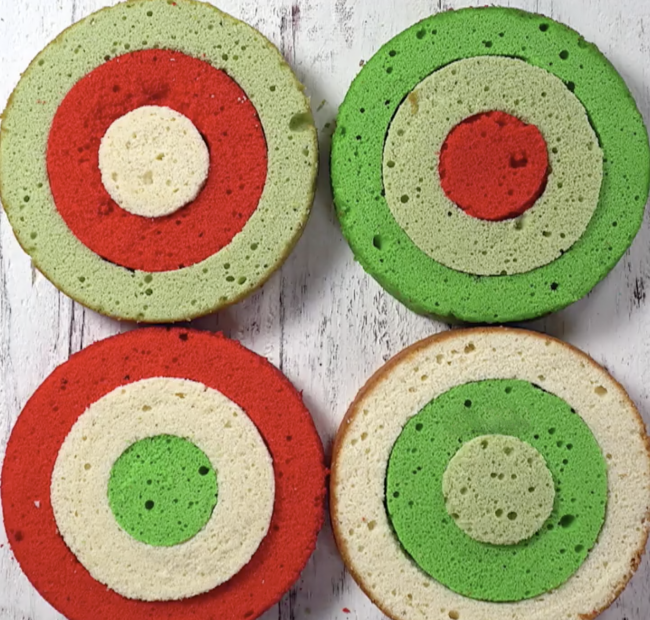
Place first layer outer layer on the counter.
For the RED outer layer, the next piece inserted is white. Then the center piece should be dark green.
For the LIGHT GREEN outer layer the next inserted layer piece is red, then white.
For the DARK GREEN outer layer the next inserted piece is light green, then a red center piece.
For the WHITE outer layer the next inserted piece is dark green, then the center is light green.
(If your cakes are warm and crumbly at this point, you may need to get them back into the freezer.)
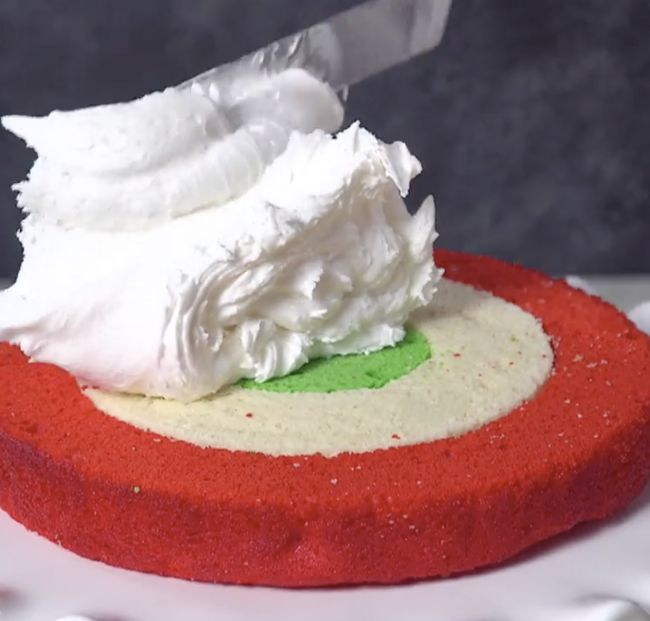
Place the layer with RED on the outside on your cake stand first. Cover with buttercream.
Next place the layer with LIGHT GREEN on the outside. Cover with buttercream.
Next place the layer with DARK GREEN on the outside. Cover with buttercream.
Finally, place the layer with WHITE on the outside.
Cover entire cake with buttercream.
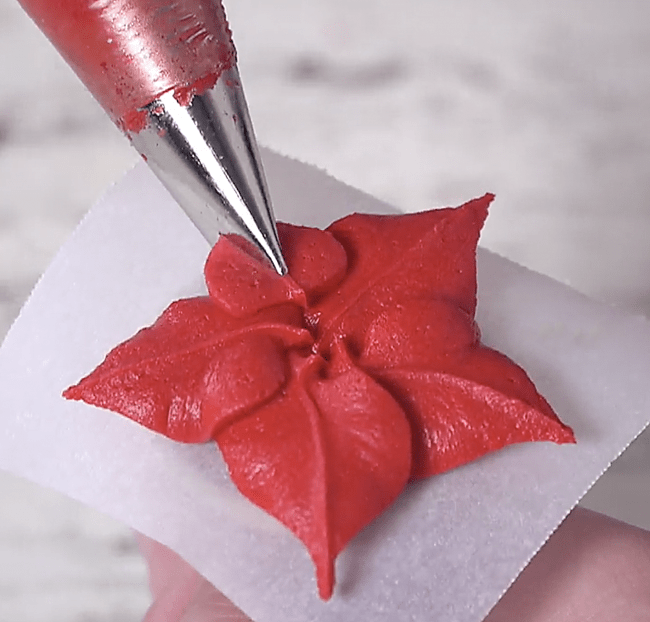
For the buttercream poinsettia’s, you will place red buttercream into a pastry bag fitted with #352 leaf tip. (Using a piping nail and piece of parchment are a great idea) Pipe out 5 leaves. Then pipe out 5 more leaves on top of that, only a little smaller. In a bag with yellow buttercream and the #233 grass tip, pipe in the center.
Pipe out as many as you would like on the cake, for this cake I used 10.
Freeze until solid.
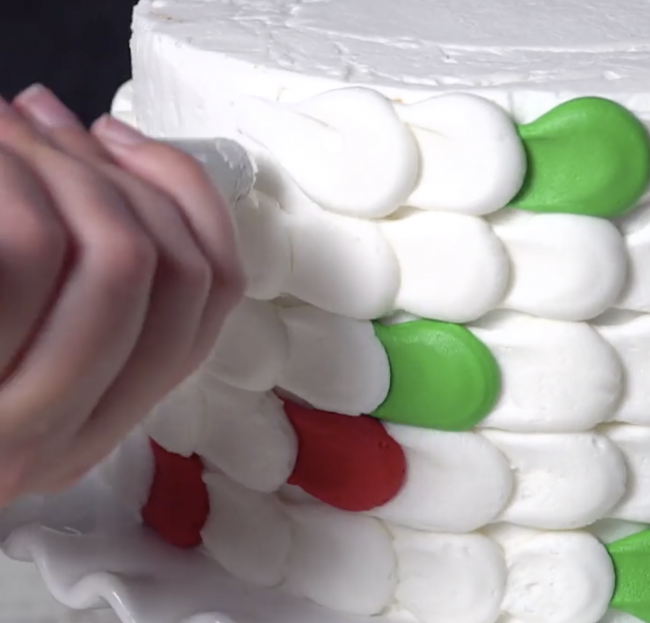
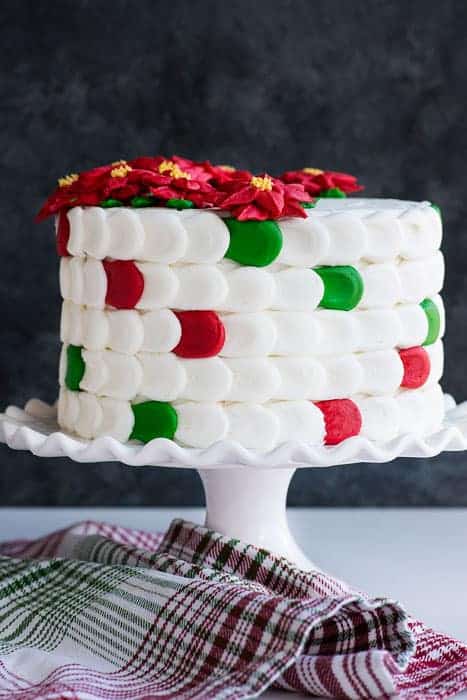
In a pastry bag fitted with a 2A large open round tip, pipe out a dollop on the side of the cake, then pull (drag) the frosting to the left. Occasionally change out the white frosting with a red or green dollop. (I talk A LOT about this technique here, in my Brown and White Illusion Cake)
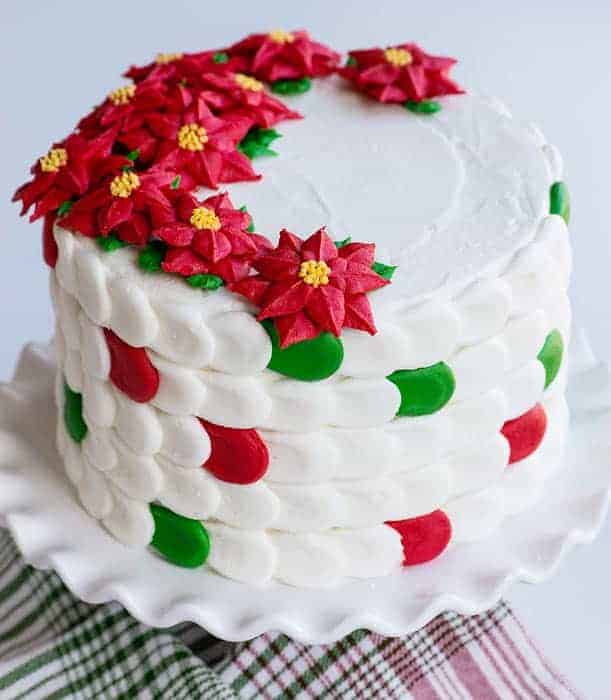
For the top of the cake, place a dollop of red frosting. Set the frozen poinsettia flower on top and then arrange more around it. On this cake, they are arranged in a crescent shape, but you can also cover the entire top of the cake.
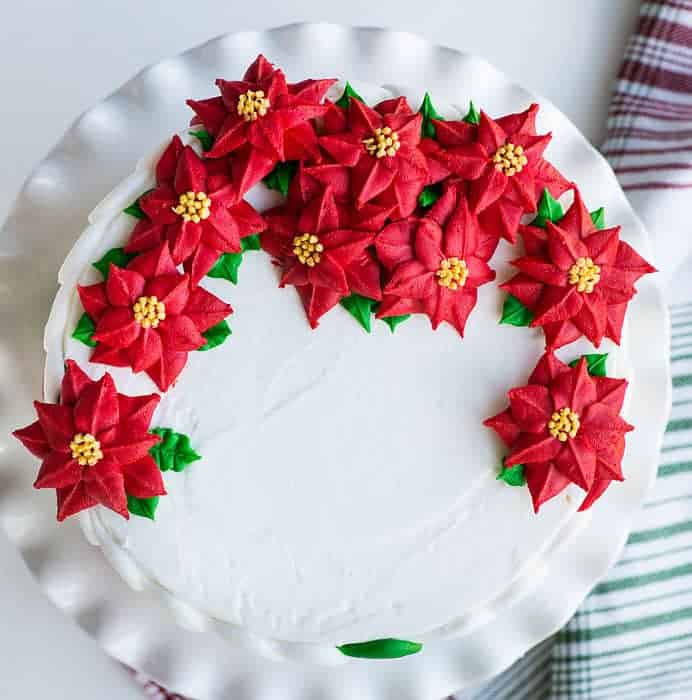
Go back in with some green frosting in a pastry bag fitted with #352 tip and pipe some leaves.
Chill cake until ready to serve.
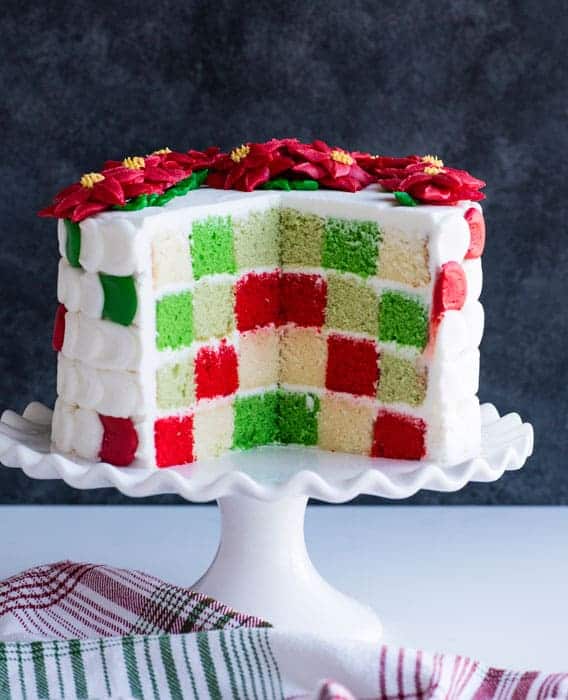
Tips for cutting a checkerboard cake:
Use a sharp knife! Part of the beauty of the checkerboard cake (surprise-inside cake) is people’s faces when you reveal the inside. If you have a long, sharp knife you can help make sure everything stays together where it should!
I prefer to serve this cake chilled. You can serve it at room temperature, but be sure to lay the piece on its side on the plate.
To make this cake easier, feel free to separate the steps over a course of days. Prepare the cakes one day, and then chill. Cut the cakes the next day and assemble the cake, then cover in crumb coat. On the next day, pipe all your poinsettia’s and cover the outside of the cake with the dollop design. Then chill until ready to serve!
If you make this Christmas Checkerboard Cake for your friends and family please do let me know! You can tag @iambaker on Instagram or Facebook!
Checkout my other Rosette Covered Checkerboard Cake here!
Photography by Ashlee Marie.


Hi Amanda!! I made this Christmas checker board cake this past Christmas and wow, was it ever a show stopper! My family was amazed!! I did not attempt your beautiful flowers and icing pattern as I think I need a lot more practice for that. Instead, I just made large buttercream swirls all over which looked like a winter wonderland (tee hee). You should have seen the faces when I cut into the cake revealing the pattern. Thank you for an exceptional cake!! I love all of your beautiful recipes!!! XO
So fun Diane! Thank you for letting me know, I am loving how you created something beautiful and shared it with your loved ones!