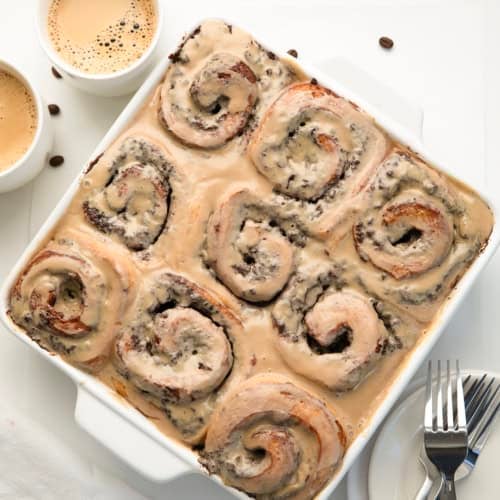
Chocolate Espresso Rolls are a rich, bakery-style twist on classic cinnamon rolls, taking the familiar soft, sweet dough and filling it with deep chocolate and coffee flavor. The rolls bake up golden, pillowy, and tender, with chocolate espresso filling melting into the swirls for a cozy, decadent center! I like making these when I want something a little more special than traditional cinnamon rolls, but still comforting and familiar enough for a weekend treat.

Ingredients & Substitutions
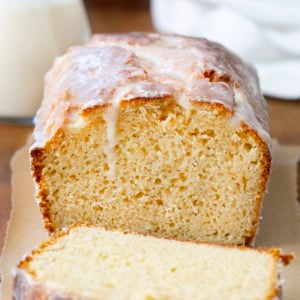
- All-Purpose Flour & Bread Flour: I use two kinds of flour in the dough, both all-purpose flour and bread flour. The all-purpose flour keeps the rolls soft and light. The bread flour, which has a higher protein content, gives the dough a slightly chewier texture and helps it hold the chocolate espresso filling without losing structure. Together, they create a dough that is soft, tender, and still sturdy enough for rolling. It is the same dough as my Maple Cinnamon Rolls, which you will also have to try!
- Cocoa Powder: I used unsweetened cocoa powder in the filling for a deep chocolate flavor that isn’t overly sweet. You can use Dutch-processed cocoa powder if that’s what you have on hand; it will give the filling a slightly smoother, more mellow chocolate taste, which works nicely with the coffee flavor in these rolls.
- Instant Coffee Powder: Instant coffee powder is the star flavor booster here. I added it to both the filling and the icing because it dissolves easily and gives the rolls that signature espresso taste without adding any extra liquid. If you don’t have instant coffee powder, you can use instant espresso powder for a stronger coffee flavor. I don’t recommend using brewed coffee since it adds too much liquid.
- Chocolate: I recommend finely chopping a good-quality chocolate bar so it melts slightly into the filling as the rolls bake. Semi-sweet chocolate can be used if you prefer a sweeter roll, or you can use chocolate chips in a pinch.
- Filling: The chocolate espresso filling is buttery, lightly sweet, and spreadable, which helps it roll smoothly into the dough. The heavy cream helps keep the filling from becoming too stiff when mixing.
- Icing: The espresso icing is drizzled over warm rolls for the perfect finish. I whisk the instant coffee powder into the cream first, so it dissolves completely, then add the confectioners’ sugar and vanilla for a smooth, pourable glaze.

FAQs
Can I Make Chocolate Espresso Rolls Ahead of Time?
Yes! After placing the cut rolls into the baking dish, you can cover them tightly and refrigerate them overnight before the final rise. In the morning, let them sit at room temperature until they finish doubling in size before baking.
For longer storage, freeze the unbaked rolls for up to 3 months. Thaw overnight in the refrigerator, then let them come to room temperature and rise before baking as directed.
Can I Use Only All-Purpose Flour?
Yes, you can make these rolls with only all-purpose flour if that’s what you have on hand. The texture may be slightly softer and less chewy since bread flour adds a little extra structure, but the rolls will still be delicious.

Can I Make Chocolate Espresso Rolls Without a Stand Mixer?
Yes, you can make these chocolate espresso rolls by hand if you don’t have a stand mixer. You’ll need about 20 to 25 minutes of gentle kneading to achieve a smooth, elastic dough. The dough may feel a little sticky at first, but try not to add too much extra flour while kneading. If you want to make rolls by hand, check out my Amish Cinnamon Rolls, made with a secret ingredient and no electric mixer required!
How Do I Know When the Rolls Are Done Baking?
The rolls should be lightly golden around the edges and set in the center when finished. If you gently touch the top, the dough should feel soft but not raw or doughy underneath.

How to Store Chocolate Espresso Rolls
At Room Temperature: Store the rolls in an airtight container for up to 2 days. If your kitchen runs warm, refrigeration is a better option to keep the icing fresh.
In the Refrigerator: Keep rolls in an airtight container for up to 4 days. Warm them in the microwave for 15 to 20 seconds before serving to bring back that soft, tender texture.
Can I Freeze Chocolate Espresso Rolls?
Yes, these rolls freeze well. For best results, freeze them without the icing. Let the baked rolls cool completely, then wrap them tightly and freeze for up to 2 months. To serve, thaw overnight in the refrigerator, warm gently in the oven or microwave, and then drizzle with freshly made espresso icing.
Chocolate Espresso Rolls
Ingredients
Rolls
- ⅔ cup (163 g) whole milk, warmed in the microwave for about 30 seconds, or until milk is 110°-115°F
- 5 tablespoons granulated sugar, divided
- 2 ¼ teaspoons (1 envelope) active dry yeast
- 2 large eggs, room temperature, beaten
- ½ cup (1 stick / 113 g) unsalted butter, softened
- 2 cups (250 g) all-purpose flour
- 1 cup (127 g) bread flour
- 1 teaspoon kosher salt
Chocolate Espresso Filling
- ½ cup (1 stick / 113 g) unsalted butter, softened
- ½ cup (100 g) light brown sugar, packed
- ¼ cup heavy whipping cream
- 2 tablespoons unsweetened cocoa powder
- 1 tablespoon instant coffee powder
- ½ cup dark chocolate, finely chopped
Espresso Icing
- ¼ cup heavy whipping cream
- 1 teaspoon instant coffee powder
- 1 cup (125 g) confectioners’ sugar
- ¼ teaspoon vanilla extract
- 1 pinch kosher salt
Instructions
- To the bowl of a stand mixer with the paddle attachment, add warm milk, 1 tablespoon sugar, and yeast. Mix together. Let sit until yeast is foamy, about 5 minutes.
- Add eggs, butter, the remaining 4 tablespoons of sugar, all-purpose flour, bread flour, and salt. Switch to the dough hook attachment. Mix on low speed to combine.
- Continue kneading on medium speed until the dough is smooth, about 5 minutes.
- Spray a medium bowl with nonstick cooking spray. Place the dough into the bowl, rotating it to grease all sides. Cover with a towel or plastic wrap. Let it rise in a warm area until doubled in size, 1 to 2 hours.
- Once the dough has doubled in size, place it onto a floured counter or work surface. Roll the dough into a 10×15-inch rectangle. It should be about ¼-inch thick.
Filling
- In a small bowl, combine the butter, brown sugar, heavy cream, cocoa powder, and instant coffee powder.
- Fold in the chocolate.
- Evenly spread the butter mixture over the dough, making sure it covers the entire surface.
Assembly
- Spray a 9×9-inch baking dish with nonstick cooking spray.
- Starting on the long edge of the dough, tightly roll it up (like a log or cylinder).
- Using a very sharp knife, evenly cut the log into 9 rolls. Place them into the prepared baking dish, filling side up. Cover with plastic wrap. Let rise in a warm place until doubled, about an hour.
- Preheat oven to 325°F.
- Bake for 35 to 40 minutes, or until lightly golden on the edges and done in the middle.
- Let rolls cool slightly.
Icing
- In a small bowl, whisk together heavy cream and instant coffee powder until fully dissolved.
- Add confectioners’ sugar, vanilla extract, and kosher salt. Whisk until smooth and creamy. The icing should be thick but pourable. If it’s too thick to drizzle, add a splash more cream. If too thin, whisk in a little more confectioners’ sugar.
- Drizzle generously over the warm chocolate espresso rolls. Let it sit for a few minutes before serving.
Did you make this recipe?
Thank you for making my recipe! You took pictures, right? Well go ahead and post them on Instagram! Be sure to mention me @iambaker and use the hashtag #YouAreBaker.