Remember this little thing? (Christmas Tree Ornament Surprise Inside Cake)
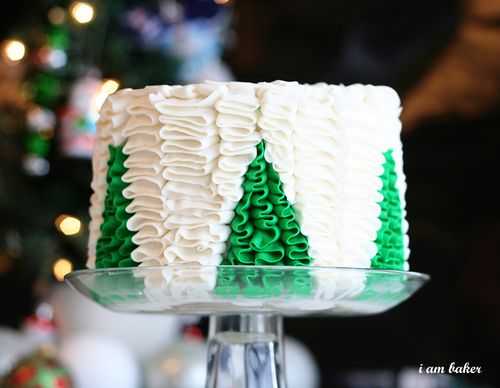
Well, I finally did that tutorial for you!
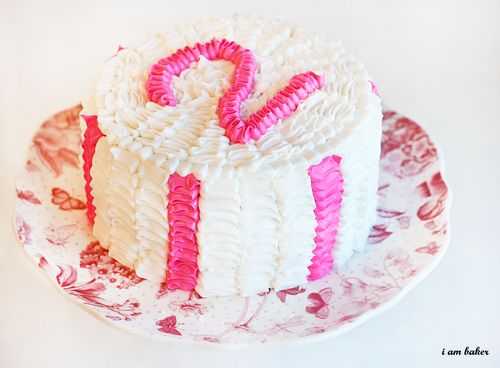
Although I must extend my apologies immediately, because my dear little Christmas tree cake morphed into a 2nd Birthday Cake for my little girl.
I do hope you can still get the general idea of how it all comes about!
Lets get started!
First, start off by baking your cake. I like a sturdy white cake, and this recipe has done me well.
Since we were actually planning on eating this cake, I wanted to make it an appropriate size for our family, so I used a 6in. pan.
This left me plenty of batter to make some pink and purple cupcakes, my little girls favorite colors.

1. Place your cake on your stand.
2. Find something that will give you a circle imprint on your cake.
3. Trace around it so you know where you are carving. Do this on both sides of your cake.
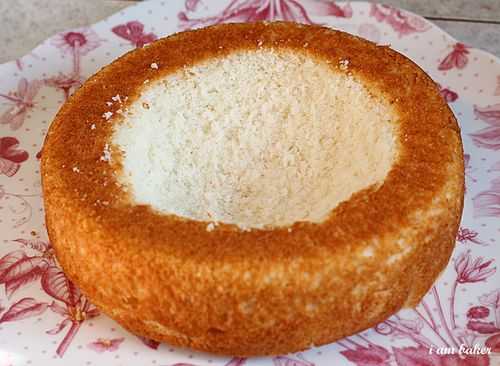
Carve out a half circle. This will be one half of the ornament we are putting inside.
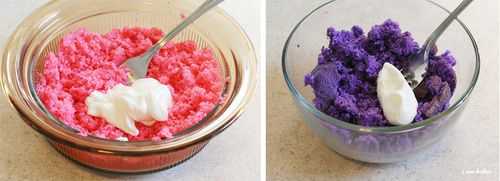
I chose pink and purple for my ornament colors. I just put four cupcake in a bowl for the pink and two for the purple, then added some on my white frosting to create a sturdy consistency. (the same application you would use in making cake balls)
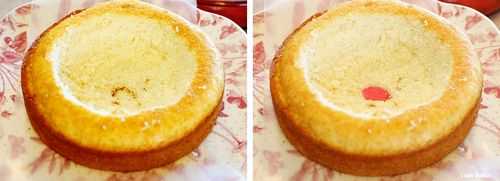
Cut out a tiny dot for the tippy top of the ornament. I went ahead and cut through all the way to the cake stand.
This will actually help me to remember which layer goes on top!
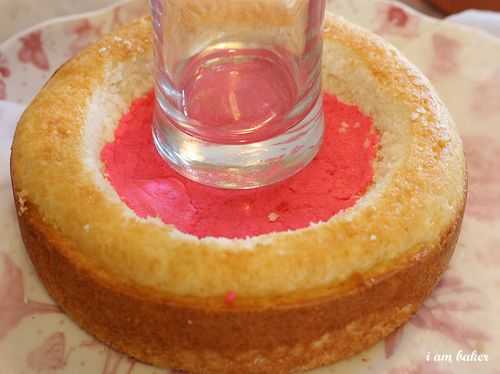
Start adding your cake ball mixture, and be mindful of the edges. We are going for straight lines in our ornament, so I also used a glass to help me get a uniformly straight line.
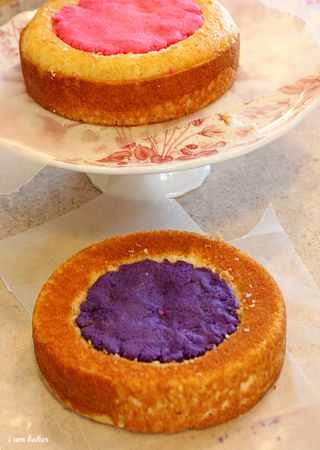
Alternate your colors (you can use as many or as few colors as you want!) until both layers of cake are level.
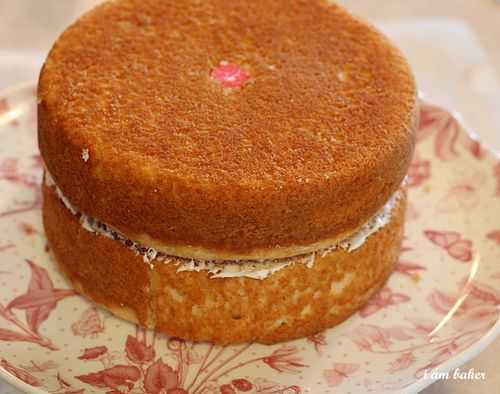
Flip your ‘top’ layer on to your bottom layer and do a quick crumb coat.
Since this is going to be a ruffle cake, your crumb coat does not have to be perfect in the slightest!
And now for a SPECIAL treat… a ruffle tutorial! Hope you dont mind, but this technique is so fun and easy I couldnt resist sharing!
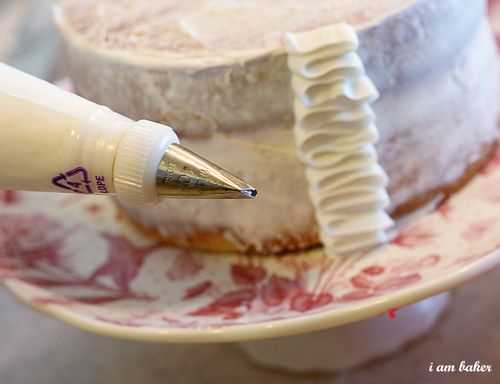
Martha recommends using a #103 tip. I think you can easily use a #102 or a #104 as well, and I did end up using a #102 for this cake.
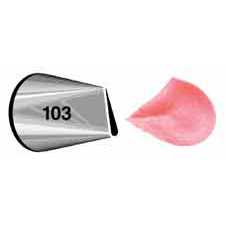
This tip has a small opening and a larger one on the opposite end.
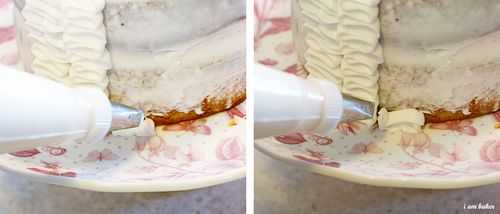
Make sure the SMALL end of the tip is facing out and the larger end of the tip is touching the cake (slightly) as you pipe.
The technique itself is simple, just choose how wide you want your ruffle, then pipe back and forth… going left to right all the way up the side of the cake.
I would take a step back from the cake every three or four rows, just to make sure your rows are straight!
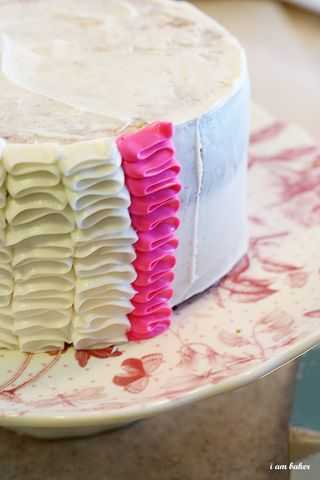
You can also make straight lines up the side of the crumb coat to help you keep upright all the way around your cake.
Wanna see the cake??
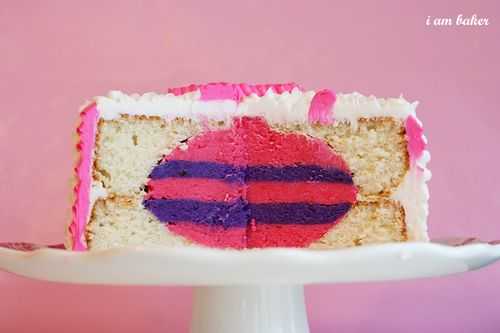
This ornament is definitely one of my favorites. It lends itself beautifully to any color or design… I cant wait to see what fun I will have with it next year!
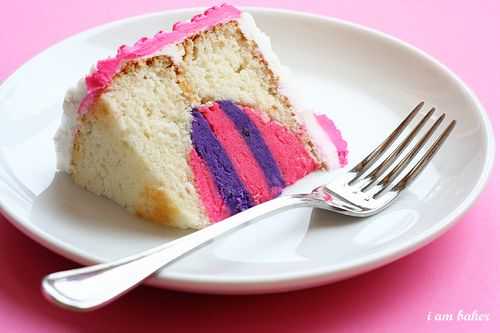
I hope you will try the Ruffle/Ornament cake. And if you do, be sure to let me know!





adorable! I specially love all the girly ruffles!
Thank you for sharing some of your magic. And you made it look doable!!!
Merry Christmas to your family! Can’t wait to see what all you come up with in 2011!
Happiest of Birthdays to you Audrey! You are one lucky little girl to have such a talented momma!
Thank ypu for showing us how to make the ornament! I was trying to figure it out on my own :O) I am going to make this cake for Christmas eve!
BRILLIANT!!!!
You ROCK, Amanda!!! Thank you so much for posting the tutorial. I may never be brave enough to put an ornament in a cake, but I have big plans for that ruffle! 😉
Really pretty cake and great tutorial! Happy Holidays!
Ever since you posted the bat cake I have been DYING to know how in the world you got a design inside! I am SOOOO excited that you are sharing a tutorial! THANK YOU, brilliant cake woman, and Merry Christmas to you! 🙂
Thank you for taking the time to make this wonderful tutorial…. You should write a cake decorating book with all your technics and different designs on making a cake pattern inside another cake?
I think it will sell good….
Have a Merry Christmas an a Nice New Year! 🙂
Another Amazing Amanda creation!
I have got to do those ruffles next time I make a cake. I could just eat them up…literally!!