I have to apologize. I took a little poll on my i am baker facebook page and asked you which tip to tackle next. The tip with the highest votes was the 2D. But after extensive testing, it came out virtually the same as the 1M tip I had used in my post. Come to find out that half of my 1M tips are closed stars and half are not. (they came that way!) So going forward I will be recommending Ateco tips (my favorite brand) and referring to their tip numbers. I will also share a link to where you can get them!
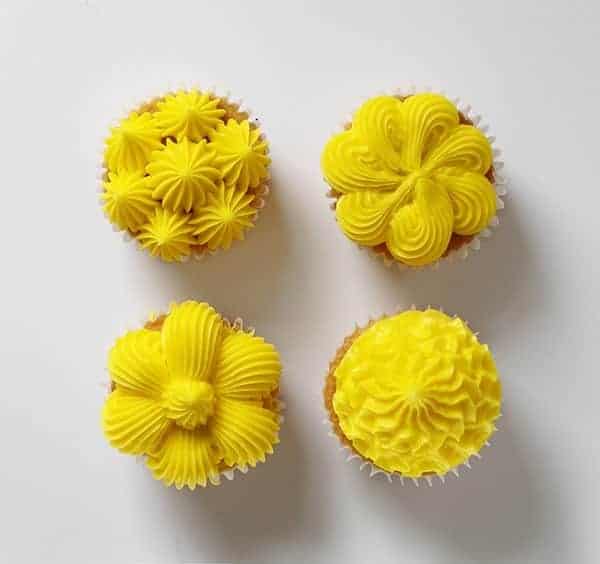
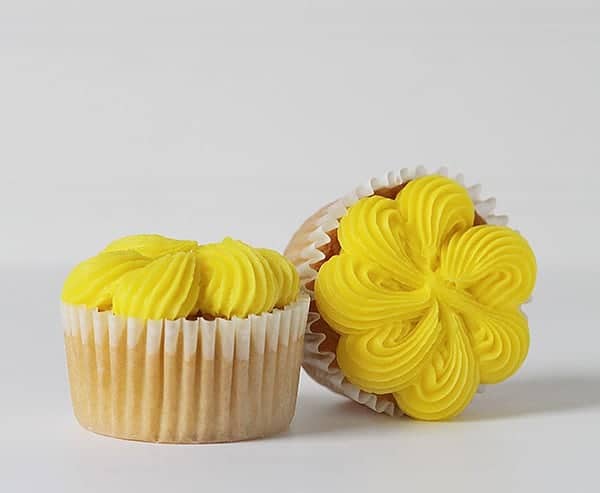
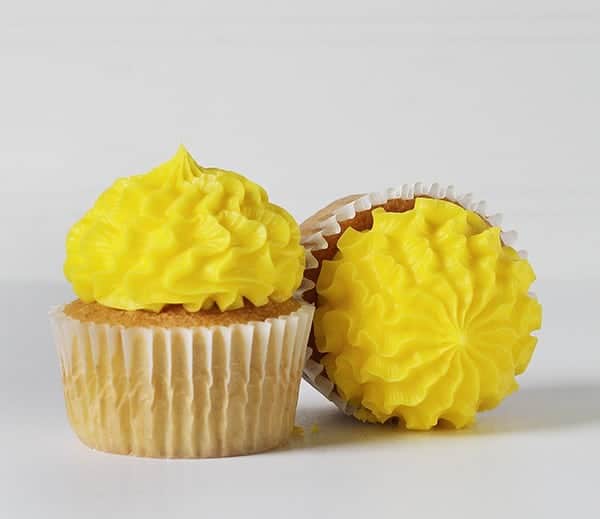
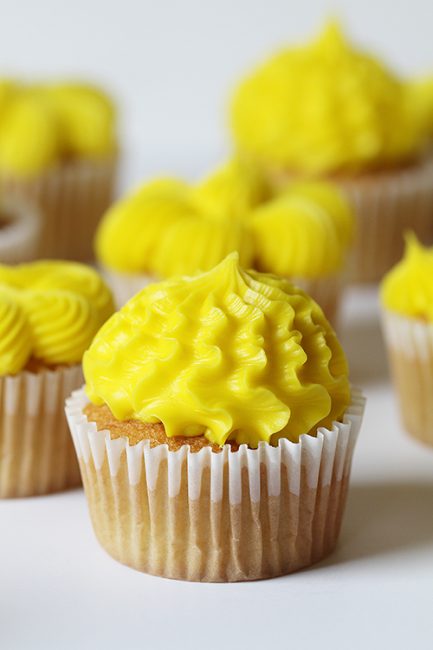
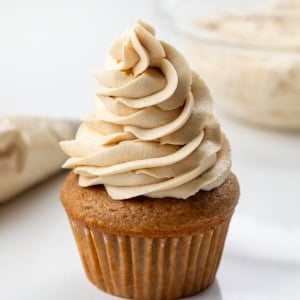
For these cupcakes I used the Ateco #869 tip.
I really love this tip and love the graceful scallop that you get when using it.
So lets start with that!
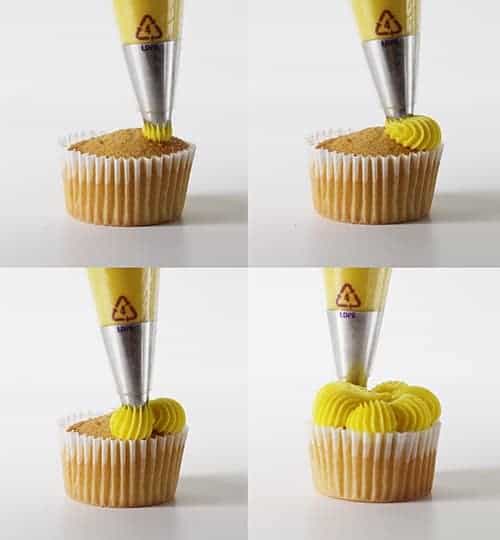
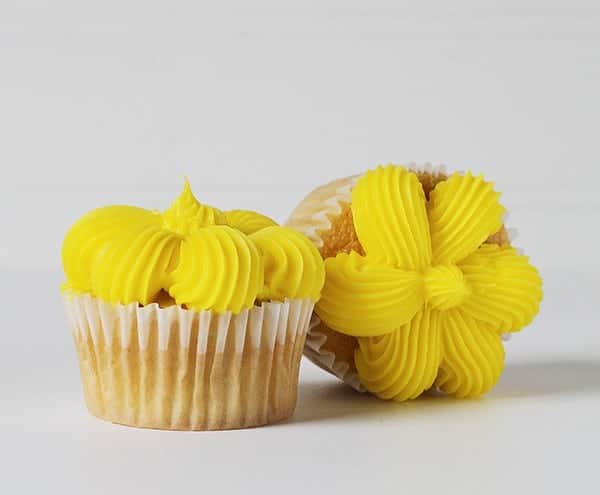
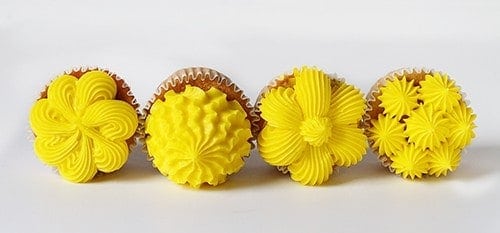
the first is the scalloped flower technique
1. Start at the outer edge of your cupcake and apply pressure to your pastry bag. The bag should be upright.
2. While applying pressure, let the scallop “fill in” a bit, then move tip towards the center of the cupcake, releasing pressure.
3. Repeat this process around the entire cupcake.
4. For the center dollop, press tip into center of cupcake, apply slight pressure and quickly release upwards.
Variation: Use two colors, one for the scallop petals and one for the center dot.
Pink, red, white with a yellow center, this cupcake is the perfect way to give mom flowers! Edible flowers that is, by far the best kind.
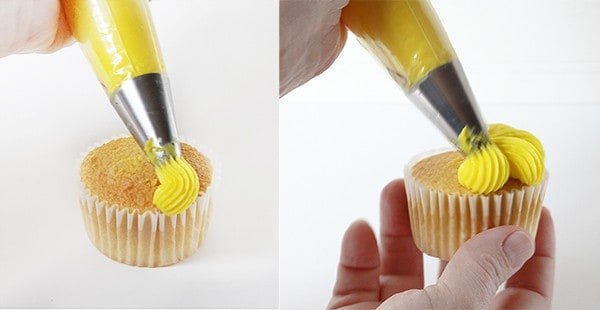
The next technique is the side swirl.
I love how this looks but completely failed at getting a proper image of myself piping it. (It was very difficult to hold a cupcake and try and take a picture at the same time, my apologies in advance!)
1. Start by holding your tip at about a 45 degree angle (can also be perpendicular to cupcake, or level with) and apply pressure at the very edge.
2. Similar to the flower cupcake above, you are piping a scallop, but this time its “on it’s side”. Apply pressure at the edge, then move tip towards the center of the cupcake, releasing pressure.
3. This technique works best when holding the cupcake and turing it as you add each scallop petal.
4. Repeat around entire cupcake, letting your final swoop end in the very center.
Variation: Using a small french tip looks really lovely!
This specific one took me about 4 cupcakes before I got it to where I liked it. I highly recommend practicing and getting comfortable with it.
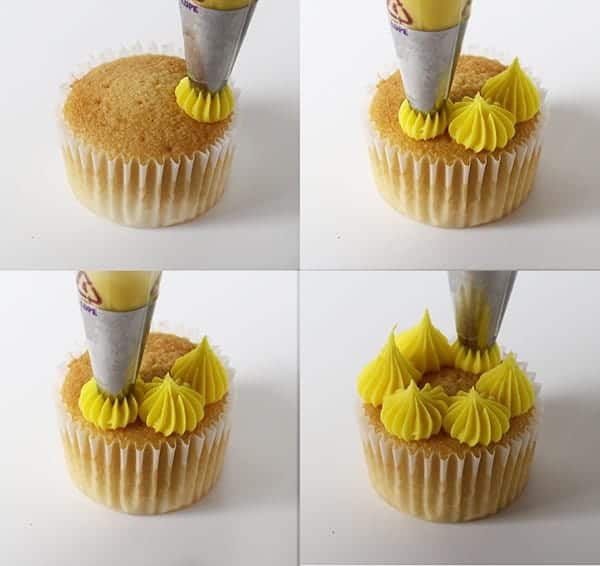
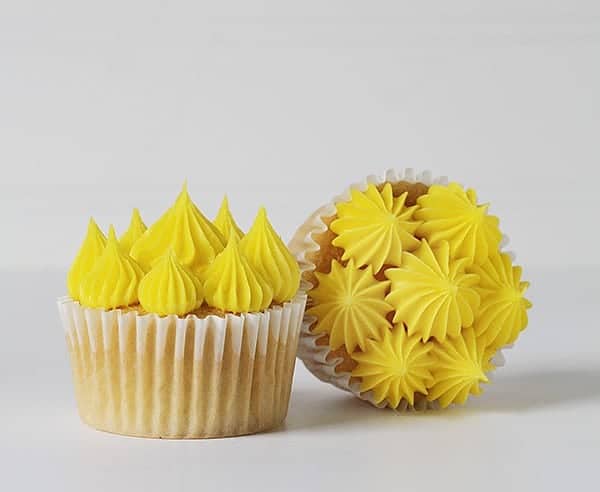
the next technique is the spiked petal flower.
So easy. So fun!
1. Starting at the edge of the cupcake, hold bag completely vertical and apply pressure.
2. Let “spiky petal” fill in for about one second, then quickly move tip up and release pressure.
3. Repeat around entire cupcake as well as the center.
Variations: Do three dots instead of seven; making each “spiky petal” bigger. Or pipe out “spiky petals” in rainbow colors! You can also create a tall, long spike by slowly moving your tip straight up still applying some pressure. When it is the height desired, quickly release pressure.
This technique is especially beautiful when it is vanilla buttercream piped onto a rich dark chocolate cupcake.
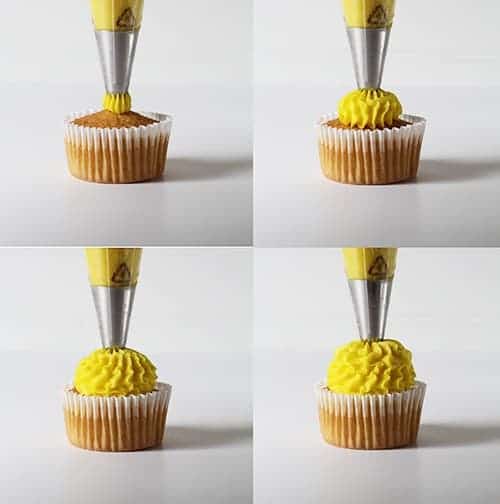
the last technique is the fat frilly.
I just thought of that name and am sorta loving it. “I’ll take the fat frilly please!”
1. Start by applying pressure to the frosting bag in the center of the cupcake. Tip should be straight up and down.
2. Apply more pressure and raise tip just slighty.
3. Let frosting spill out and fill in by using pressure only, do not move tip around. (If you can see in the images above, my tip barely moves throughout the whole process.)
4. Release pressure and lift tip straight up.
Variation: Use two-tones of color in frosting.
I am ALL about this technique. Its adorable, easy, and means you get a big ole portion of frosting on your cupcake. #winning
So which was my favorite?
Fat Frilly of course! How can you go wrong with a name like that?
I used the Perfect White Cake Recipe.
I share some of these techniques (as well as others!) in my new book surprise-inside cakes. Every cake has a fun and creative frosting technique with detailed step by step instructions on how you can achieve it! You can get a copy of surprise-inside cakes here!



Love your tutorials so much!
Hi Amanda, you watching this tutorial I noticed that you just put tip into the decorating bag… without any coupler or
extra parts etc .. is that right? I REALLY struggle with using a bag due to trying to figure out the coupler or it doesn’t
fit tip I have etc. plus frosting seeps around top of tip .. what am I doing? , what can I try.. I think it would be so much easier to use a bag rather then a decorator that, #1 I can never see when I’m about to run out of frosting with and #2 it kills my thumb pressing on plunger for that continuous pressure for roses etc…
thank for input. I would LOVE to just use bags…I could do so much more!
By the way I thought I was crazy.. I had tips that were closed and open as well… so I modified..so I could get my roses to turn out like you kept showing… go figure. I will definitely be looking at the link you provided and getting a new supply!
Denise
Hi Denise! Yes, I put some of the larger tips right into the bag. It works much better (IMHO) and is less clean up!! I have had some of the same issues you have had and agree… so frustrating! 🙂
hello…this is such a great post and i a, obsessed with the Fat Frilly! i just tried it myself and i am having trouble getting coverage over the entire top of the cupcake. how do you do it so tht you get a nice wide frill on the bottom without losing the cripness of thr frill – if that makes sense. thanks so much for any advice!
Hi Anne! A lot of initial pressure… dont move the tip up and all, just apply pressure and really let the frosting spill out and around. Happy decorating!
Can someone help me with a flavorful frosting I can use like to pipe on cakes or to make flowers? I’ve tried so many times and I can’t for some reason find anything that isn’t to sugary. Or it isn’t stiff enough to hold the shape of the flowers. I’m doing something wrong or not getting the right recipe. I want it to taste really good like a store bought cake or a wedding cake. And I want to pipe designs, but I’m just learning and can’t figure it out. PLEASE HELP!