My daughter is obsessed with Frozen.
And I think there are at least 29,000,000 moms who can say the exact same thing.
Just in case you haven’t heard it enough times, click here to listen to “Let it Go” while learning how to make your very own Frozen Inspired Cake.
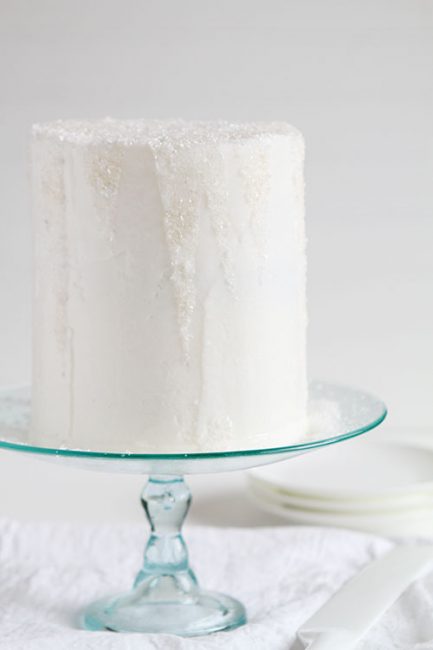
So I decided to make a cake that would be easy enough for anyone to make, but that would remind little kids of their most beloved movie and characters, Elsa and Anna.
Even though I leveled each cake and used the same amount of frosting in between each layer, my cake still turned out crooked and wonky. I hope that it was just a fluke and that your cake will NOT turn out wonky.
I did a few things on this cake.
1. Made it in 6 inch round cake pans, which meant the cake would be tall and skinny.
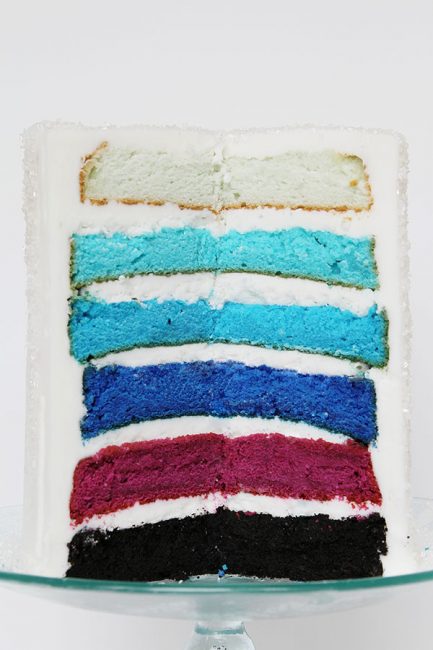
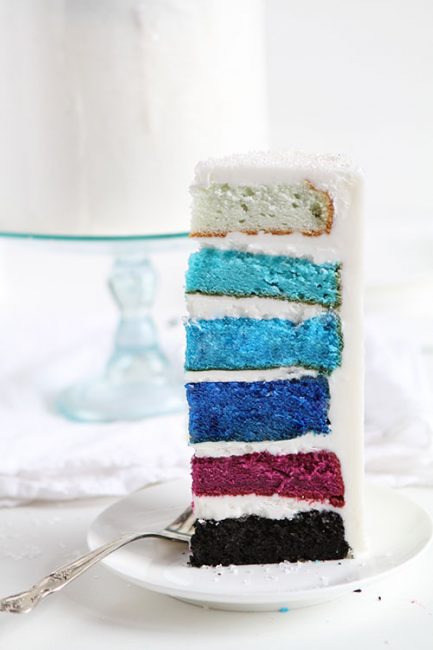
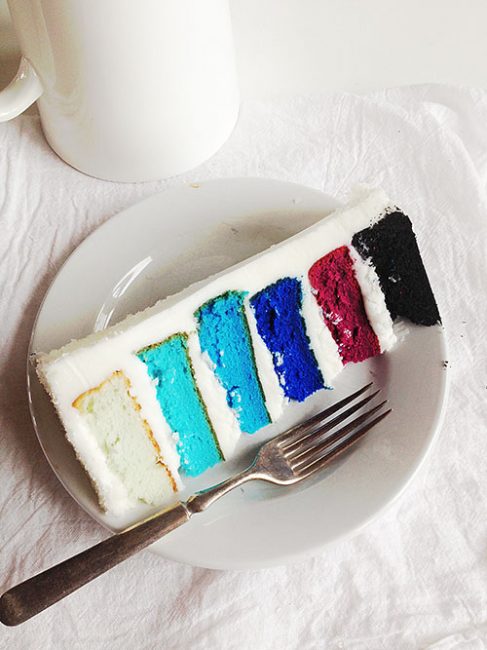
2. Make it a different color layered cake to match Elsa and Anna’s dresses in Frozen.
3. Made “icicles” on the outside.
You will need:
1 batch buttercream
Gel Food Coloring (see below for exact colors and amounts)
White Sprinkles
To make the I started by first prepared one white cake batter. My white cake recipe yields about 4 cups of batter (as does a box mix if you prefer) so I divided that between three bowls. (1 1/3 cups batter per bowl)
You can also double the white cake recipe and divide the batter between six bowls. I chose to make one cake, prepare the three colors and bake the three 6 inch cakes before starting on the next white cake.
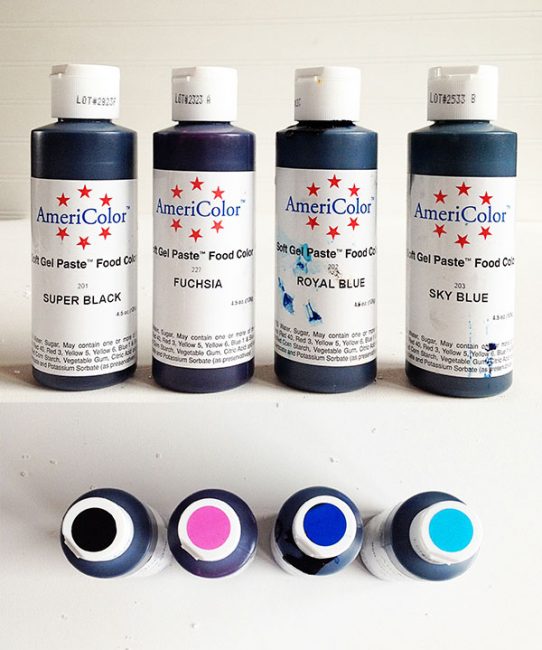
To get the layers these vibrant colors I used AmeriColor gel food coloring. They worked perfectly!
For ANNA’S colors I used the Super Black, Fuchsia, and Royal Blue. I used about 1/4 teaspoon of each, but you can use as much as you want/need to to achieve the color you want. (While the Fuchsia above looks pink, it turned out very true to the color in Anna’s dress after I added the full 1/4 teaspoon.)
For ELSA’S colors, I used Royal Blue and Sky Blue. In three bowls each containing 1 1/4 cups cake batter you will add:
5 drops Sky Blue + 1 drop Royal Blue (If you want to have a more distinguishable difference between the layers, you can add 2 drops Royal Blue)
5 drops Sky Blue
1 scant drop Sky Blue
So each different color layer was baked in 6 inch round cake pan for approximately 25 minutes (20-30 minutes depending on your oven) and then cooled.
Once cooled I leveled each cake to approximately 1 inch high. After adding in frosting between each layer, my cake was about 8 inches tall, which is vey tall! And now I will show you why I wanted a tall cake.
(My daughter pointed out that Elsa’s original party dress was the same colors as Anna’s.)
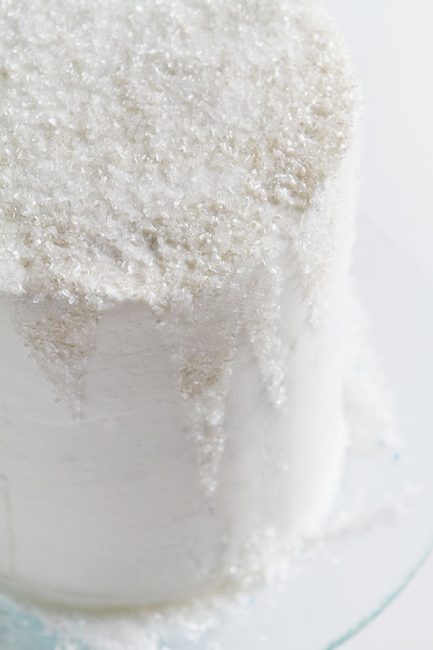
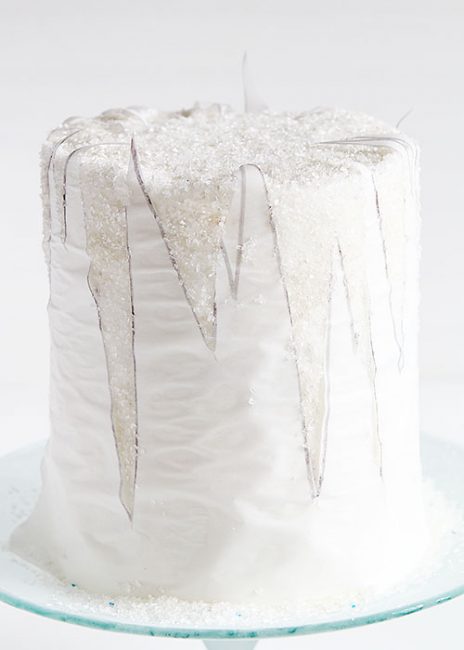
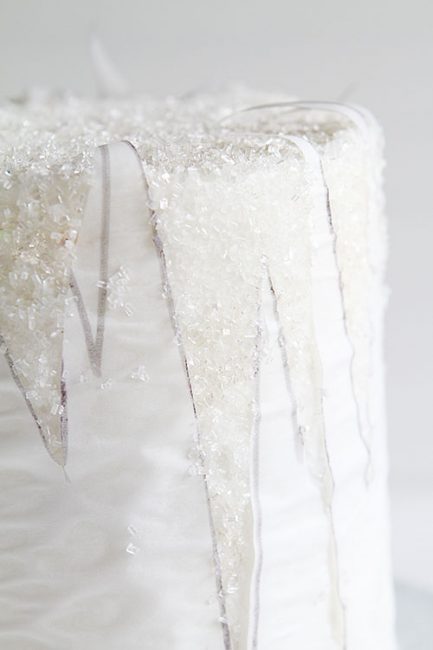
Icicles! Well, kinda. More like sparkly wanna-be icicles. But definitely pretty enough for any Frozen Fan!
Here is how to made the “icicles”.
First I started by covering my cake in a coat of white buttercream. This crusting buttercream recipe works really well because it is very white, but you can certainly use your favorite recipe.
Get your icing as smooth and flat as you can.
Place in freezer for at least one hour.
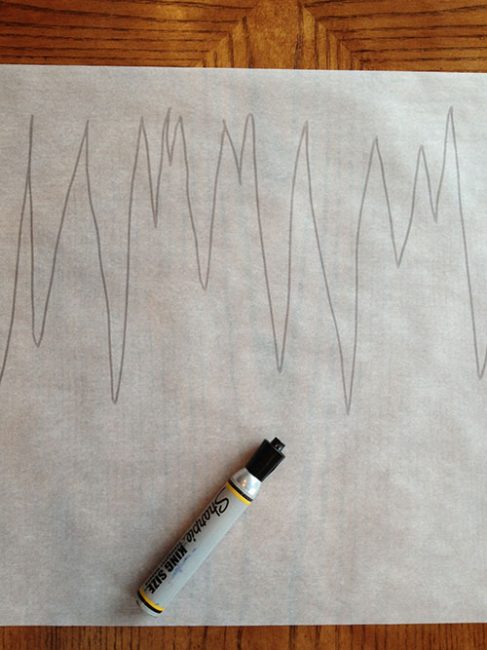
Get out a piece of parchment that is the length of your cake. My cake was about 20inches around, but you will want to measure YOUR cake. (You can do this by wrapping parchment around the cake and then marking where the ends meet.)
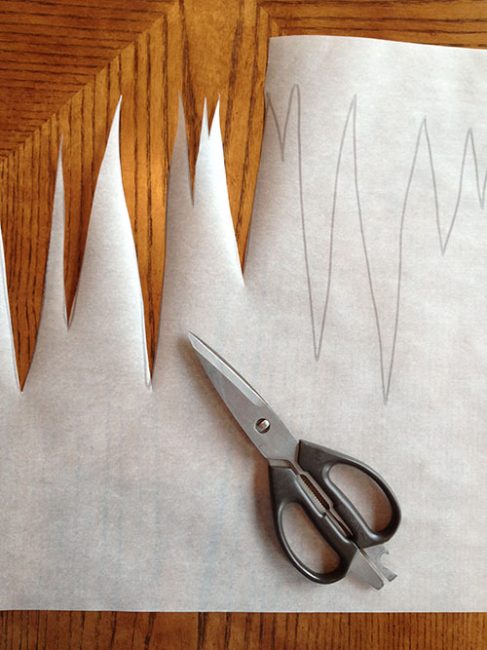
Lay parchment flat on table and start making icicle shapes pointing down. There is no right or wrong, but I found that the more icicles the better.
Starting at the top of your sheet, cut the “icicles” out. (If you used a black marker like I did, be sure to cut out all areas that marker is on. I did not do that. The marker bled in a later step. Don’t be like me.)
Remove cake from freezer after it has been chilling for at least one hour. (Again, please make sure you did not leave any black marker spots on your parchment.)
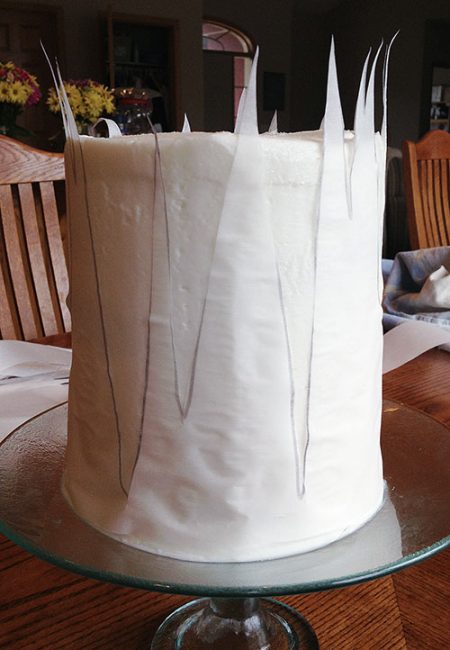
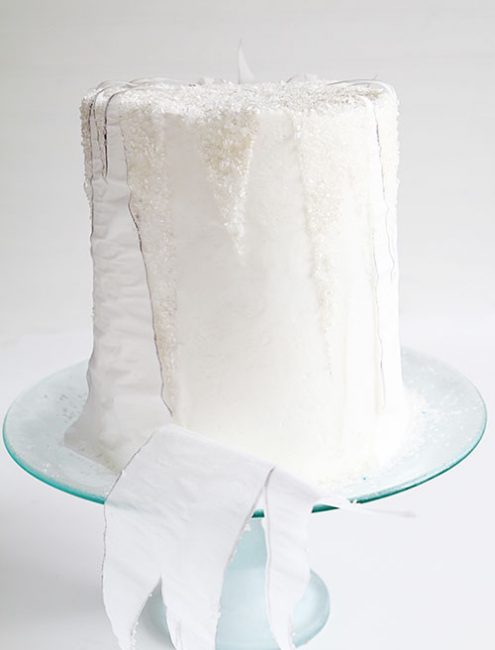
I held my parchment up to my cake to determine the height needed and trimmed a bit off of the bottom section. I then started to carefully wrap the parchment around the cake.
Go slow, and smooth the parchment out as needed. This does not need to be perfect, we just need the parchment to stick to the frosting right around where the icicles will be.
Now get your “white sparkling sugar” or “shimmer white sugar” or “sparkling white sprinkles” (all can be found at grocery stores and Walmart).
Place your cake covered in parchment on a clean baking sheet.
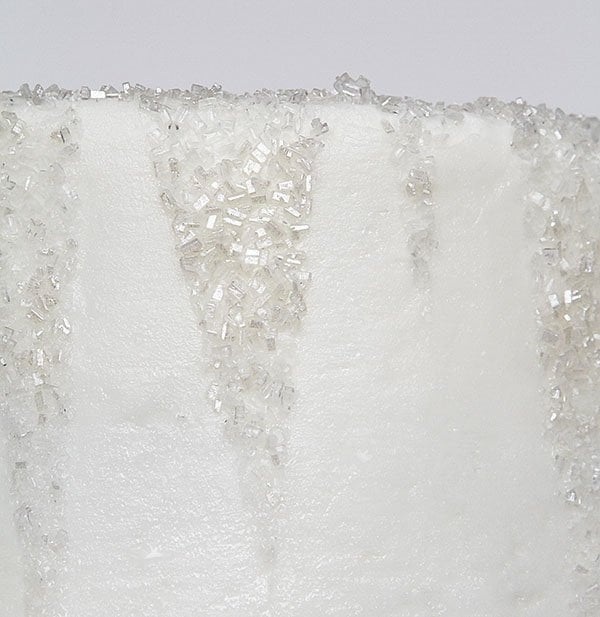
Pour a generous amount of sprinkles into the palm of your hand and start pressing your hand into the cake where the frosting is exposed.
Do this around entire cake. If you need to, scoop up excess sprinkles from around cake stand base and from baking sheet and press into any areas of frosting that need to be covered. Also be sure to cover top of cake.
Once you have covered everything, you can either place the cake back in the freezer or you can begin to remove the parchment. Start by testing a small section; if you pull the parchment and some frosting comes up then the cake needs to be chilled. (Start with at least 30 minutes). If you can safety remove the parchment without any frosting being removed, then proceed slowly.
My cake was nicely chilled, so the parchment peeled away very nicely, leaving a nice clean, sharp line. Nice.
Remove all of parchment and discard. If you have any sparkles left over, they look great right around the base of the cake.
You can easily make this cake in 8 inch pans, it will just not be as tall. (Just make the necessary adjustments for the height of your icicles.) I would take a bit more care to make your layers neater… mine don’t look as good as I would like. (And I didn’t have time to re-do!)
(taken with my iphone)
If you do not want to put that much black food coloring into your cake here are two options.
1. You can add up to 1/4 cup of cocoa powder. Doing that can provide a base color, allowing you to add less food coloring. (This will also give the cake a slightly chocolatey flavor.)
2. You can bake a separate cake that is a dark chocolate cake for the bottom layer. (I would still recommend using a little black food coloring to achieve the same colors as in Anna’s dress.)
And that is how to make a “Frozen” inspired layer cake!
Do let me know if you have any questions. This cake will lend itself to so many possibilities, and I do hope you are inspired!


I am making this cake for an order I have this week…LOVE it! I am also adding the doll cake to the top….question….should I stack the cake first before I put the sanding sugar on? or should I sand it first? I have been running this over in my head!!! I keep thinking the sanding sugar may interrupt the cake board for the top layer in getting it to sit right on the cake. Any advice?
I would ad the sugar then stack… you can always touch up if needed. But if the cakes are chilled and sanded, stacking should be easy! 🙂
Thank you for sharing your idea. The simple beauty of the outside definitely inspired me!
Great job elegant design