Spiders in jars. Spider webs made from chocolate. Black and orange everywhere. It must be ‘that’ time of year!!
(I also made spiders and webs in 2009 on petite fours!)
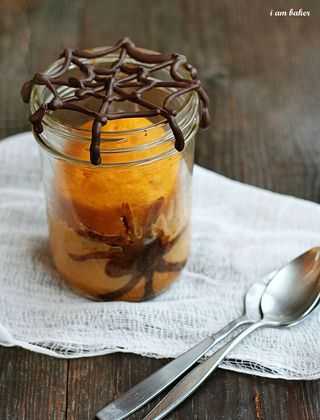
It’s Halloween! Well. In like a month and a half it is.
But its definitely fall… and I adore fall.
What I don’t adore about fall is every spider known to man trying to make its way into my house so it will not perish in the bitter winters of Minnesota.
I digress.
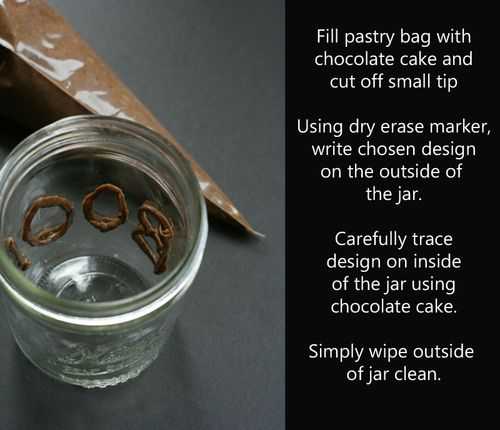
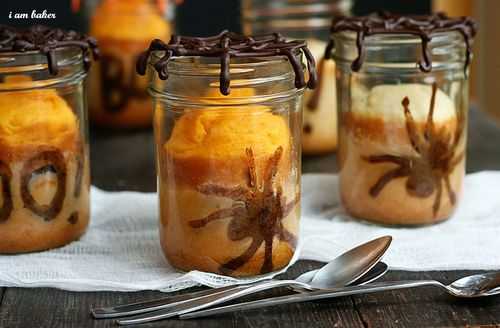
I wanted to do something fun with cake in a jar and also wanted to add a little somethin somethin to the outside. So I found a way to write messages or pictures on the inside of the jar as well as add lots and lots more calories with chocolate on top!
It was a good day in my kitchen.
And it can be a good day in your kitchen too. These are super easy!
To write on the inside of a jar I used a chocolate cake and made a white cake to fill the jars with. If you don’t want to make two separate cakes, simple reserve about 1/4 cup of your white cake and use food coloring to tint brown or black.
One cake recipe made approximately six jars.
After I piped the cake into the jar, I popped it into the microwave for eight seconds. Maybe ten seconds, but no longer. I just wanted the chocolate batter to set in place so it wouldn’t fall when I poured the white cake batter in.
I added 1/2 cup of white cake to the jar and then baked for about 20 minutes in a 350-degree oven.
This was tricky… some baked fully in 18 minutes, some took about 25 minutes. It really depended on where it was placed in my oven. So just keep a close eye on them!
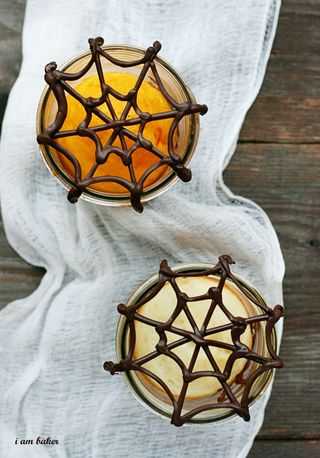
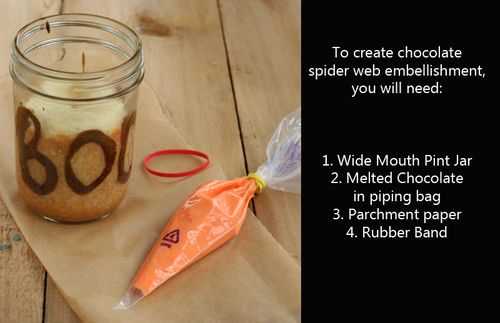
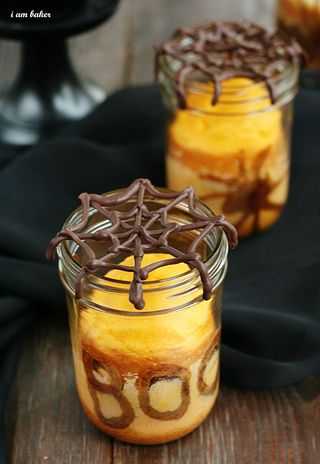
And if writing inside your jars isn’t enough, I am also gonna show you how to make chocolate spider webs that fit snuggly over the rim of your jar!
You do not NEED to use a wide mouth jar for the chocolate spider web, I just prefer it.
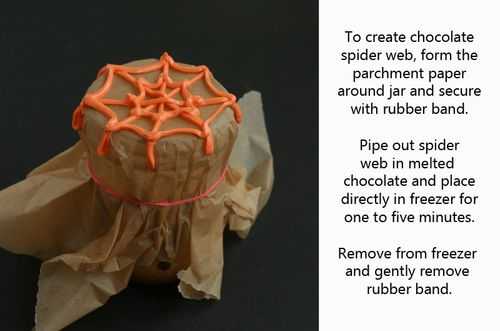
Just popped them in the microwave for 30-second intervals until the chocolate was completely melted.
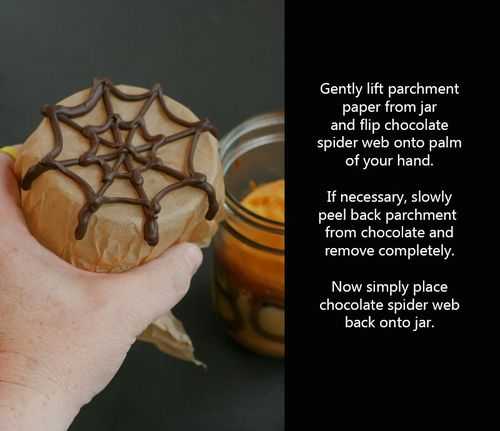
I grabbed the jar with my left hand, then slowly moved the rubber band from the jar to my wrist.
While the chocolate is sturdy, if it ever broke it was when I was removing the rubber band. So be careful during that process!
Seriously that easy. Less than ten minutes from beginning to end!
I also piped out BOO! and a pumpkin and other fun stuff for the kids.
While the words are fun (you know I am so excited to do jars with red velvet Christmas greetings in them!) I think my kids liked the spiders best.
Ok, ok, so did I.
But do grab yourself a spoon and tell the kids to ‘break’ into their jars.
They are as fun to eat as they are to make!






wow! they are very creative and definetly something different for halloween decorations!
this is SO cute! would have loved it as a kiddo.
this is SO cute! would have loved it as a kiddo.
Really cute – especially the spiderweb topper. Isn’t it difficult to pipe on the inside of the jar?
Lisa
I LOOOOVE this Amanda! So original, the kids will love thiese!
I’m horribly arachnophobic. And yet, I LOVE these! Absolutely brilliant. I’ll be sure to link on Edible Crafts later today! (And PS, I just made spiders from chocolate melted in a decorating bag, also just posted today, but these are way beyond.)
Spooky fun Amanda!
That is so cool! I love the results and the piping on the inside is fantastic. I’d love to share this on my Halloween blog if it’s ok with you.
How do you think of this stuff? Piping the cake on the inside of the jar is so fun!
My first Grandbaby is due on Halloween, I’m saving this for a future birthday party! I’ll have to test it many many times first to perfect it. Ya know, for the kids….:)