I made homemade sprinkles a year ago but never shared my recipe or directions.
Hopefully you can forgive me?
These are seriously the easiest homemade sprinkles out there and are so flexible in terms of use!


Let me tell you why they are so awesome:
It’s three ingredients.
It can be made in whatever quantity I want.
It can be tinted to any color I need.
And it actually tastes good!

Glaze Icing for Homemade Sprinkles
1 cup powder sugar
1 – 3 tablespoons milk (depending on whether you want a thicker or runnier consistency; I prefer a thicker consistency for these, roughly the same as butter cream frosting)
1 tablespoon light corn syrup
Optional:
Food coloring of choice (I would add 1 to 2 drops per cup of powder sugar, and I highly recommend gel based)
Flavored extracts (about 1/4 teaspoon of extract per cup of icing)

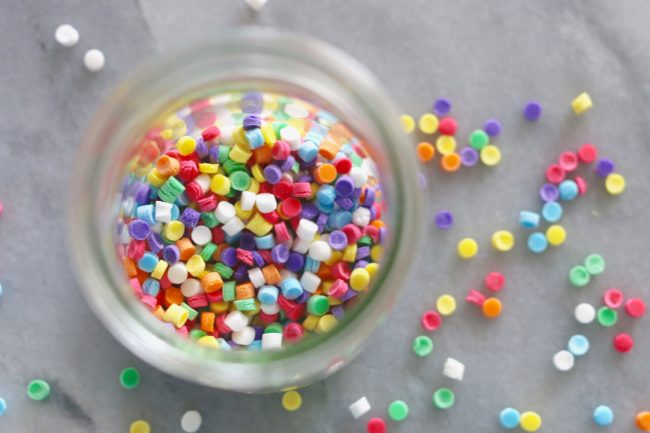
To make the spinkles, place the icing in a baggie and cut of a very small corner tip to “pipe out” dots. You can also use a pastry bag with a #3 tip. Each row took roughly 15-20 seconds, so this process was much faster then I had imagined.
I then let them sit out overnight, but found that they were actually dry and ready to be used after a few hours.
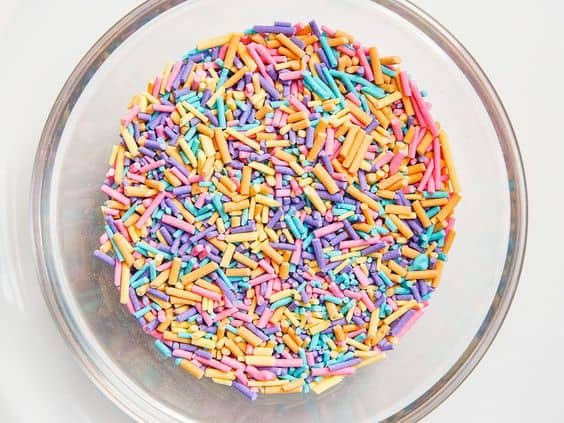
I did eight rows of 18-20 dots, so ended up with roughly 160 dots.
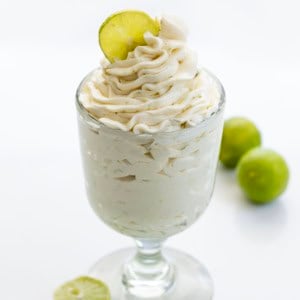
This ended up being the perfect amount for a sweet little cake!

To make the sprinkles cake simple bake your favorite flavor cake and cover in buttercream frosting.

Next I cut out 8 strips of parchment paper (you can also use wax paper). My cake was baked in a 6-inch cake pan, so I made each strip about 2 1/2 inches wide and 10 inches long.
I placed them around the cake, leaving approximately a 2 1/2-inch space between each strip.
Starting in the first blank panel, I add sprinkles to cover the area. Nothing fussy about it — you can just smoosh them into the cake.
Keep adding as many sprinkles as you would like until the panel is completely covered. You can then move on to your next blank panel and next sprinkle color.

When you have finished adding all your sprinkles, I would put the cake in the freezer for no less than 30 minutes or in the refrigerator for no less than 1 hour.
This will help the frosting set and allow the parchment to be removed in nice, clean strips.

Although I loved the crisp lines of the cake, I couldn’t help but go back and add the remainder of my sprinkles.
I just mixed them all together then placed them around the base of the cake for a burst of color.

The color and flavor combinations for these little dots are limitless. You can even use the parchment technique I created and make shapes or words!
And honestly, while I love looking at all the beautiful and colorful sprinkles at the store, I dont love buying them. It can be $5 for just one bottle!
This is a very economical way to decorate your cakes and cookies!
Want more ideas for making Homemade Sprinkles? Check out these other options!!
Check out these beauties from Bigger Bolder Baking!


Like many other posters, it reminds me of the candy dots on paper that we used to buy at the candy store. So much fun!
That looks so fun and easy! Thank you for sharing 🙂
You are incredible! I just want to do all your recipes!!! Love them all! Thanks for sharing! I have so much to learn…just start baking….
So creative, thank you! I would never of even thought of using icing like this as sprinkles. How long would they keep f you wanted to make lots to store? And would RI work better if I wanted to store away? Thanks again.
Hey…. these look so pretty.. would love to try them soon….!! 🙂
These are a fantastic idea, I’m just wondering how it would go making long thin lines instead of dots and then just breaking them up? Do you think they would break easily, and what about the consistency? Maybe a bit runnier? I’m always trying to re-invent the wheel unfortunately, but I do love this idea!
What a fantastic idea! I need to do this and SOON! =D
Amazing! This is a great skill to keep in your baking box… Just in case you’re out, or it’s 2am and you’re still finishing a cake… *ahem* 🙂 Great post!
So i tried making them but idk what happen i made them last evening and they are not done yet, then when i was putting them on the wax paper if i put them too close they would end up together and forming not a circle but something else, why did my mixture came out too thin and slipery i only added what the recipe said??? Thanks!
Sounds like the consistency was just a bit runny… you can thicken it up by adding more powder sugar. 🙂
My neighbor gal just made these and it took until the 3rd batch where she found a lot less fluid make it better. So go easier on the milk.