I suddenly got this brilliant idea that I wanted to make Red Velvet fudge. So I sat down and googled it, hoping for a great, no fail recipe.
Those words are very important to a bad recipe follower like myself.

No such luck.
I couldnt even find a match for ‘red velvet fudge’.
I was totally dejected.

Then it hit me… I could create a recipe!
At the very least, significantly modify an existing one.

I started here, with Martha’s Foolproof Holiday Fudge.

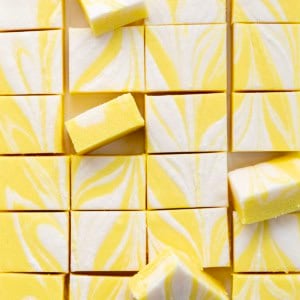
I added food coloring and used white chocolate chips and red cherry flavored chips.
Talk about significant modifications. *snort*

Thing is, this recipe is just not my favorite. It was good, but not mind blowing.

(side by side comparison of the two recipes I made… I love the texture on the second)
So then I found a recipe on allrecipes.com. I read it twenty seven times. I read every comment.
I figured, if I could make a recipe for red velvet fudge, like real red velvet fudge, it would be from this one.


If you ever try this, please let me know what you think!
Happy Holidays!

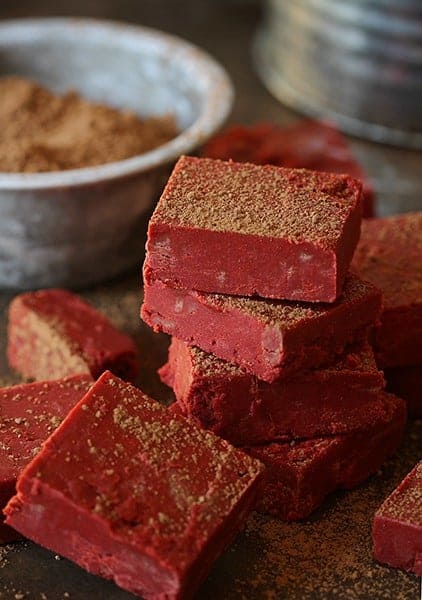
Red Velvet Fudge
Ingredients
- 2 c white sugar
- 1/4 c cocoa
- 1 c buttermilk
- 3 tbsp. butter
- 1 tsp. vanilla
- 1 tsp. red gel food coloring
Instructions
- Using a 5×9 pan (typically same size as banana bread pan, if you want thinner pieces, use 8×8) line pan with wax parchment paper or wax paper.
- Make sure you have some extra on all four sides.
- Combine sugar, cocoa, buttermilk, sweet condensed milk (if you choose to add it), and food coloring in a non stick pan. (I used a big pot) Stir to combine. Bring to a boil, stirring constantly, but do not scrape down the sides. (to avoid getting crystallized sugar in fudge)
- Using a well calibrated thermometer, make sure the fudge gets up to 238 degrees.
- Reduce heat and allow fudge to simmer. DO NOT STIR. At all. Like seriously dont even touch the pan.
- Allow fudge to cool to 110 degrees and add butter and vanilla.
- Beat by hand or use electric mixer until fudge loses its sheen. (I used an electric mixer for 20 minutes. Not kidding. Some folks say this stage takes 3-5 minutes.)
- Place in prepared pan and allow to cool, usually 1-2 hours.
- This recipe yielded 25 small squares.
Did you make this recipe?
Thank you for making my recipe! You took pictures, right? Well go ahead and post them on Instagram! Be sure to mention me @iambaker and use the hashtag #YouAreBaker.
*Next time I make this I am going to try 1/2 cup buttermilk and 1/2 cup sweet condensed milk… I think it could handle a little more sweetness!
Happy Note to Share:
I had read that a great way to clean your pot after baking fudge is to add some milk, reheat the pot, then enjoy a wonderfully delicious cup cocoa… or in our case, Red Velvet Hot Cocoa!!
Yes, I really did just say Red Velvet Hot Cocoa. I actually did that and can attest to its wonderfulness!!


I just came back from Michael’s and Wilton now has a limited edition Red Velvet flavored candy melt package!
I tried this last night and it did not turn out. In your recipe you state after it reaches 238 degrees to then reduce heat and allow fudge to simmer but you do not say how long. Originally I just thought that I was suppose to watch the temp while it simmered until it reached the 110 degrees but on simmer it retained the high heat and stayed there. So then I turned it off and let it go down itself but it took a long time, which is ok but I still do not know how it would have reached the 110 degrees on simmer.
I did beat it but not 20 minutes because it looked glossy sooner than that.
End result is it never set up.
Please let me know about the time on simmer, but for now, what I will try is a regular chocolate fudge with the red added and see how it turns out, maybe just adjust the cocoa ratio.
I made this last night.
I was so excited, but I did let it sit out over night?
woke up to it still being liquify on the top. I have now put it in the fridge to see if that helps make it set a little more 🙁
doesn’t say how much of the condensed sweet milk to use…please tell
it must be a typo to cool the fudge to 110 degrees and then add the butter? or maybe an adjustment needs to be made when using sweetened condensed milk that wasn’t accounted for . my fudge, at 110 degrees was unstirable….
have never had this much trouble with a fudge recipe in my life first try didn’t come out at all 2nd try was all like sand. please make proper adjustments to your recipe so others dont waste time and money too.
I am so sorry you have had problems Mike! I can assure you, I know exactly how you feel, so this is what I went through when I was developing this recipe. Unfortunately I cannot be in your kitchen and help you to troubleshoot as to what went wrong. I do hope that you can look back on the experience as a learning one, and not a “waste of time and money”. Have a Merry Christmas!
Hi, i was wondering how long it is supposed to take to get up to 238 degrees? if im stirring constantly it rarely reaches that temp and ive made this recipe 3 times.
You may need to raise the temperature then. Sorry for any issues!
I see Sweetened Condensed Milk in the directions, but not in the ingredient list. Did I miss something?
There is a note right after the recipe… saying that IF you want to use it how much to add and when. 🙂
I do have some tips, so read on if you like.
I agree the recipe ‘card’ area should be what makes mention of the sweetened condensed milk, no doubt! Or at least have an asterisk (*) within instruction #2 to reference the note below the card like in any other document… a clue to people to look around.
Let’s define “large pot”. This is not your stockpot! That being the pot you boil your potatoes in when you’re making your famous mashed potatoes to company that has two stubby handles. You need your largest saucepan, which are the pans (‘pots’) which have the long handle. You need room for the mixture to boil and expand, which milk ingredients in particular are going to; while at the same time you do not want a big ol’ stockpot which has too large of a surface area that will give you a) uneven temps, and b) not allow your candy thermometer to be properly submerged so you get an accurate reading.
For any liquid you add in addition to what’s listed, you must remove an equal portion of liquid from what is listed. If you don’t, then no surprise your fudge is going to be soup. So in her suggestion about using sweetened condensed milk, she is NOT saying to put in all listed ingredients AND the condensed milk. She is saying to only use half of the listed qty of buttermilk (so down from 1c to 1/2c) and replace the now missing 1/2c of buttermilk with the sweetened condensed milk. That same principle goes for ANY recipe, period. Including if you were to use liquid food colouring…which may not have the same potency as a gel anyway. Gels are awesome and you should not live without, especially if you ever make candy, imperial icing, anything consistency tricky where 1-2 drops can make or break.
Ingredients:
2 cups white sugar
1/4 cup cocoa
1 cup buttermilk, closer to room temp
3 tablespoons butter, room temp
1 tsp vanilla
1 tsp red gel food coloring
*Next time I make this I am going to try 1/2c. Buttermilk and 1/2c. Sweetened Condensed Milk, instead of 1c Buttermilk… I think it could handle a little more sweetness!
…keep in mind she hadn’t done it when she wrote that, so at that point it’s just an idea and untested who knows if it actually works out…
Instructions
1. Prepare: Take out your buttermilk and your butter maybe 20 mins in advance. Line a 5×9 pan with parchment or wax paper (loaf bread pan; you could use 8×8 cake pan for thinner pieces). NOTE: You may find it beneficial to lightly spray/butter the pan first so paper sticks better to the sides; making pouring the mixture in there later easier. But also make sure you have some extra on all four sides, fold them over the edges of the pan so they are well creased, to help keep in place while pouring and the length provides a little more leverage for lifting it out.
2. In your large saucepan, put the sugar, cocoa, and buttermilk*. Cook over medium heat, stirring gently, until all the sugar is dissolved.
3. Put in your candy thermometer. Turn the temp up to medium high, and stir in the gel food colouring.
4. Continue to cook, stirring constantly, but not vigorously (the plan is to not stir so much that you are tossing mixture up the sides much, and do not scrape down the sides of the pot). You need to stir until the mixture comes just to a full boil.
5. When the mixture reaches a full boil, let it continue only until 238 degrees Fahrenheit (114 degrees Celsius), stirring gently only occasionally.
6. As soon as it reaches 238F/114C, reduce heat to low and allow mixture to simmer. DO NOT STIR. Keep an eye on the temperature. IF you allowed it to go to 241F/116C, you should probably just remove the pan from heat completely, moving the pot to a different, off, element. If you stuck to the 238F/114C, with it now on low, in theory, the mixture should no longer maintain its high temp and will slowwwwly go down. This will take some time, but stay close by.
7. In that state, you must allow the mixture to lower to 230F/110C, and at that point you will add both the butter and the vanilla extract.
8. Turn off heat, remove pot (protect your counter!) bringing the thermometer with you, and beat vigorously by hand with a wooden spoon (you can probably keep the candy thermometer in as you will still need it), or use an electric mixer …(Amanda says: I used an electric mixer for 20 minutes. Not kidding. Some folks say this stage takes only 3-5 minutes.) …Personally, I would try electric, and to me that means transferring the fudge mixture to a large, ideally tall walled, mixing bowl, scraping the bottom of the saucepan but not around the sides. With a hand electric, or stand mixer units you will probably want to start medium low and get up to a medium high speed. You need to be careful you don’t get burning hot sugar on yourself and mixture could go flying.
9. Check the temperature after a few minutes (if going electric you will need to stop beating, but try to act fast), you are looking for 140F/60C. Because you are incorporating air, and if you’ve transferred the dish even moreso, it will probably cause the temp to lower quicker than it heated up for you. It will be getting really thick, and now you’ll notice it is losing its shine. Check the temp. Once you hit 140F/60C IT’S IMPORTANT YOU KEEP BEATING FOR A FEW MORE MINUTES, that temp is just your marker. This is how you’ll start getting the creamy smooth texture.
10. Before it is completely set, quickly pour the fudge into your prepared tin and smooth over the surface (use the back of a metal spoon maybe).
11. Leave to cool at room temp, uncovered, for 3-4 hours. Once risk of condensation is past, you can cover partially with plastic wrap but leave a corner open to let warmth out. Let finish setting overnight at room temperature. DO NOT put fudge in the fridge, unless you like sticky, not properly set, fudge…
12. This recipe yielded 25 small squares.
Any other questions, that’s what Google and YouTube are for 😉
Two more things, if you have paste food coloring, you may not have needed to buy food coloring for a very long time as that stuff lasts forever. I have paste and had no idea what gel food coloring was. It seems it has the brightness of paste, just a different consistency. That is what is on the market now, you just may not have known it, I didn’t. The other thing, there is a neat food coloring by Wilton white icing color that can be used in candy making to turn whatever you are making white before you add the color of your choice. I looked into it when I saw bright pink caramel apples for Breast Cancer Awareness and wondered at how they did it. It truly works, I tried it out at Halloween to make white Jello.
I am going to try this recipe. My nephew loves red velvet cake so I want to make him some fudge.