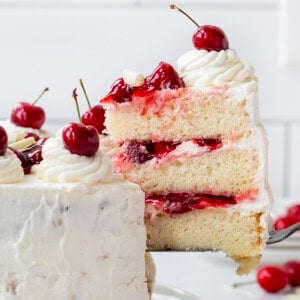
If you are looking for the most delicious cake ever, you have found it! Two layers of decadent chocolate frosting surround one layer of white cake. There is chocolate frosting, whipped vanilla frosting, fresh strawberry and strawberry pie filling topping this mile-high cake!
To make this Chocolate and White Layer Cake with Strawberry you will need:
2 cups strawberries
1 cup + 1/4 cup strawberry pie filling divided (1 1/4 cups total)
rotating cake stand
small offset spatula
bench scraper
plastic disposable pastry bags
#846 tip (Ateco brand, see my tips here)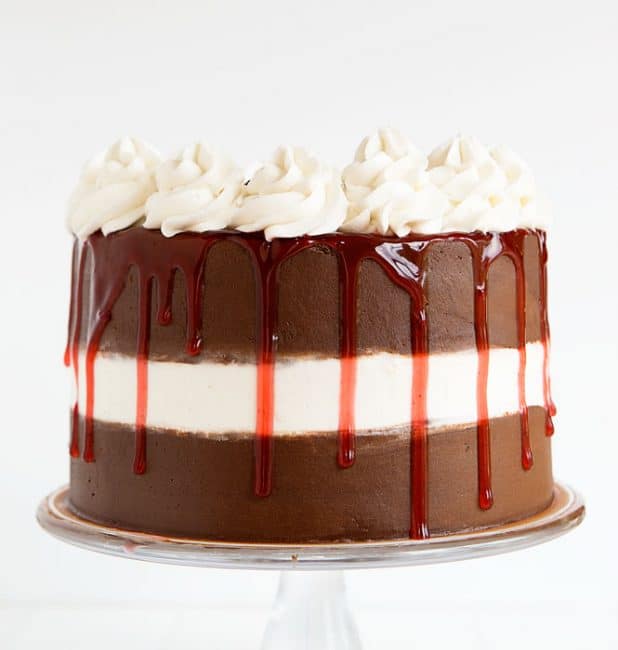
Bake chocolate cakes in 8-inch round cake pans. Allow cakes to cool then place in refrigerator for at least 4 hours or in the freezer for 1 hour.
Bake white cakes 8-inch round cake pans. Allow cakes to cool then place in refrigerator for at least 4 hours or in the freezer for 1 hour. You will only be using one layer of the white cake. Wrap the other (cool) layer in plastic wrap, place in an air-tight bag and freeze until ready to use. (Or just eat!)
Prepare whipped vanilla buttercream. Store in plastic disposable pastry bags. (I like to store in 14-inch bags, but 12-inch works great as well.)
Prepare whipped chocolate buttercream. Store in plastic disposable pastry bags.
Remove green stem from strawberries and slice into 1/2 slices. You will use about 1 cup per layer. (Maybe vary depending on your strawberry size and cuts.)
Pour strawberry pie filling into a bowl. Remove 1/4 cup of the filling and remove any strawberry bits. Add 2-4 tablespoons of water to the 1/4 cup of strawberry pie filling to water it down. This will be dripped around the edge of that cake. Place it in a plastic disposable pastry bag and set aside. (You may want to test the “drip” of the pie filling to make sure it will not run -or drip- too much or too little.)
When you are ready to assemble:
(I have more tips on how to build a layer cake here.)
Place chocolate cake on a cake stand that is on top of a rotating cake stand.
Cut off the tip of the bag of chocolate buttercream. Pipe out a circle around the edge of the chocolate cake and then fill in the center with a slightly thinner layer of chocolate frosting.
Place strawberry slices flat on top of the chocolate frosting.
Add a layer of white cake.
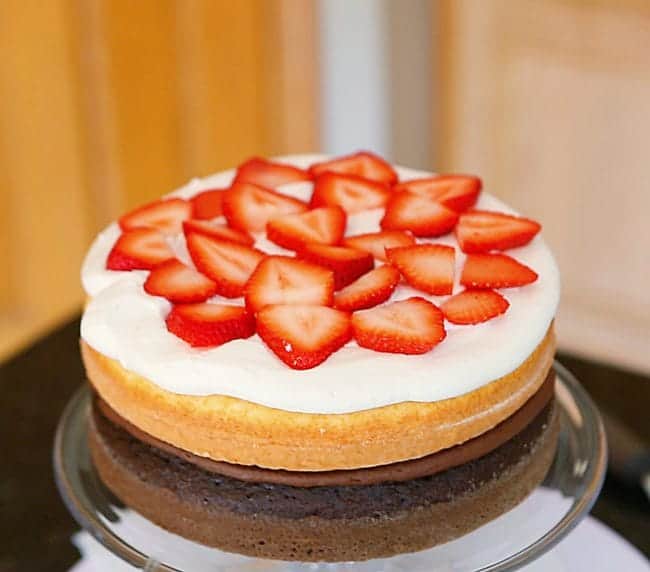
Cut off the tip of the bag of whipped vanilla buttercream. Pipe out a circle around the edge of the white cake and then fill in the center with a slightly thinner layer of whipped vanilla frosting. Place strawberry slices flat on top of the chocolate frosting.
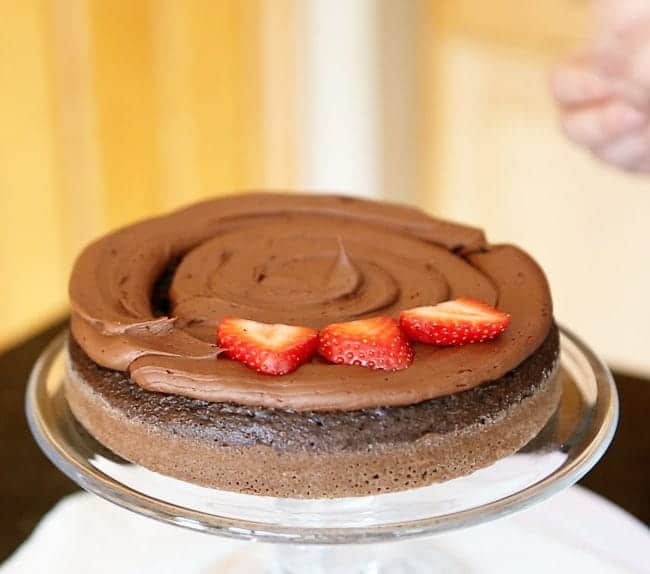
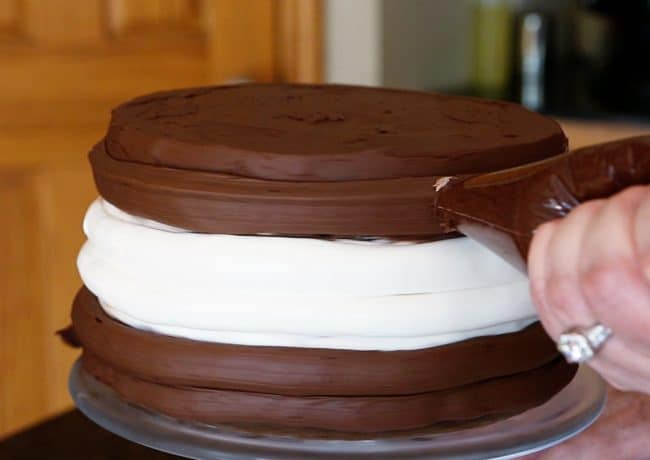
Add the final chocolate layer of cake. Cover top of cake with some chocolate buttercream and smooth it out. You will now do a crumb coat which is basically adding a layer of frosting to seal in crumbs and smooth out
You will now do a crumb coat which is basically adding a layer of frosting to seal in crumbs and smooth out the cake. I copied the design of the interior of my cake, so I did chocolate frosting on the bottom, white buttercream in the middle, and chocolate frosting on top. Smooth out with a small offset spatula really making sure you adhere the frosting to the cake and make sure it is as flat as possible.
Chill cake for at least 15 minutes.
(Sorry this is blurry! My cake is moving very fast in this picture as I turn it on the rotating cake stand.)
This is the fun part! Now we will add the final coat of frosting. Add two rings of chocolate buttercream around the base of the cake. (Or add as much as you need to fill in the bottom layer of chocolate cake.) Now move to the white buttercream. Then add more chocolate to the top.
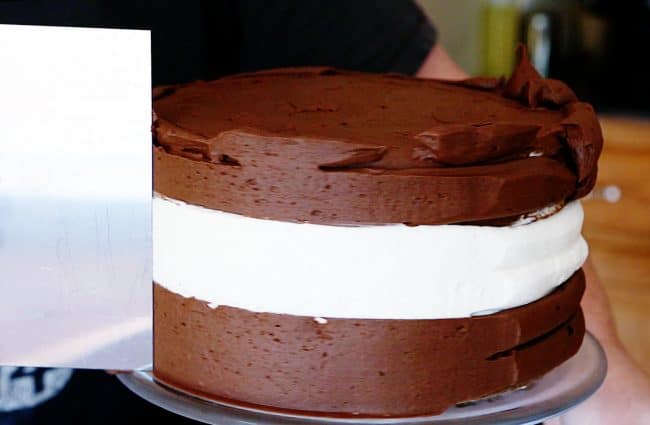
Place a bench scraper flat against the side of the cake with one hand, then use the other hand to move the rotating cake stand. Pressing the bench scraping into the cake, rotate the cake stand and then gently pull the bench scraper away. Scrap off excess frosting into a bowl.
Tip: Scrape frosting into a bowl then mix up the frosting. You will have a lighter chocolate buttercream that you can use for embellishment or on another cake! Because you have the crumb coat, this frosting is all re-useable.
Continue this method until the sides are perfectly smooth.
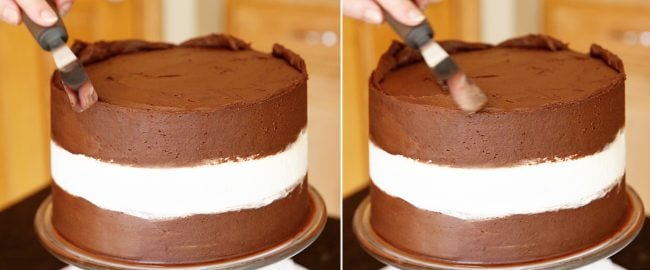
When you are done, take a clean small offset spatula and smooth out the edges of the top of the cake.
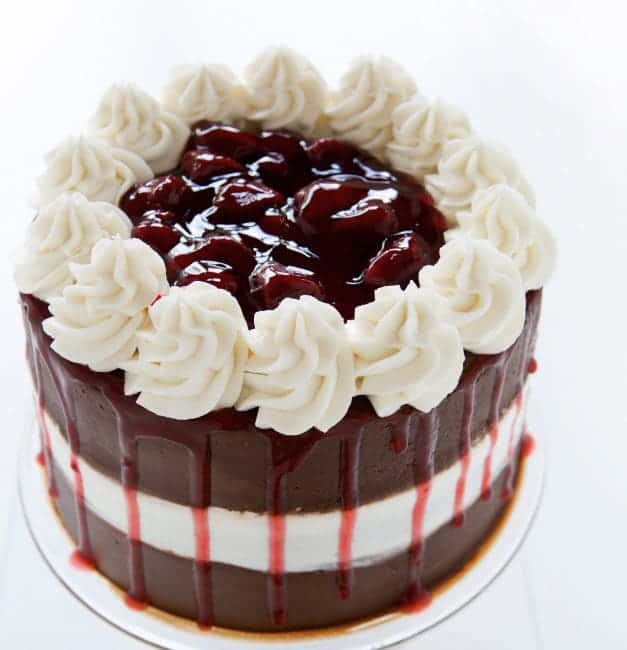
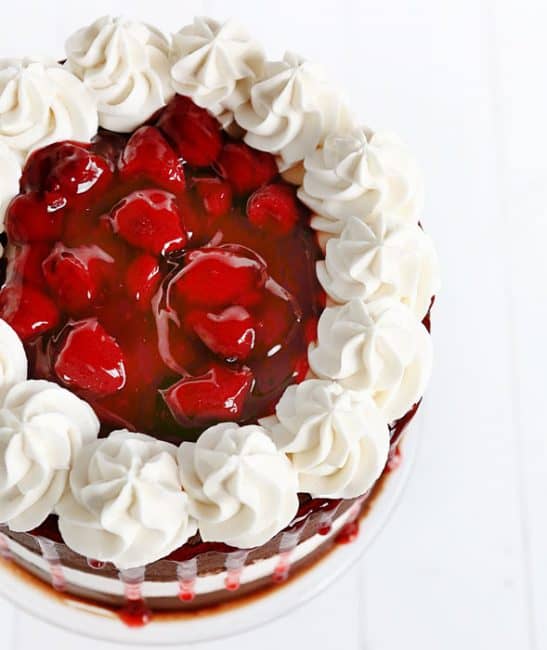
Now take the watered-down strawberry pie filling and cut the tiniest tip off of the pastry bag. Moving around the top edge of the cake, drip a small amount over the top edge of the cake.
Now place your whipped vanilla buttercream into a pastry bag fitted with the #846 tip. (You can read more about my double bagging method here.)
Pipe out dollops of buttercream around the top edge of the cake.
Now fill in the top of the cake (the area inside of the whipped buttercream dollops) with the strawberry pie filling.
There are a lot of steps to this cake, but it can actually come together quite quickly! Check out the a video on how I made this!


What a pretty cake! I would love to try this with raspberries!
Ooh great idea or even with cherries!
So pretty! Can you make my next birthday cake? 🙂
I would like to try making this cake it’s so nice .
Hello, I tried this and it turned out amazing… so happy with the result.. thank you for this amazing recipe and gorgeous assembly of this cake.
I was wondering why you put the cakes into the fridge for four hours before icing. Do you do that with all your cakes.
What kind of prepared strawberry filling??? Just the stuff on the baking isle?
Can you please tell me how you made the strawberry dripping?
I love delicious cakes, these cakes looks mouthwatering.I am not into baking but would love to try and bake some of these great recipes.Greetings Patricia Rondganger.