Did you want to know how you can make this fun cake?
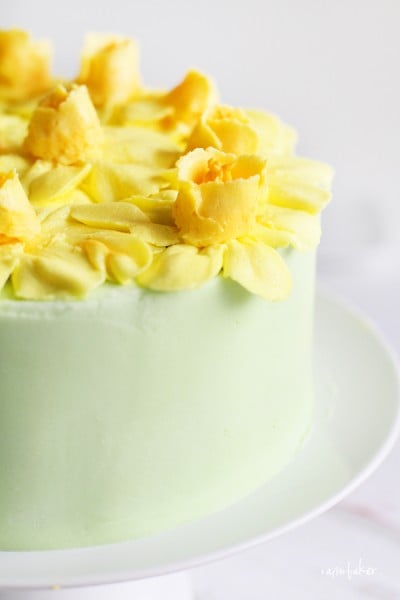
I put together a tutorial for you! But instead of on a cake I put them on cupcakes.
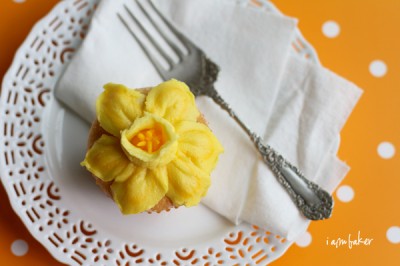
I hope you are able to translate the look into any medium that you want!
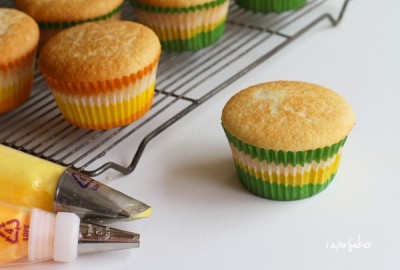
Make your favorite flavor cupcakes. Then make a batch of crusting buttercream frosting. I halved this recipe. I then tinted 2/3 of it yellow and the remaining 1/3 orange.
For the petals I used #127 tip, but you can also use a #104 tip. For the center and the little stamens, I used a #10 and a #3 tip.
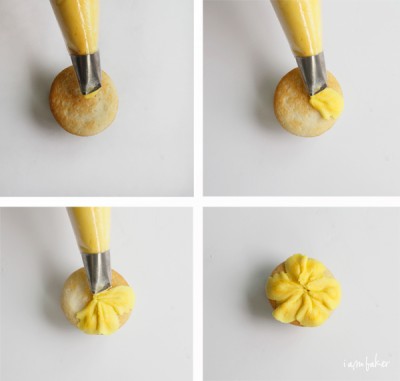
To make the base of your flower, start by piping out a petal. With the smallest edge of your tip facing out, apply light pressure to the bag and allow to tip to form the petal. Try to let some of the petal tips hang over the edge of your cupcake.
Repeat five times. Then move on to next cupcake and repeat process again.
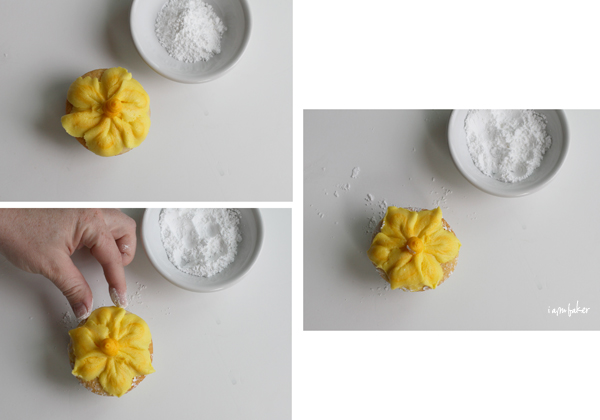
If you look at a real daffodil, their petals are pointed. Since I was unable to get the point I wanted from the #127 tip, I decided to just go back and do it by hand. (I also tried a leaf tip and was not successful at that either)
So to get the point I dipped my fingers in powder sugar and just pressed in. Easy peasy. To do a dozen cupcakes took about 10 minutes.
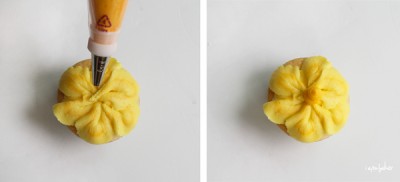
Now get out the orange frosting and the #10 open round tip. I just piped out a center that was about an inch high.
Do this to all your cupcakes.
Place them in the freezer for five minutes or fridge for half an hour.
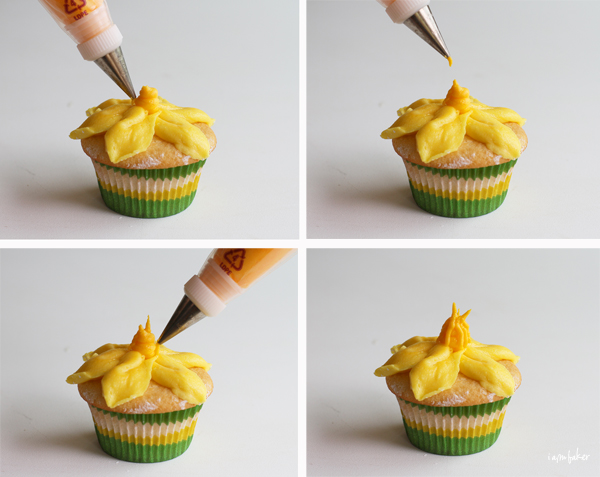
Now switch from the #10 tip to a #3 tip. (#2, #4, and #5 all work just as well!) Starting at the bottom, bring your tip to the top of the center portion and quickly pull away. This should leave a nice little bit of frosting extending just above the center.
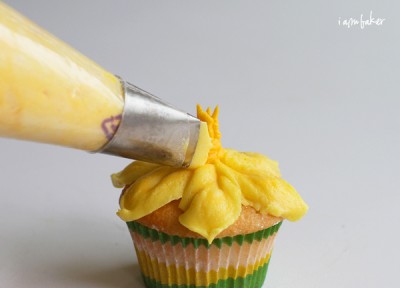
Pick up your yellow frosting and #127 tip again. With the smallest edge pointing up and starting at the center start piping around.
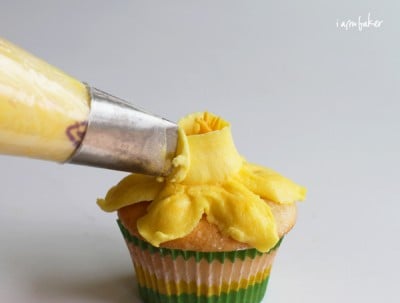
I found it easiest to pick up the cupcake and turn it around in my hand as I was piping. If you want you can go back in and (gently) press the top edge down and out. This helps to better replicate a real daffodil.
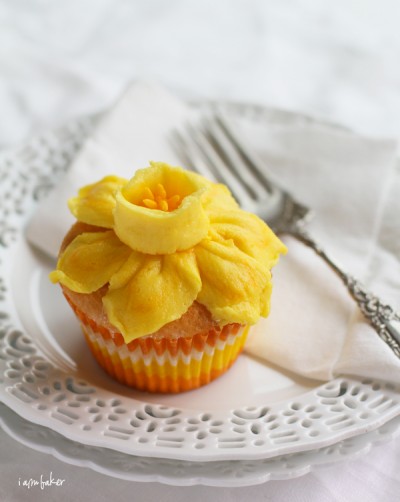
After having made a cake already, it took me about 30 minutes to do two dozen cupcakes.
After posting my Daffodil Cake here, on facebook, and Pinterest, I was able to learn about so many ways that we use the Daffodil in charitable organizations and as a message of hope. Thank you for sharing what Daffodils mean to you!


Wow, that’s gorgeous! I wish I had piping skills like that. I’m pretty sure mine would look like a 5-year old did it!
Simply beautiful! And I can imagine how tasty too 🙂
This is a great lesson. We can always learn something new to make. A Pastry Chefs View From Inside A Bakery
I’ve nominated you for a Versatile Blogger Award. You can pick it up here: http://doctoratehousewife.com/2012/05/09/the-versatile-blogger-award/
So very pretty!
Wow, these look so much like spring!!! Thank you so much for the tutorial. They look beautiful as cupcakes! Can’t wait to try my hand at this great recipe and design! Love daffodils! xoxo Kim
This is gorgeous! I was planning on making mums and roses for mothers day, and this will be perfect for added flower variety!!!
Love love love this blog….super cute and informative!
gorgeous! I’ve been asked to make cupcakes for a Marie Curie fundraiser next month so I might give it a go…
I have a question that I hope gets answered! I don’t know who else to ask and I figured you’re perfect because you’re so great at everything baking!! I know the daffodils here are not gum paste but my question is about gum paste flowers. Can I freeze gum paste flowers? Thank you so much! I am always looking on your blog for new ideas! I’ve made a bunch and they are so great! You’re incredible! Thank you!!!!!
So sorry Nikki… that is not a medium I work with! I do not have an answer for you. 🙁
You CAN freeze gum paste flowers – but you don’t need to. Once they’re set and hard, you can just put them in a box with some layers of paper towels for cushioning and keep the box in a cool, dry place. I know cake decorators that keep their gum paste flowers like this for MONTHS. The trick is no sun light but the box isn’t sealed air tight.