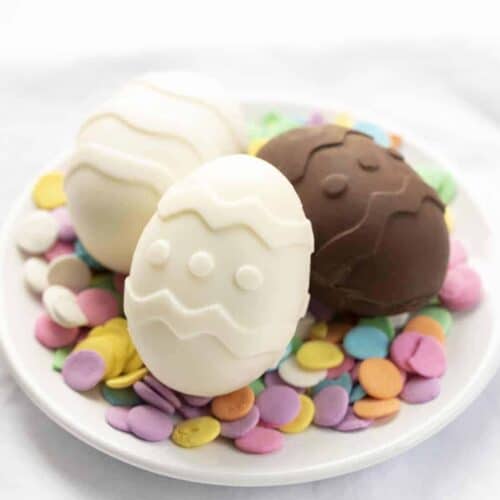
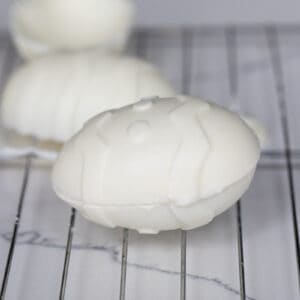
Easter Hot Chocolate Bombs are white chocolate eggs filled with chocolate malted milk powder and marshmallows that are put into a mug with hot milk for a delicious cup of hot cocoa. If you prefer the traditional round shape (that is a bit more customizable), I also have my popular Hot Chocolate Bombs.

Easter Hot Chocolate Bombs
I love my traditional Hot Chocolate Bombs in the cooler months but wanted to try something different for Easter. The eggs are filled with chocolate malted milk powder and marshmallows. The malted milk powder is what makes these taste so much like an Easter treat. I also have peppermint hot cocoa bombs you might love!
When hot milk is added to the bombs, they open up, or ‘explode’ to let the hot chocolate mix and marshmallows out. When stirred, you have a decadent and delicious cup of white hot chocolate! Or, try these bombs with my Hot Cocoa Mix or White Chocolate Mix, too!

Hot Chocolate Bomb Ingredients
There are two main parts to this recipe–the milk powder and the white chocolate bombs.
Chocolate Malted Milk Powder: Can I tell you what makes my hot cocoa bombs better than the rest? Homemade chocolate milk powder. I used my homemade chocolate milk powder recipe with added malted milk powder. And it will make the richest flavor for your hot cocoa bomb!
Malted Milk Powder: Malted milk powder is a fine light-yellow powder with a mellow, nutty flavor and a natural sweetness. You could leave it out if you don’t have it on hand or are not a fan.
White Chocolate: Look for high-quality white chocolate chips for the best results when melting. I like the quality and convenience of Ghirardelli white chocolate chips.
Mini Marshmallows: I opted for the pastel version of mini marshmallows, but any mini marshmallows will work.

Do I Have to Use Egg Molds?
Nope! You can use any round shape you prefer. I purchased Easter Egg Molds from Amazon but the idea of the pastel marshmallows and malted milk powder will translate into “spring” with almost any shape. Especially if you add pastel sprinkles or chocolate drizzle to the assembled cocoa bomb.
If you have any questions on assembling these Easter Hot Cocoa Bombs, I have a video here.

How to Store
I recommend only making as many chocolate bombs as you need. They are best used right away or within 24 hours and stored at room temperature.

Easter Hot Chocolate Bombs
Ingredients
Chocolate Malted Milk Powder
- ½ cup (39 g) malted milk powder
- ⅔ cup (133 g) granulated sugar
- ⅓ cup (39 g) unsweetened cocoa powder
- 1 pinch kosher salt
Chocolate Bombs
- 1 cup (182 g) white chocolate chips
- 6 tablespoons chocolate milk powder, divided
- 3 tablespoons mini marshmallows, divided
- 1 silicone chocolate bomb mold
Instructions
Chocolate Malted Milk Powder
- In a large bowl, use a whisk to combine the malted milk powder, sugar, cocoa powder, and salt.
Melting Chocolate–Double Boiler Method
- Fill a medium pot almost halfway with water. Bring the water to a simmer over low heat.
- Place a heat-safe bowl (glass or stainless steel) that can just fit on top of the pot of simmering water, but leaves a gap between the water and bottom of the bowl.
- Add the white chocolate chips to the bowl. Keep the heat on low and use a rubber spatula to stir the melting chocolate chips until smooth. Remove the bowl of chocolate, but leave the water in the pot to be used later.
Chocolate Molds
- Line a baking sheet with parchment paper. Top with a wire rack.
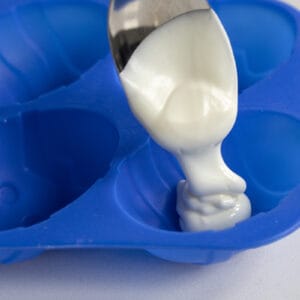
- Add a heaping spoonful of the melted chocolate to each of the six chocolate molds. Use the spoon to spread the chocolate up the sides of each mold. Make sure the entire inside of each mold is evenly coated with chocolate.
- Flip the mold over onto the rack that is on top of the parchment-lined baking sheet. This will allow any excess chocolate to drip onto the parchment to be re-melted and used later if needed.
- Place the molds in the refrigerator to chill for 20-25 minutes, or until set. You could also place the molds in the freezer for 10 minutes. While the molds are setting, line another baking sheet with parchment paper.
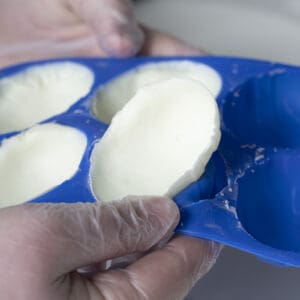
- Once set, carefully remove the chocolate cups from the mold, placing them on the lined baking sheet.
Assembling Hot Chocolate Bombs
- In a medium skillet over low heat, gently press the edges of the chocolate half onto the warm surface. Press just long enough to smooth out all edges. Set back onto the baking sheet. (I like to wear gloves during this process to prevent any fingerprints.) Repeat this two more times, so that you will have three chocolate halves total to be filled.
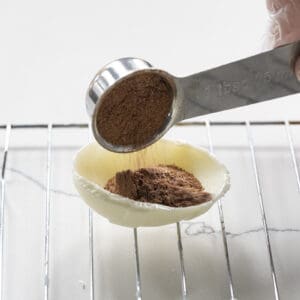
- Fill each of the three halves with 1 tablespoon of the chocolate milk powder and 1 tablespoon of mini marshmallows.
- Working one at a time with the remaining three molds, repeat the process of slightly melting the rims of the molds.
- Cover each filled chocolate half with an empty half, sealing it.
- Decorate with any extra melted chocolate, sprinkles, and other candies. Use immediately, or within 24 hours, for best results. Store at room temperature.
- To make hot chocolate, add a chocolate bomb into a mug. Slowly pour about 1½ cups of hot milk over the bombs and stir. Sip and enjoy!

Notes
“Recipe Image” or “Instruction Images” to print the recipe without images.
Did you make this recipe?
Thank you for making my recipe! You took pictures, right? Well go ahead and post them on Instagram! Be sure to mention me @iambaker and use the hashtag #YouAreBaker.


You are the woman!!! Can’t wait to try these!!!
Keep these great recipes coming!