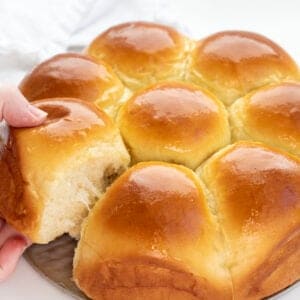
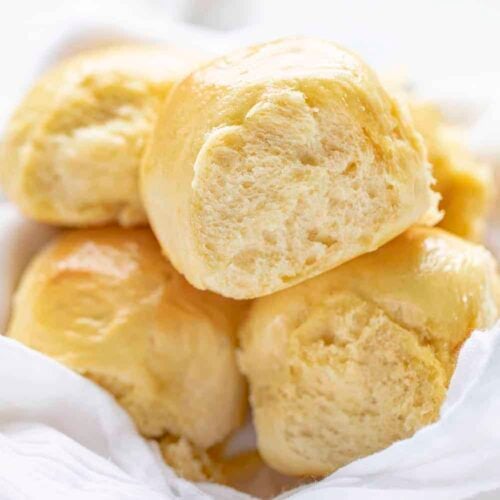
Homemade Hawaiian Rolls are sweet and fluffy rolls that you can make at home and skip the grocery store! They have the same texture and flavor of store-bought rolls and you will be blown away by how delicious they are. The melt-in-your-mouth rolls are great on their own or perfect for burgers and sandwiches. I use them all the time for my slider sandwiches like my Cheeseburger Sliders and Ham and Cheese Sliders.

Ingredients & Substitutions
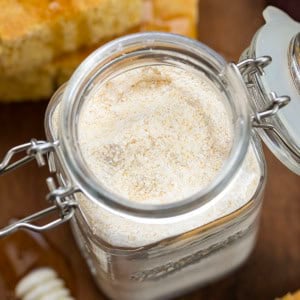
Potato starch— Potato flour contains flavor, fiber, and protein, while potato starch is pure, flavorless starch. Potato starch helps keep rolls soft, moist, and tender by absorbing liquid and improving texture. It can even help slow the staling process, which makes it ideal for soft dinner rolls. You can find Potato Starch here.
If you don’t have potato starch on hand, the best substitutes are tapioca starch or arrowroot powder. You can also use cornstarch in a pinch, but the rolls may be slightly denser and less tender. Rice flour is not a true substitute, since it behaves more like a flour than a pure starch.
Pineapple Juice: Pineapple juice is added to homemade Hawaiian rolls to give them their distinct sweet and slightly tangy flavor. It also helps to tenderize the dough and adds moisture to the rolls, making them softer and fluffier.

How to Shape the Dough
After the dough has risen for a few hours, it’s time to shape the rolls and put them in a greased 9×13-inch pan. There are a couple of ways you can make your 16 rolls.
- First, gently punch down the dough to deflate it. One strategy you could use is to gently roll the dough into a log on a clean surface.
- Then, use a bench knife or stiff spatula to cut the log of dough into equal-sized pieces. If you have a kitchen scale, now would be a wonderful time to use it to get the rolls as similar in size and weight as possible. You could also continue to divide the dough in half, and in half again, etc., until you get 16 pieces.
- To roll the pieces of dough, simply roll them in your hands, making sure you form a smooth top surface of each roll. Place the rolls into the greased pan and cover them with plastic wrap to allow them to rise for about an hour.

How to Store Hawaiian Rolls
To store homemade Hawaiian rolls, allow them to cool completely and then place them in an airtight container or a resealable plastic bag. You can keep them at room temperature for up to 3 days. If you want to keep them fresh for longer, you can store them in the refrigerator for up to a week.

Can I Freeze Hawaiian Rolls?
Yes! To freeze homemade Hawaiian rolls, allow them to cool completely and then wrap them tightly in plastic wrap or aluminum foil. Place the wrapped rolls in a resealable freezer bag and label the bag with the date. You can freeze the rolls for up to 2-3 months. To thaw the rolls, remove them from the freezer and let them come to room temperature for about 1-2 hours.

More Bread Recipes
Hawaiian Rolls
Ingredients
- 1 tablespoon instant yeast
- 2 tablespoons warm water
- ½ cup (125 g) pineapple juice, canned
- ¼ cup (½ stick / 58 g) unsalted butter, softened
- ⅓ cup (67 g) brown sugar
- 2 large eggs
- 1 large egg yolk, with white reserved
- 1 teaspoon vanilla extract
- 3 cups (375 g) all-purpose flour
- 2 tablespoons potato starch
- 1 ¼ teaspoons kosher salt
Instructions
- In the bowl of your stand mixer, combine the yeast, water, and pineapple juice. Let it rest for 5 minutes.
- Add the butter, brown sugar, eggs, egg yolk (remembering to reserve the egg white), and vanilla, mixing until combined. (Some butter clumps are okay.)
- In a separate bowl, whisk together the flour, potato starch, and salt.
- Add the flour mixture to the yeast mixture, beating with the paddle attachment for about 3 minutes at medium-high speed. Scrape the dough into the center of the bowl.
- Switch to the dough hook and knead for about 5 minutes at medium speed. If you notice the dough is too sticky, add a little flour.
- Round the dough into a ball and place it into a greased bowl to rise (about 3 hours).
- Spray a 9×13-inch pan with nonstick cooking spray.
- Gently punch down on the risen dough to deflate it. Divide the dough into 16 equal pieces. (You can do this by continuing to divide the dough in half until you are down to 16 pieces. Or, roll the dough into a log and use a bench knife or stiff spatula to cut it into 16 pieces.)
- Round each piece into a smooth ball and place it in the greased pan, evenly spaced.
- Cover the rolls with a piece of greased plastic wrap and let them rise for an hour. They should be nice and puffy.
- Preheat the oven to 350°F when the rolls are just about done rising.
- Add 1 tablespoon of water to the reserved egg white to make an egg wash. Brush the egg wash over the tops of the rolls.
- Bake for 20-25 minutes, or until the rolls reach an internal temperature of 190°F.
- Remove the rolls from the oven and let them cool a bit before turning them out onto a wire rack.
Video
Did you make this recipe?
Thank you for making my recipe! You took pictures, right? Well go ahead and post them on Instagram! Be sure to mention me @iambaker and use the hashtag #YouAreBaker.


I had high hopes but was very disappointed with the final result of this recipe – that I followed completely with the exception of the potato starch (I used corn starch). I would have been more upset if I would have ran all over town looking for potato starch and had the result I did. The texture was good, they were fluffy, nice looking rolls, but they were not even close to the flavor of a Hawaiian Roll. I suggest changing the recipe or the name of your recipe. This can’t be the first time someone has said this, so please do the right thing. Take care, Cath
Hi Cath
I do want to point out one important detail: potato starch and cornstarch are NOT interchangeable in yeast breads. Potato starch contributes to the softness and flavor in a way that cornstarch can’t replicate, so that substitution would definitely affect the final result. I’m afraid, Cath, that you made a the change that resulted in them not being up to your standards.
These rolls are a homemade, from-scratch version inspired by Hawaiian-style rolls, not an exact copy of a store-bought product. Readers have had great success with the recipe as written!
I appreciate you giving them a try, and I’m glad to hear the texture turned out fluffy and nice looking. If you ever decide to try them again following the actual recipe, I’d love to hear what you think!