SO excited to share with you how easy it is to make the rose cake. (Video tutorial HERE. In four minutes I frost an entire three layer Rose Cake!)
Seriously, once you see you are going to run right out, buy a 1M tip, and make one.
That or go back to work. Or bed. Or whatever it was you were doing before I interrupted you.
Ok, here we go!
There were two main components to this cake.
The vertical layer interior and the frosting rose exterior.

Pin It
I am going to do a vertical layer tutorial at a different time, (updated: you can see it HERE) as I did not get any pictures of it this go around and it is IMPOSSIBLE to explain without pictures. What I can tell you is, I did not make a sponge cake that I simple rolled up. I actually made two separate cakes and assembled them into the vertical layer pattern.
Now for the frosting rose tutorial!
I promise you, this could NOT be easier. Bakers have been putting frosting roses on cupcakes forever by simply using a 1M decorators tip. That is all I did!!
(I need to mention… before I froze my cake I poured a simple syrup over it. This helped to retain moisture as well as assist in binding the layers together… just be careful to not use to much!)
Start with your cake. I put a good crumb coat on… as in, a crumb coat that conceals the cake underneath. It can be sloppy and uneven, but you should not be able to see what color the cake is.

Put your 1M tip (or any large open star tip) into the pastry bag then fill it up with buttercream frosting.

If you have an appropriately sized coupler you can use that, or you can just insert the tip into the bag and cut off the excess.

To make your rose, start in the center, then slowly move your tip in a circle around the center point. I wanted a single rose to span the side of the cake so I looped around my center point twice.
Try to end in the same place each time.

Go all the way around the cake and complete with one last rose!

This is how it looks after completing the circumference of the cake.

Then go back and add the roses to the top using the same method.

When making flowers that big, you are bound to have some ‘dead’ space in there. Can you see that big empty spot up there?
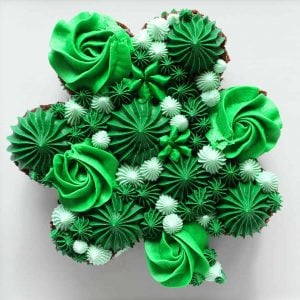
My first instinct was to go back in and add dollops of stars… but I think I found a better way!

Instead go in and make a swoop with your tip. (try and go in the same direction as the rose right next to it)
In the overall design it seems to fit in better then the star dollop!

At least, I hope so anyway. 🙂
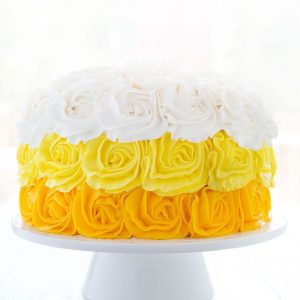
Now… if you are really adventurous and want to add some color to your cake…

You can pick up some of these.

I did a light dusting of yellow then went back over it with the pink. I have to admit, all white is still my favorite, but I love the flexibility of being able to add some color.
I think a deep red would be stunning on a Valentines Day cake! If you try that, be sure to send pictures! Or just add it to my flickr group!
Here are my tips to finding success:
1. Use a good crusting buttercream recipe. I used my new favorite and loved how it worked. You will want to make sure the frosting is not creamy though… for the tutorial cake I used a creamier version and the roses did not holdtheirshape as well.
2. Make sure you have enough frosting! Those roses use a lot… I would make the whole batch of the above recipe.
3. Put your cake in the fridge after you are done with decorating to help them set up and retain their shape.
4. Have FUN with it! Those roses are so forgiving. But if you find that you really dislike how they are turning out, just scrape them off and start over!
Cant wait to see what you do!
And of course, if you have any questions, feel free to let me know.
***
You can also see Audrey’s Rose Birthday Cake and my Royal Wedding Cake!
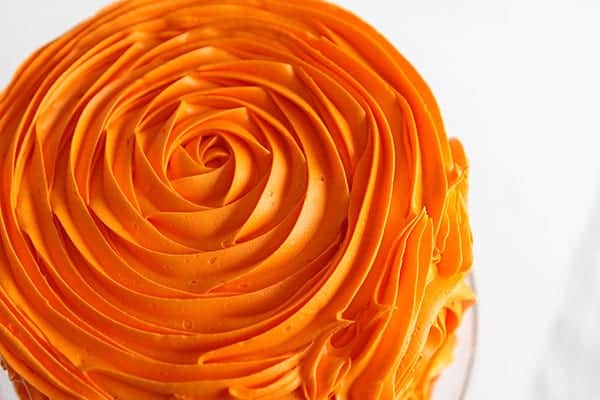
To make this design, simply start in the middle of the cake and create the same pattern as you did on the sides. Instead of stopping, keep going around and around until you have covered the whole cake!
Thank you for much for viewing and commenting the Original Rosette/Rose Cake that I created. Although many have stolen this idea and passed it off as their own, I can assure you that I was the Original. Thanks!


Thank you, I used this technique to decorate a cake for my sisters birthday. It was pink Champagne flavored and it took me a while to do 3 tiers of pink roses but it came out beautiful 😊
I can’t wait to try this for Easter! In the morning I will start practicing making roses. If it turns out I am not so great at it, plain will work as well.
Thank you for a great recipe.
That was beautiful I will learn to make the rosettes today am a beginner.Thank you
Sounds wonderful and know it is as I baked it!
Was too afraid to try the roses but still got rave reviews as it being great! ( I used my comb and made ridges on the whole cake.
I think I’m ready to try making roses and will keep you informed on the outcome.
You make it look super easy.
Thanks for this awesome tutorial!
Hello
This looks so beautiful! Please can you share the recipe for the buttercream and sponge? I’ve never made a rose cake before and really want to try.