The second time making the cake I was surprised by how quickly everything went. Its amazing how much smoother life is with a plan.
Huh. I gotta remember that.
Anywho… I made two cakes. One red velvet and one white cake. I made them in 8in pans and used these methods for creating a level cake.
Here is an important step… immediately out of the oven, within five minutes at most, I removed the cakes from their pans and cut the top dome of both 8-inch cakes.
I then placed the cut parts together. (It should look like a two layer cake here, except without frosting) Then put it in the freezer for no less than five hours.
The reason I do this is:
1. I want the height of a two layer cake. (four or five inches)
2. I do not want a frosting seam.
3. This helps to meld the layers together so they appear one complete layer.
(If you have a 5-inch deep cake pan you can use that.)
Now! Once the cakes have firmed up nicely (after a good five hours) you can remove them from the freezer.
We will begin to cut out our layers!
I simply used a cardboard cake round as my guide. I traced out three evenly spaced concentric circles.
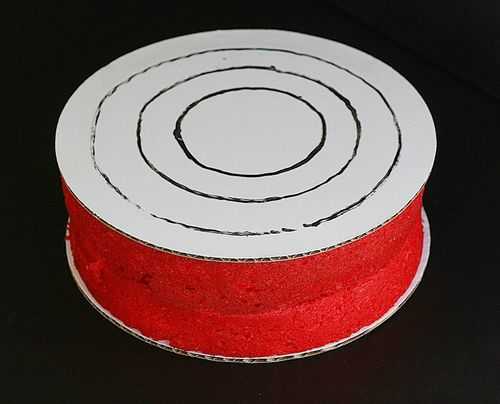
I am now going to cut off the outside circle.
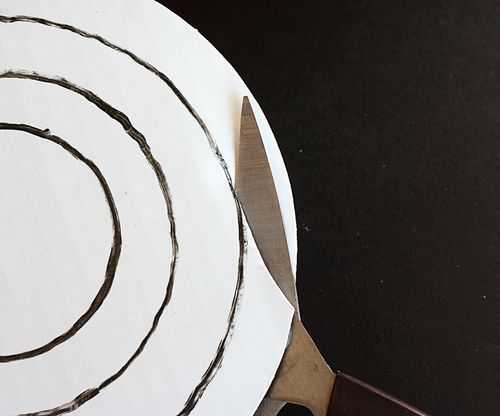
Place the template back on the cake. Now I need to carve around that circle! It’s important to try and get your knife at a 90-degree angle… you want a very straight up and down cut.
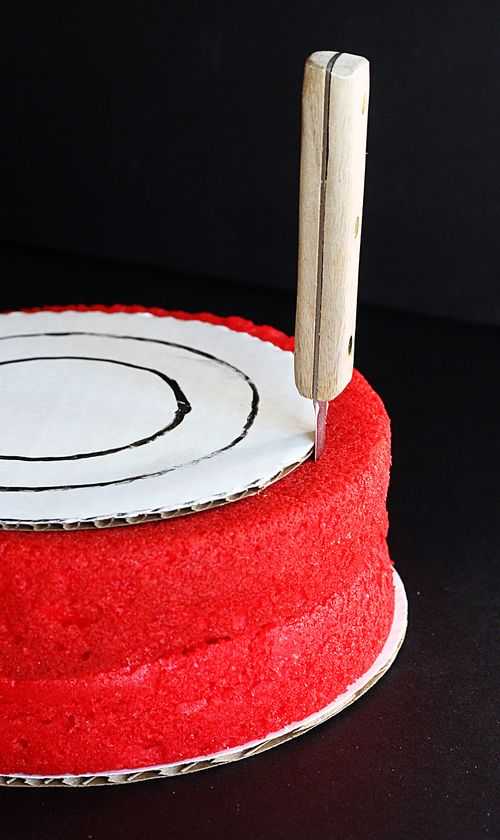
Follow the template as close as you can. A sharp knife here is a great idea!!
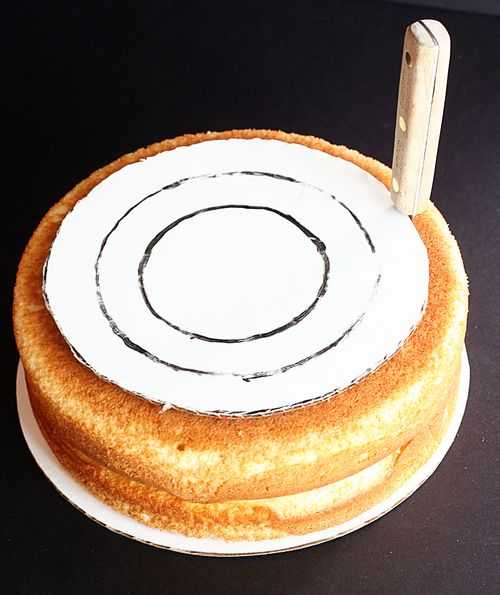
You are going to do this with BOTH cakes.
Now I cut off another circle and started the process again.
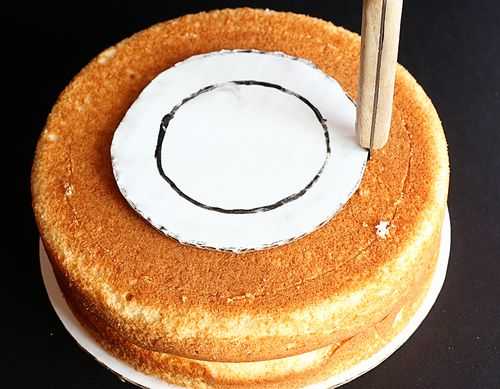
Do this to both cakes.
Then cut off another circle so you are left with the center portion. (FYI, if you want to do another circle, therefore making your center smaller, you certainly can!)
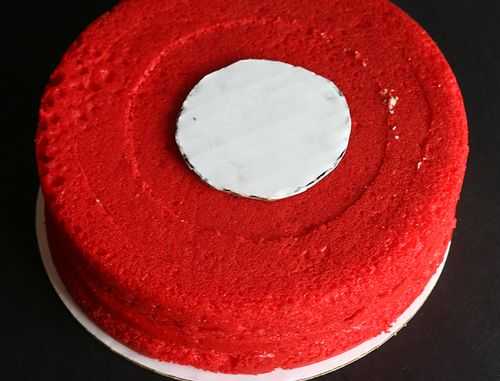
You are now left with two cakes that have concentric circles cut in each.
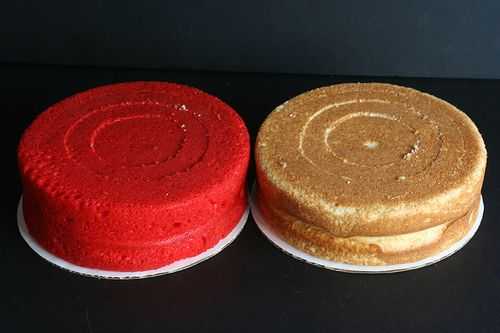
The next step might go against everything you know about cake… but just do it anyway.
Wow that was bossy.
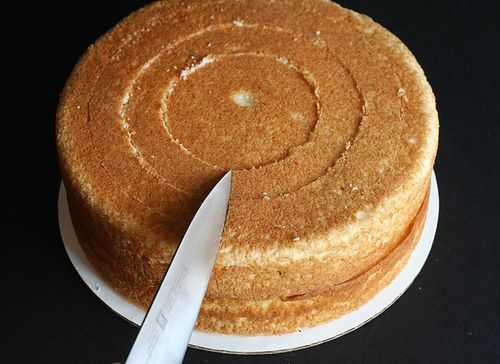
Take a nice big sharp knife and cut from the OUTSIDE of the center circle through the cake.
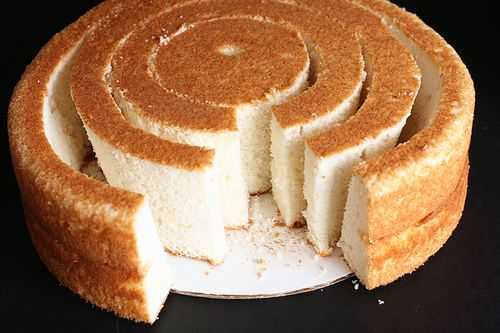
You are going to gently separate the layers into individual sections. This is why it is SO important to have a very chilled if not frozen cake!
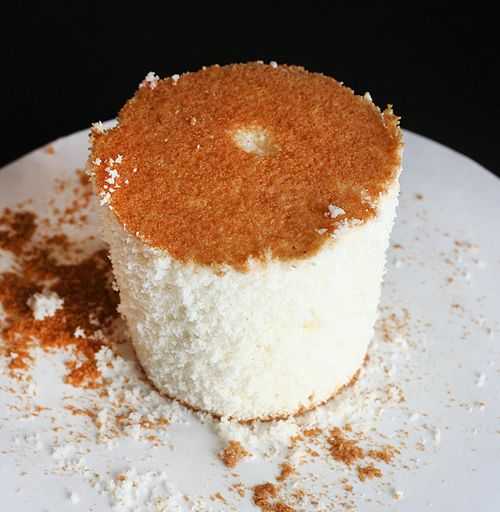
Choose which center you want to start with. (I choose the white cake)
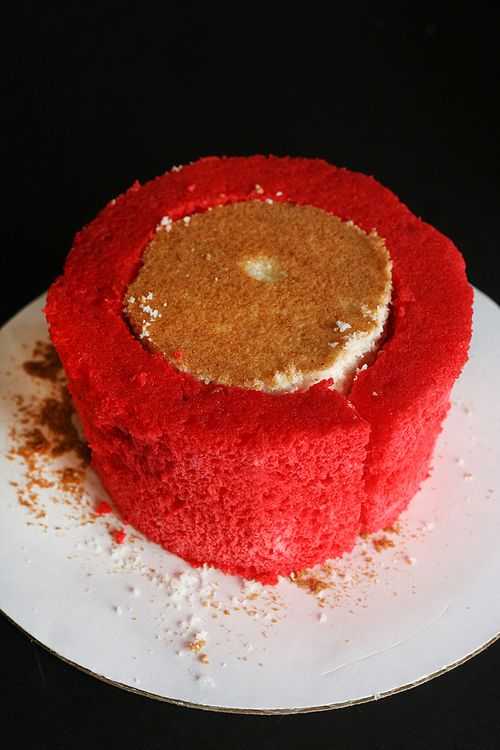
Take the next larger layer of the other cake and place it around the center.
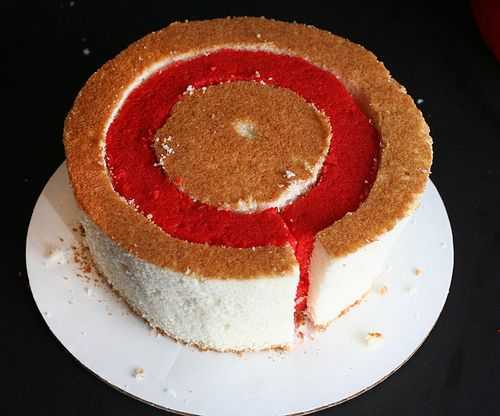
Keep doing this… alternating the layers… until you have a complete cake assembled again!
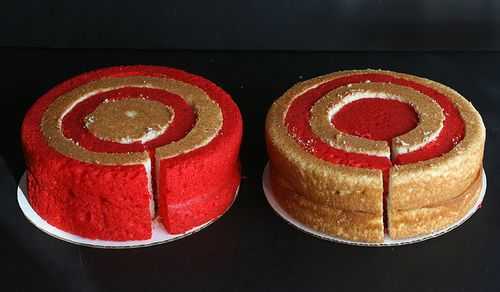
And there you go! Easy right?
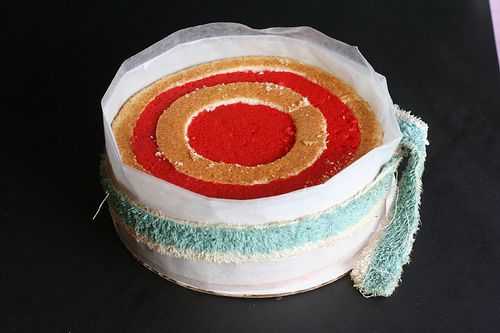
Now… were you worried about the layers not staying together? I fixed that with three easy steps.
1. Pour a simple syrup over the re-assembled cakes. (not too much!!)
2. Place a wax paper “belt” around the cake and bind it together with a cord or towel scrap.
3. Place it back in the freezer for a bit!
A couple hours before you are ready to decorate, place the cakes in the fridge so they can “thaw” without sweating.
(I wouldnt recommend decorating a frozen cake.)
Now… please forgive me but I didn’t decorate the outside with the roses.
I just did a smooth layer of frosting then wrote out a romantic quote I found.
It’s nothing fancy, but it was easy.
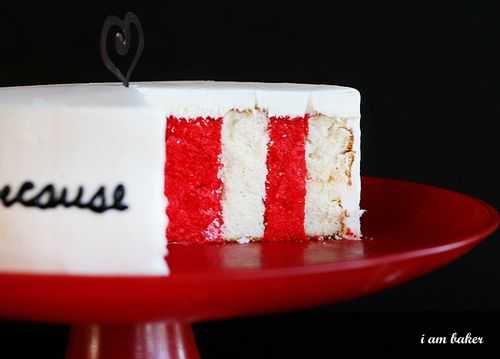
“When I saw you I fell in love, and you smiled because you knew.”
And there are the vertical layers!
If you make this cake please let me know, I would love to see! And of course, love to know if you came up with an easier way. 🙂
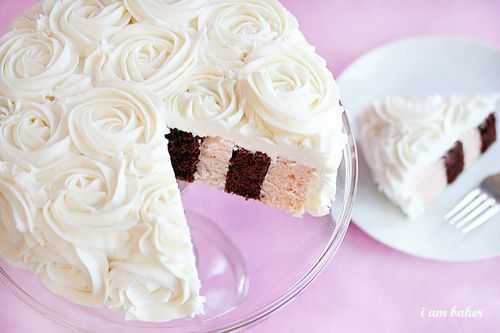




made this cake below with ur tutriol
https://www.facebook.com/media/set/?set=a.2036555804136.2118718.1551454194&type=3#!/photo.php?fbid=2167689642400&set=a.2036555804136.2118718.1551454194&type=3&theater
Just wanted to let you know that I did make this cake and it was well received. I took it to a Scout leaders meeting 🙂 the ladies love their cake.
I did mine a little differently though. Instead of cutting the circles open, I used the cardboard circle to push it out the bottom. The layers ended up fitting together very snugly once reassembled.
And you were right! the 1M roses are really easy – I had never done them before. And I did totally underestimate the amount of frosting I would need and ended up making another batch halfway through.
It ended up looking rather wedding-y, but it was very pretty and surprisingly easy.
thank you so much for the tutorial and the idea!
Wow this is great. I am not a great baker or even a fair one for that matter. However, I think I might be able to do this. Thanks. I am sure I will have no trouble with the roses as that type of thing is a bit easier. Thak-you sooooo much for this great idea.
I am amazed! Thanks for sharing such a well written tutorial! Just gorgeous!
This is a wonderful idea! I was thinking when I saw the rose tutorial how in the world did she do that…..I’m am dying to try that out hopefully I can find some spare time to make one. I wanted to know how do you get your icing so smooth and to stay in place?
This is amazing, thank you SO much for the tutorial!!!! I love the white frosting with the quote around the cake! I am going to try to summon the courage to attempt this… & I just love your blog! Thank you!
Beautiful cake and amazing work! Try using a checkerboard cake form…what you did turned out great, but seems like a lot of work. A checkerboard cake form will give you the same results, and it’s really easy to use 🙂
I would love to know how you got that icing so amazingly smooth!! What kind is it?? I just love following your blog, you are so amazing!! Some days I am just stunned!!
Все гениальное просто.
This is stunning! One of the most beautiful cakes I have ever seen. Would love to try this some day when I get the courage. Could you recommend a link to the appropriate buttercream frosting that works with this cake?