Simple White Bread is simple to make, and it’s easy enough that you can triple or quadruple the recipe so you can have freshly baked bread every day! Really, you can! It is soft and delicious enough to be enjoyed on its own or with just a touch of butter. If you love homemade bread, be sure to try my Old Fashioned Buttermilk Sweet Bread!
Simple White Bread
My mother-in-law started baking bread with the kids as soon as they were old enough to stand by her side. They loved it… getting their hands into the dough and being a part of creating something so delicious. As a family of seven, we go through 1-2 loaves a day, and I want desperately to be that mom that creates bread from scratch, with love, and with wholesome ingredients. For years now I have been saying how I want to bake fresh bread daily.

But, we all know that can be a bit daunting…However, with the way things are right now in the world and bread disappearing off the shelves, there is no better time to make your own bread. And, I am telling you, this is THE bread to make because it is so easy and you only need a few ingredients!

Simple White Bread Recipe
There is a reason I am sharing this recipe now, and that is most importantly convenience. This recipe tastes amazing, you can make as much or as little as you need, and it only used a minimal amount of flour. Most recipes call for 5-6 cups and I wanted to be mindful that rationing ingredients may be on some folks’ minds. With all those wonderful perks for convenience, I would be remiss if I didn’t mention that this bread TASTES AMAZING. You are going to have a hard time stopping at one piece!
With only a few ingredients, and the option to double, triple, or even quadruple the recipe, there is no excuse to not have fresh bread daily. 🙂

How to Make Simple White Bread
After you make a loaf of this Simple White Bread, you will make sure you have enough ingredients to at least double the recipe next time. And, it’s easy enough that your kids could help with the measuring and kneading of the dough. The only hard part about this recipe is the waiting to bake the loaf of bread. You do need to let the dough rest in the refrigerator overnight before baking it.
To prepare the dough, begin by adding the sugar and yeast to a cup of warm water and set it aside. Next, in a medium bowl (or a large bowl if doubling or tripling the recipe), mix together the flour and salt. Add the yeast mixture to the flour mixture and stir everything together.
Get a work surface ready by sprinkling a couple of tablespoons of flour on it. Knead the dough until it is smooth and elastic. Then, place the kneaded dough into a large plastic zip bag that has been drizzled with olive oil. Make sure you get all the dough covered in the oil. Seal the plastic bag and store it in the refrigerator overnight.

How to Bake Simple White Bread
- The next day, when you are ready to bake the bread after letting the dough rest in the refrigerator, remove the dough from the refrigerator. Keep the dough in the plastic zipped bag as you let it come to room temperature.
- After about an hour, sprinkle some more flour (1-2 tablespoons) of flour onto your work surface. Take the dough out of the plastic bag and knead and fold the dough for about a minute.
- Form the dough into a log that will fit into a greased 8-inch loaf pan.
- Cover the dough after you have placed it in the loaf pan, and let it rise until it is almost double in size (about 2 hours). I just used the plastic zip bag to cover the dough, and it worked great!
- After the dough has risen, slash the dough with a sharp knife and bake it for 35-40 minutes at 350°F. To be precise, the internal temperature of the bread should be 190-210°F.
- Let it cool before slicing. Enjoy!

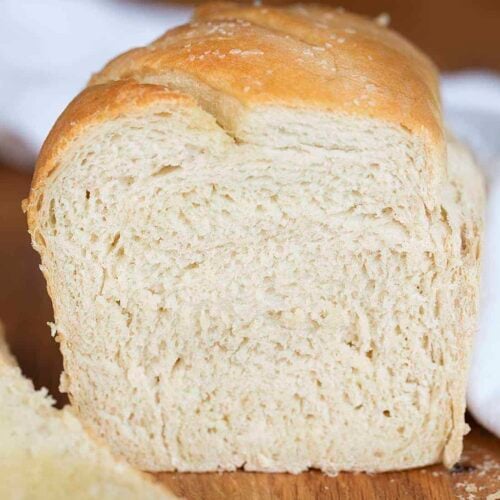
Soft, light, and oh so delicious! I love my bread smothered with warm butter and then sprinkled with flakey sea salt. Perfection!
Can You Bake This Right Away?
Yes! Just skip steps 5 -6 in the recipe below.
Simple White Bread
Ingredients
- 1 cup water, lukewarm
- 1 tablespoon granulated sugar
- 2½ teaspoons (1 package) dry active yeast (not rapid rise-see notes for Rapid Rise instructions)
- 2½ cups (312g) all-purpose flour
- 1 teaspoon salt
- 2 tablespoons olive oil
Instructions
- In a measuring cup, combine the sugar and yeast to 1 cup of lukewarm water, stirring until combined. Set aside.
- In a medium bowl, mix together the flour and salt.
- Pour the yeast mixture into the bowl and combine all the ingredients.
- Sprinkle 1-2 tablespoons of flour onto your work surface and knead the dough for a few minutes, or until smooth and elastic.
- Store the dough in a sealable plastic bag that has been drizzled in olive oil, making sure the dough is completely covered in the oil. Keep the dough in the refrigerator overnight.
- WHEN YOU ARE READY* to bake the bread, remove the dough from the refrigerator. Leave the dough in the plastic zipped bag,and let it come to room temperature (about an hour). *This can sit in your fridge for SEVERAL days!!
- Prepare a loaf pan with nonstick spray.
- Sprinkle 1-2 tablespoons of flour on your work surface, take the dough out of the bag, and knead and fold the dough for about 1 minute.
- Form a log with the dough that will fit in your prepared loaf pan. Cover the pan with the plastic bag and let it rise until is has at least doubled in size (about 2 hours).
- Meanwhile, preheat the oven to 350°F.
- After the dough has risen, remove the plastic covering and slash the top of the dough with a sharp knife.
- Bake for 35-40 minutes at 350°F, or until the internal temperature is 190-210°F. Let it cool completely before slicing.
Notes
Did you make this recipe?
Thank you for making my recipe! You took pictures, right? Well go ahead and post them on Instagram! Be sure to mention me @iambaker and use the hashtag #YouAreBaker.
Here is a video on how easy this bread is to make:
Looking for More Homemade Bread Recipes?


I like your recipes but I am unsubscribing because the ads are too annoying. Wasting my time trying to print without the ads. I can find recipes without all this added irritation !
All of my tested recipes are free to you. The only “annoying” aspect is the ads, which are what keep the lights on. I’m sorry that you feel that seeing an ad is just too much for you to handle.
Amanda, I love your recipes and would watch those ads any old time to get them. Your recipes are so worth it. I make them all the time. Keep them coming!
Thanks!
If you double or triple the recipe, do you also increase the yeast and salt by that quantity as well?
The recipe looks super simple and easy, and I’m eager to try it. I’m not a big fan of white sugar, would it still work substituting honey for the sugar?
I just made this bread for the third time! We love it. I add a little sprinkle of flaked sea salt on top.
Today I’ll be making your bread for the 4th or 5th time. Feeling adventurous so I’ll be adding some cheese and herbs. Thanks so much for the easiest bread recipe ever.
Love that you have mastered it and are making it yours! That flavor sounds delicious!