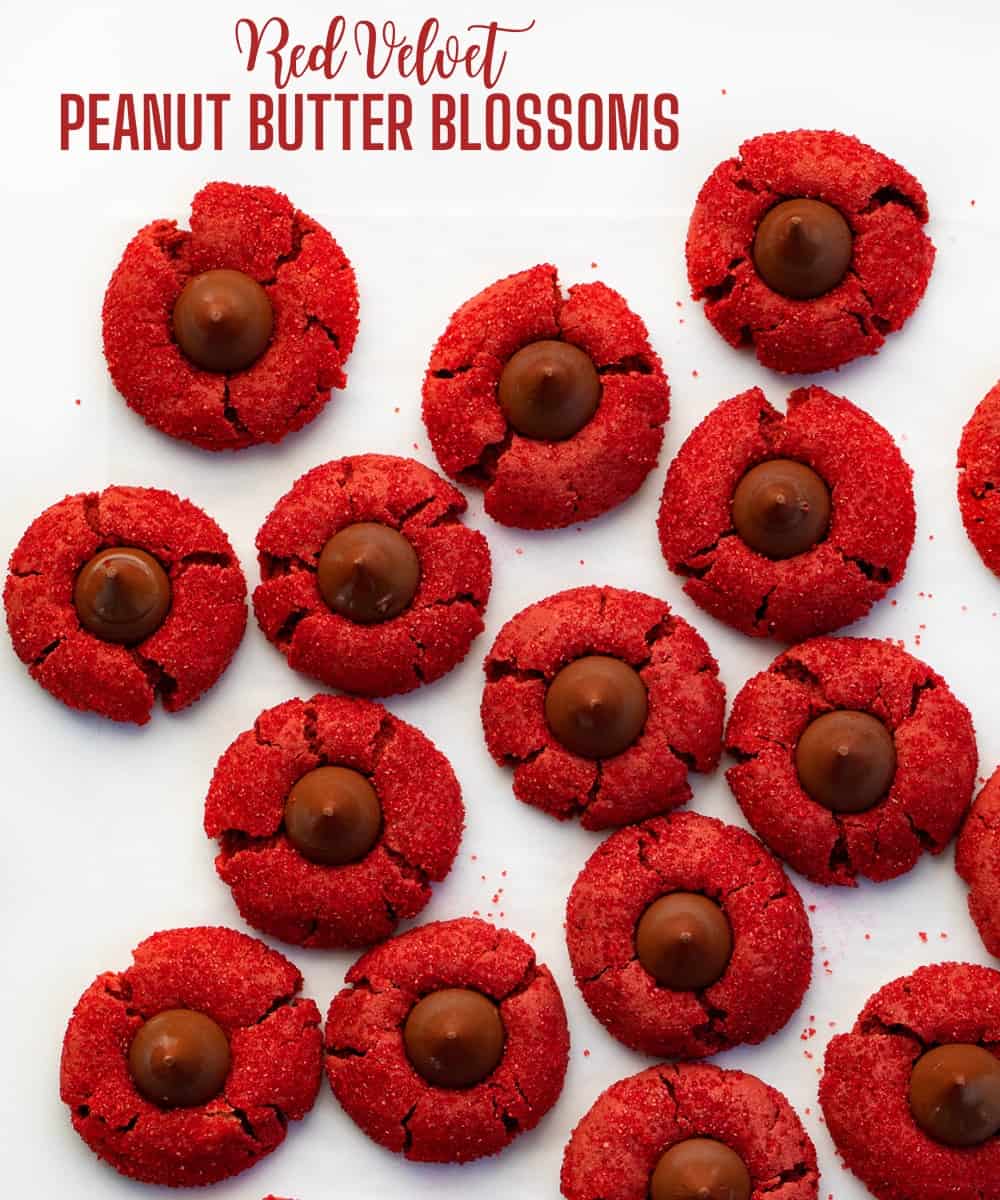
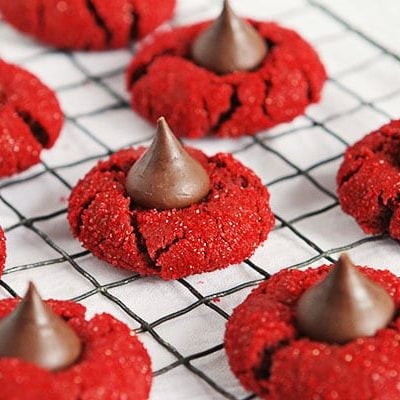
This Red Velvet Peanut Butter Blossoms recipe, a holiday and Valentine’s Day favorite, is soft and chewy peanut butter cookies with a Hershey’s kiss in the center, made with red food coloring for a festive touch. I also have a Classic Peanut Butter Blossom Recipe you will love!

Ingredients & Substitutions
Butter: I prefer unsalted butter in this recipe, as well as in many of my baked goods. It allows you, the baker, to control the amount of salt needed for the recipe. If using salted butter, omit the pinch of kosher salt in the dough.
Peanut Butter: Both creamy and chunky peanut butter would work in this recipe. The chunky peanut butter will add more texture to the cookies.
Food Coloring: Start with one teaspoon of red gel food coloring, which is more vibrant than liquid food color. No matter which variety you use, you can always add more until you get the shade of red you are going for.
Sanding Sugar: Sanding sugar is a type of decorative sugar utilized in baking to add sparkle and texture to desserts. It is coarser and larger than regular granulated sugar, making it a popular ingredient for decorating cakes, cookies, and pastries. If you don’t have sanding sugar, you could use any coarse sugar or colored decorating sugar. Granulated sugar would also work in a pinch.
Hershey’s Kisses: The traditional peanut butter blossoms are topped with Hershey’s chocolate kisses. However, if you don’t have any on hand, add a few chocolate chips to the tops of the cookies or miniature peanut butter cups. Rolos, with their soft, chewy caramel center, is another delicious choice.

Why are my Red Velvet Peanut Butter Blossoms Flat?
A flat cookie could be the result of the butter being too warm. To avoid this you can try adding cold butter to your stand mixer and beating until creamy, about 4-5 minutes. You could chill the dough before rolling in the sanding sugar or you could also chill the cookies for about 10 minutes in the freezer right before baking.

How to Bake a Chewy Cookie
This is a soft cookie that is crispy on the outside and chewy on the inside. To ensure your cookies are chewy you can follow these tips:
- Don’t overmix the cookie batter.
- Avoid over-flouring. Be sure to measure carefully.
- Refrigerate the dough. (It is not necessary, but you certainly could do this.)
- Underbake by a couple of minutes (my favorite option).
- Use a light cookie sheet (dark colors will heat faster).

Can I Make These Cookies Ahead of Time?
Yes! Here are the steps to freezing the dough until ready to bake.
- Prepare the peanut butter blossom cookie dough according to the recipe instructions.
- Scoop the dough into balls and coat with red sanding sugar.
- Place the dough balls on a cookie sheet and place them in the freezer for 30 minutes.
- After 30 minutes, transfer the dough balls to a freezer-safe plastic bag, label it, and store it in the freezer for up to 3 months.
- When ready to bake, place the frozen dough balls on a cookie sheet in a single layer and let thaw for about an hour.
- After the dough balls have thawed, bake as instructed.
Storing Red Velvet Peanut Butter Blossoms
Baked peanut butter blossom cookies can be stored at room temperature in an airtight container for up to 5 days. To keep them soft and chewy, place a sheet of parchment or wax paper between the layers of cookies. For longer storage, freeze in an airtight container or freezer-safe plastic bag for up to 3 months.
Red Velvet Peanut Butter Blossoms
Ingredients
- ½ cup (1 stick / 113 g) unsalted butter, room temperature
- ¾ cup (193.5 g) creamy peanut butter
- 1 ⅓ cups (267 g) granulated sugar
- 1 large egg, room temperature
- 2 tablespoons milk
- 2 teaspoons vanilla
- 1 teaspoon red gel food coloring
- 3 tablespoons unsweetened cocoa
- 1 ½ cups (187.5 g) all-purpose flour
- 1 teaspoon baking soda
- 1 pinch kosher salt
- ⅓ cup (67 g) red sanding sugar
- 1 bag Hershey's Kisses, unwrapped
Instructions
- Preheat oven to 375°F. LIne a baking sheet with parchment paper.
- In the bowl of a stand mixer with a paddle attachment, add butter, peanut butter, and sugar. Mix for 2 minutes on medium speed. Reduce to low speed and add in egg, milk, vanilla, and red food coloring. Mix for about 30 seconds to incorporate. Then, increase the mixer speed to medium-high and blend until light and fluffy.
- In a separate bowl sift cocoa, flour, baking soda, and salt. With the stand mixer on slow speed, add the flour mixture to the butter mixture and beat until just combined.
- Remove the mixer bowl from the stand. Using a 1-tablespoon scoop, drop dough onto the lined baking sheet. Roll each scoop of dough into a ball.
- Pour red sanding sugar onto small plate or bowl.
- Roll each dough ball in red sanding sugar and place it back onto the prepared cookie sheet, leaving about 2 inches between each ball of dough. (If you prefer the cookies extra chewy, chill for 10 minutes in the freezer before baking.)
- Bake for 7-8 minutes.
- When the cookies are done baking, remove them from the oven and immediately press a chocolate Kiss into the center of each cookie. The cookie should crack around the edges.
- Allow cookies to cool to room temperature before serving.
Video
Did you make this recipe?
Thank you for making my recipe! You took pictures, right? Well go ahead and post them on Instagram! Be sure to mention me @iambaker and use the hashtag #YouAreBaker.
If you are looking for more Christmas Cookies I’ve got you covered! Be sure to try my BEST Apple Crisp Recipe as well as my Snickerdoodles and Sugar Cookie Recipe.
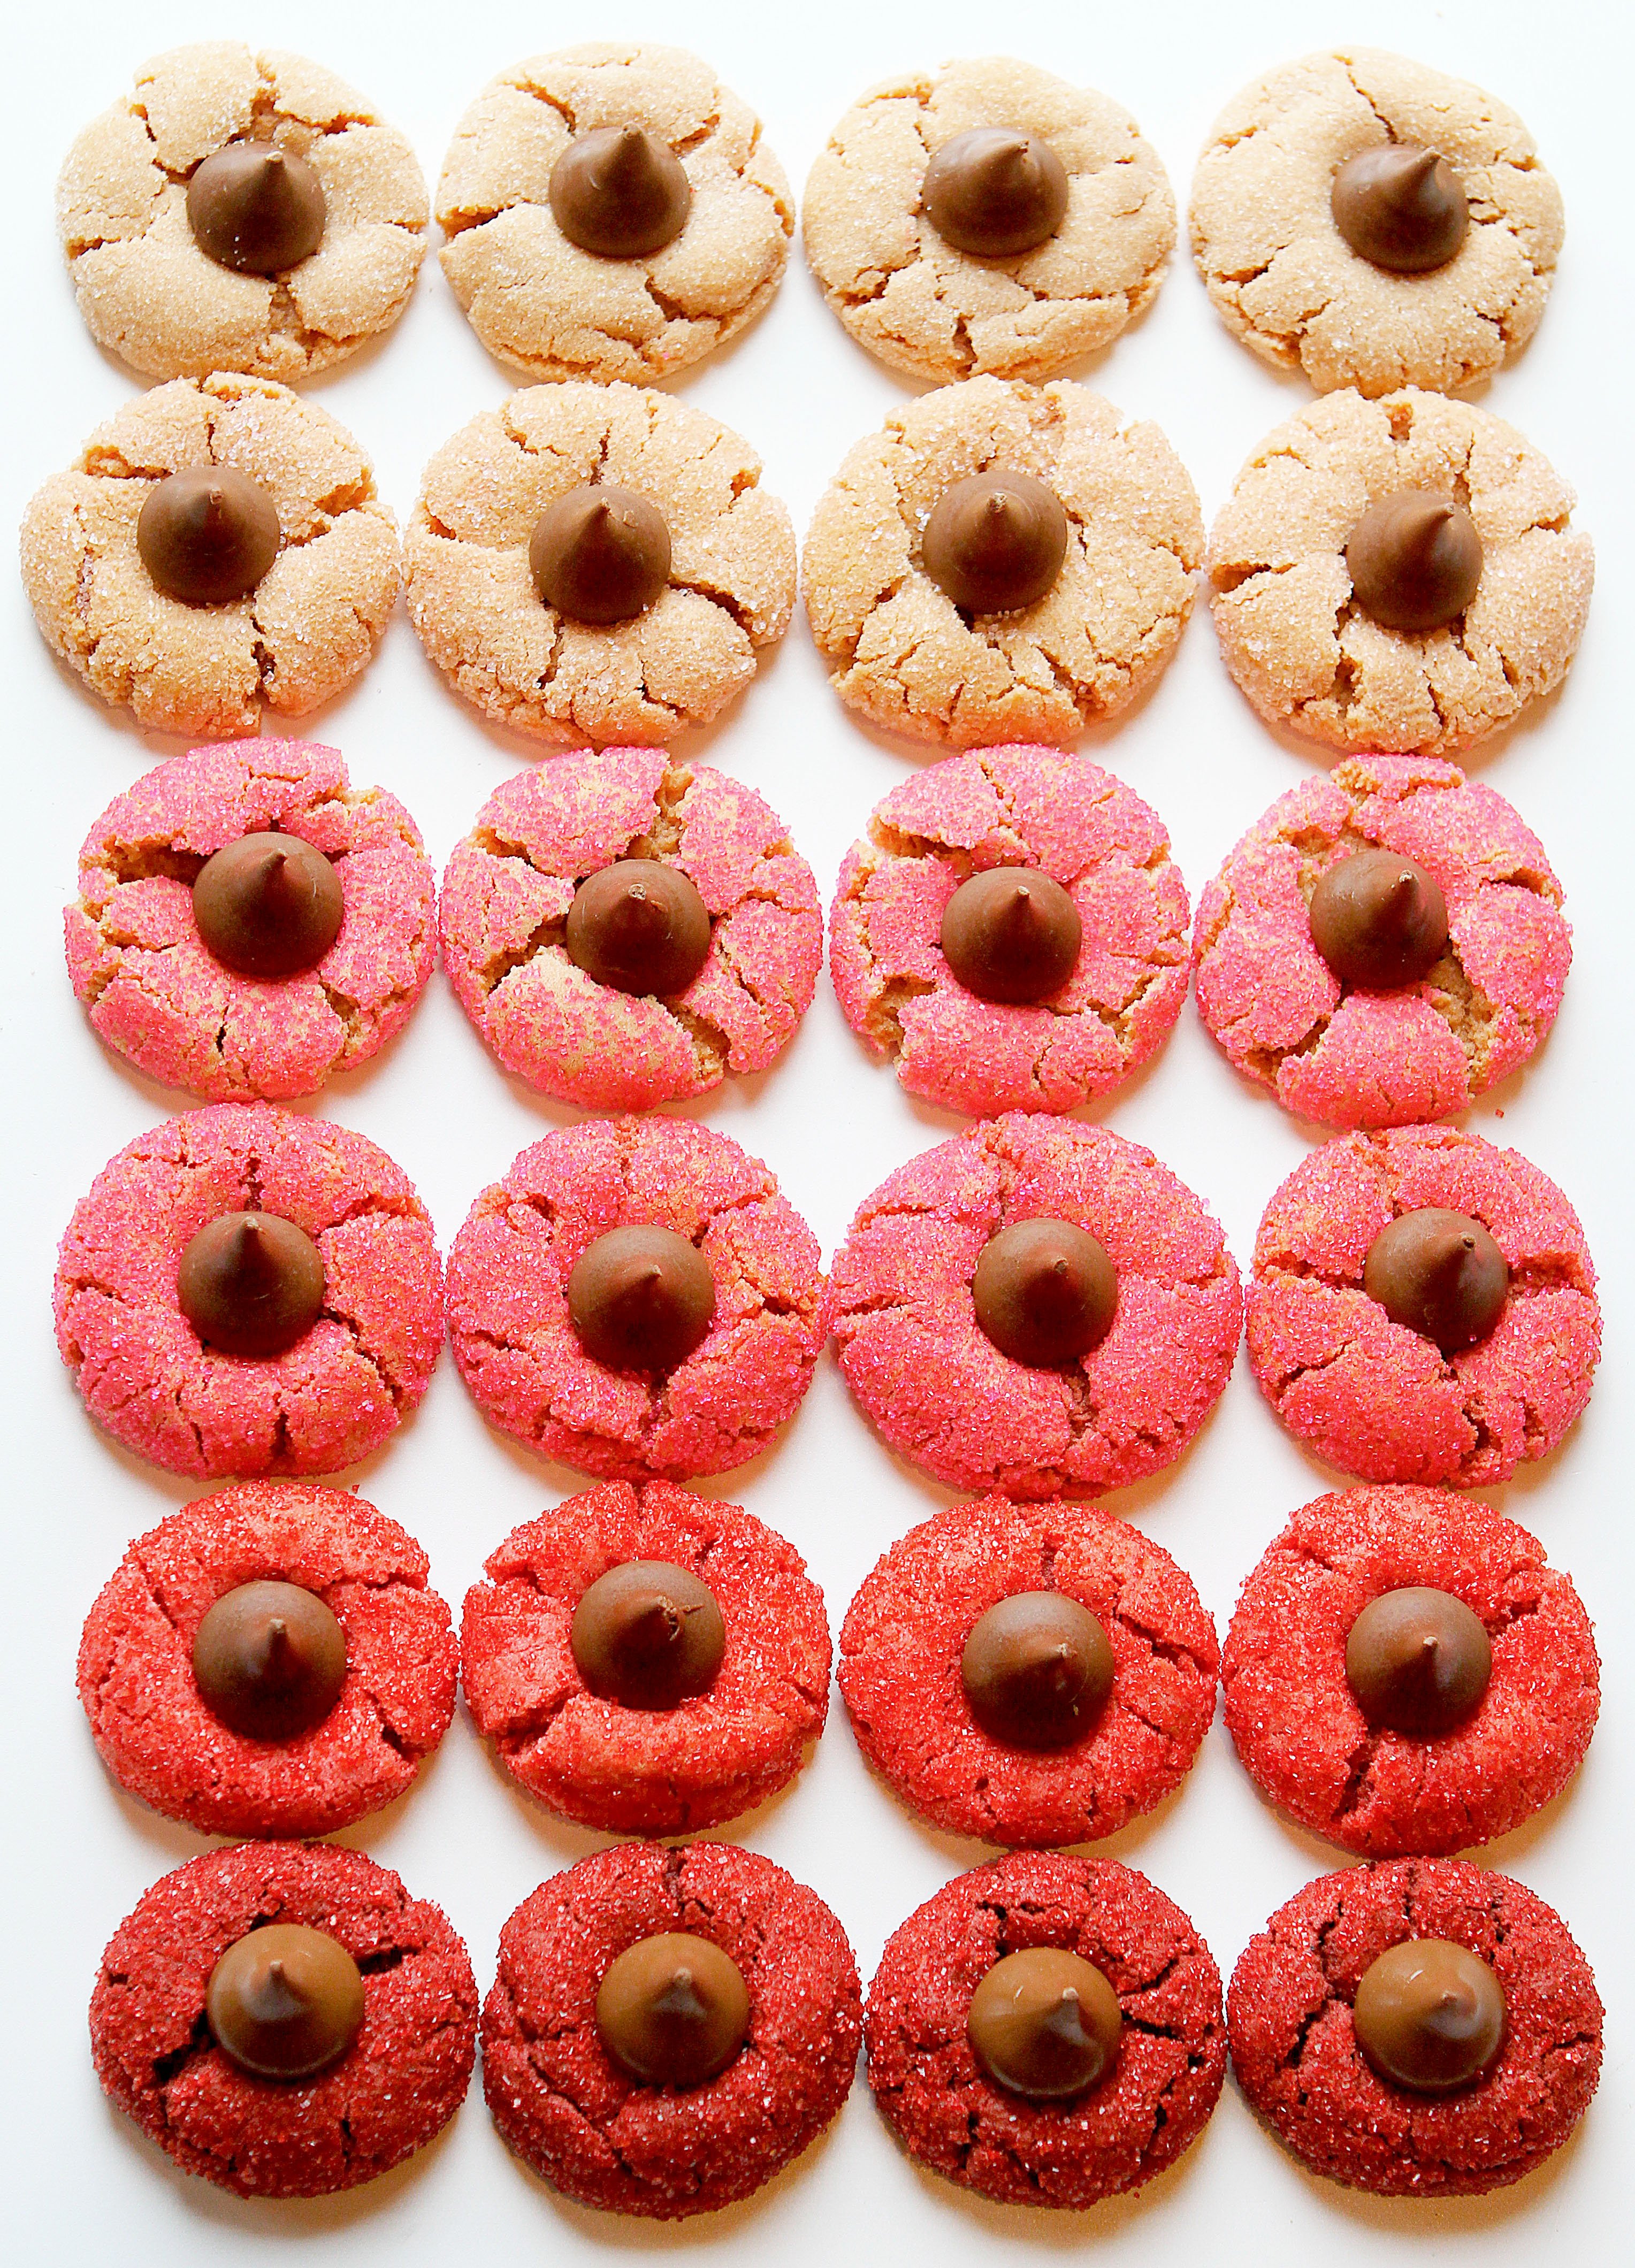
Pink Peanut Butter Blossoms
To make different shades of these blossoms, there are a couple of different things you can do!
- Add less food coloring to your batter. This will result in lighter shades of red, turning into pink.
- Do not add food coloring to the batter and simply add the pink sanding sugar to the outside of the cookie.
Both options are quite beautiful, as you can see above! <3


These are beautiful Amanda! So sparkly and shiny indeed! My daughter has wheat and peanut allergies otherwise I would be in the kitchen right now prepping for these… Maybe for friends 🙂
Beautiful photography too! The cookies seem to be flying in clouds 🙂
Thank you! Bummer about the allergies. But I bet you go above and beyond to make her fabulous and delicious treats without wheat and peanuts! 🙂
My son has a pn/tn allergy as well. We use Wow or IM Healthy soy butter instead of peanut butter. You could also get the wheat replacement (flour) and make them? Id be interested to see how that would turn out? Love the possibility of making an alternate cookie!
Soy is estrogen, it affects male hormone and infertility. Cookie butter is good substitute. There’s coconut flour potato flour in place of gluten.
These are hands down the prettiest PB blossoms I’ve ever seen. Lovely, friend!
Pretty big compliment coming from a pro like yourself! 🙂
Where is your “pin” button when going from FB to your site
Hi Barb! If you let your mouse hover over any image on my site a “pin it” button will appear in the upper left hand corner of the image. There is also a “pin it” button at the bottom of every post. Thanks!
obviously like your website bbut you need to
take a look at the spelling on quite a few of your posts.
Several of them are rife with spelling problems and I in
finding it veryy bothersome too tell the truth however
I will surely come again again.
You are quite right! I am a wretched speller any my grammar is sub par at best. But I look at it this way… I can either spend a great deal of time focusing on writing and grammar and spelling, or I can create cakes and treats. For now, I am going to keep baking! 🙂
You go Amanda! I don’t give a flip about you spelling! I here for the food! And I’m a normally picky person about spelling. That person could have privately emailed you or something. How tacky. Bake on girl!
Thanks Stefanie! 🙂
I agree,I just read you recipe and never noticed the spelling mistakes, guess I was to interested in the recipe,which are awesome and I’m going to try them.Keep the good work up
So funny that you spelled several words wrong in a comment criticizing spelling.
Wow, get a life. God forbid people make typos.
u shure arrr an ashole
Have you noticed your grammar mistakes? Spelling mistakes? You sound like the uneducated one to me!
I am confused if your own grammar mistakes are intentional or not. When one is giving spelling correction advice, one must also have a foundation to stand on, that being correct grammar. Otherwise, the credibility is also lacking in your post as well.
Did you take a look at this post of yours? It is also full of spelling errors. So, before you ridicule someone else for their mistakes, I suggest you take a look at your own! I find this to be really rude, offensive, and mean of you to even post such a thing! I guess some people just like to be a nit-pick to make themselves feel better! It’s really very sad that people like you feel the need to be so critical as to correct someone on something so inconsequential!
Love your red velvet twist on a classic cookie!
Thank you Carla!
I was taught to bake and cook standing next to my dad and grandma. To this day, I encourage my children to do the same. It is such a wonderful time together, baking a cake, cookies or cupcakes with my children standing next to me. We also love to bake and cook for others as well. I used to go with my dad when he would drop off a cake or a pie to someone, just because. 🙂
Sounds like you have some pretty wonderful memories. So powerful that they have helped form how you interact with your babies! Thanks for sharing Joy… its always a pleasure to see your smiling face. 🙂
I also look forward to baking this cooking with my kids. 🙂
These cookies are SO gorgeous!! They’re just so red, bright, and festive! I absolutely love making memories with people through food and the holidays. It’s amazing how a simple homemade treat can make someone happy. And you’re so good at that! 🙂
You are pretty darn amazing at that as well my dear!
wow!! cuanto brillo! me encantan… se ven como pequeñas joyas! un saludo!
I’m wondering if you could also turn them green?
Yes! Absolutely.