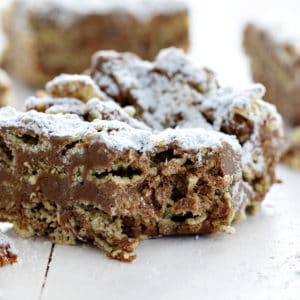
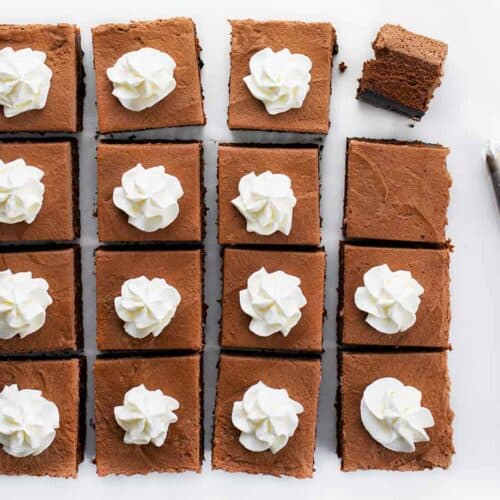
Chocolate Cheesecake Bars are creamy and chocolatey dessert bars with an Oreo cookie crust and homemade chocolate whipped topping. Try my Chocolate Chip Cheesecake Bars for another cheesecake treat.

Chocolate Cheesecake Bars
Get ready to indulge in rich and moist chocolate cheesecake bars that will satisfy even the sweetest tooth. This dense and creamy treat is full of chocolate flavor in both the crust and the filling. As if it wasn’t chocolatey enough, I even added homemade chocolate whipped topping as the icing, I mean whipped topping, on the dessert bars.

Bars Ingredients
There are three delicious and chocolatey parts to this recipe–the crust, cheesecake filling, and whipped topping.
Oreo Cookies: For the crust, I used about 20 cookies with the filling removed.
Cream Cheese: Make sure the cream cheese is softened, or at room temperature, before making the cheesecake filling.
Heavy Cream: Also known as heavy whipping cream, heavy cream contains 36-40% fat. The cream is the dairy that supplements the cream cheese, giving the cheesecake a smoother texture. You will also use this for the chocolate whipped topping.
Eggs: Again, as with the cream cheese, use room temperature eggs. The eggs act as a binding agent and give the cheesecake structure.

How to Store Chocolate Cheesecake Bars
Store the leftover bars covered in the refrigerator for 1-2 days.

Tips for Chocolate Whipped Topping
- Don’t aim for “stiff peaks”. You want the whipped cream to keep its shape and be soft, billowing peaks. If by chance you OVERBEAT the whipped cream (I have done this and cried!) fixing it is actually very easy. Simply add in more fresh heavy whipping cream and whisk by hand. My life was changed when I found that out!
- Wait until peaks start to form before adding in the cocoa powder and confectioners’ sugar. I much prefer confectioners sugar in this recipe, as it dissolves entirely and leaves a smooth texture. If you choose to use granulated sugar be sure to add it immediately at the beginning and whip it with the cream.

Can I Freeze Cheesecake Bars?
Yes! With a dessert this rich, it’s hard to get it all eaten at once. But, you don’t want the chocolate cheesecake bars to waste, either. It’s easy to freeze the bars. Just make sure you freeze the bars without the chocolate whipped topping. To freeze cheesecake bars:
- Let the bars cool completely.
- Remove the bars from the pan and place them on a plate (cut or uncut). Put the cheesecake (uncovered) in the freezer for about an hour.
- After the hour in the freezer, remove the cheesecake bars and wrap them tightly in plastic wrap.
- Place the wrapped cheesecake into a zipped freezer bag or wrap it in aluminum foil. Be sure to label and date the cheesecake. It will last up to 3 months in the freezer.

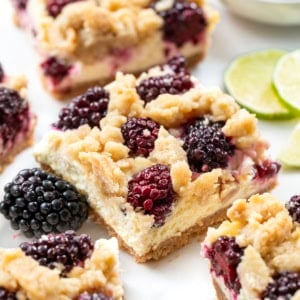
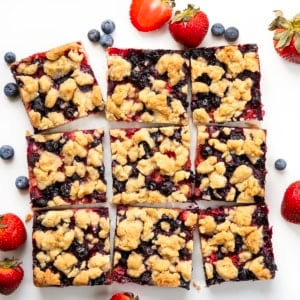
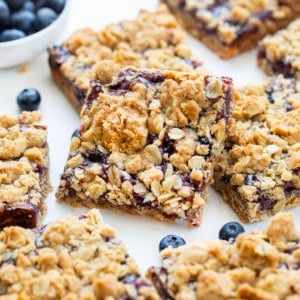
More Delicious Bars
Chocolate Cheesecake Bars
Ingredients
Crust
- 1 ½ cups Oreo sandwich cookies, filling removed and crushed (approximately 20 cookies)
- 6 tablespoons (85 g) unsalted butter, melted
Cheesecake
- 1 ½ cups (252 g) semisweet chocolate chips
- ½ cup (119 g) heavy cream, room temperature and divided
- 2 packages (8 ounces each) cream cheese, room temperature
- 1 cup (200 g) granulated sugar
- 3 tablespoons cocoa powder
- 3 large eggs, room temperature
- 1 teaspoon vanilla extract
Chocolate Whipped Cream
- 1 cup (238 g) heavy cream
- 2 tablespoons cocoa powder
- ¼ cup (31 g) confectioners' sugar
Instructions
Crust
- In a medium bowl, combine the Oreo cookie crumbs with the melted butter, mixing well with a fork. (You want every crumb coated in the butter as this will be the glue that holds it together.)
- Pour the coated Oreo crumbs into a 9-inch square baking dish. Pat them flat with your hand and then use a kitchen glass to press flatter. Set aside.
Cheesecake
- Preheat oven to 325°F.
- In a microwave-safe bowl, add ¼ cup of the heavy cream and the chocolate chips. Heat for 20-second intervals until the chips have melted and the mixture is smooth with no lumps. Set aside.
- In a large mixing bowl, beat the cream cheese with a hand-held mixer until creamy and smooth.
- Beat in the sugar and cocoa powder until smooth.
- Add the eggs, one at a time, and the remaining ¼ cup heavy cream, mixing until combined.
- Fold in the melted chocolate mixture. Add the vanilla and stir to combine.
- Pour the batter on top of the Oreo crust.
- Bake at 325°F for 55-60 minutes. The cheesecake bars are done when the sides are set but the center is still a little bit jiggly.
- Remove the cheesecake from the oven and let it rest until the pan is cooled.
- Refrigerate for 2-3 hours or until completely chilled.
Chocolate Whipped Cream
- After the cheesecake has chilled, make the whipped cream. Add heavy cream to a mixing bowl. Start mixing at the lowest speed, and then gradually increase speed to medium until the cream starts to get thicker. (The gradual progression prevents you from spraying yourself with cream.)
- When the cream starts to thicken, stop the mixer. Slowly add in the cocoa powder and confectioners' sugar. Then, resume mixing again, starting with low speed and increasing to medium speed, and eventually moving to a high speed.
- The cream will thicken and start to peak. Mix on high until the cream is thick and stiff. This happens quickly, the stage between soft and stiff peaks, so watch it closely.
- Spread the chocolate whipped topping over the chilled cheesecake. Place the cheesecake back in the refrigerator for about 15 minutes before cutting and serving. Add a dollop of whipped topping (optional).
Did you make this recipe?
Thank you for making my recipe! You took pictures, right? Well go ahead and post them on Instagram! Be sure to mention me @iambaker and use the hashtag #YouAreBaker.


I made these for a family event yesterday, and they were a huge huge hit! I only have one recommendation; make sure you let them sit out from the refrigerator before serving. The crust was very hard to cut, but after they sat out for a bit, it was absolute perfection.