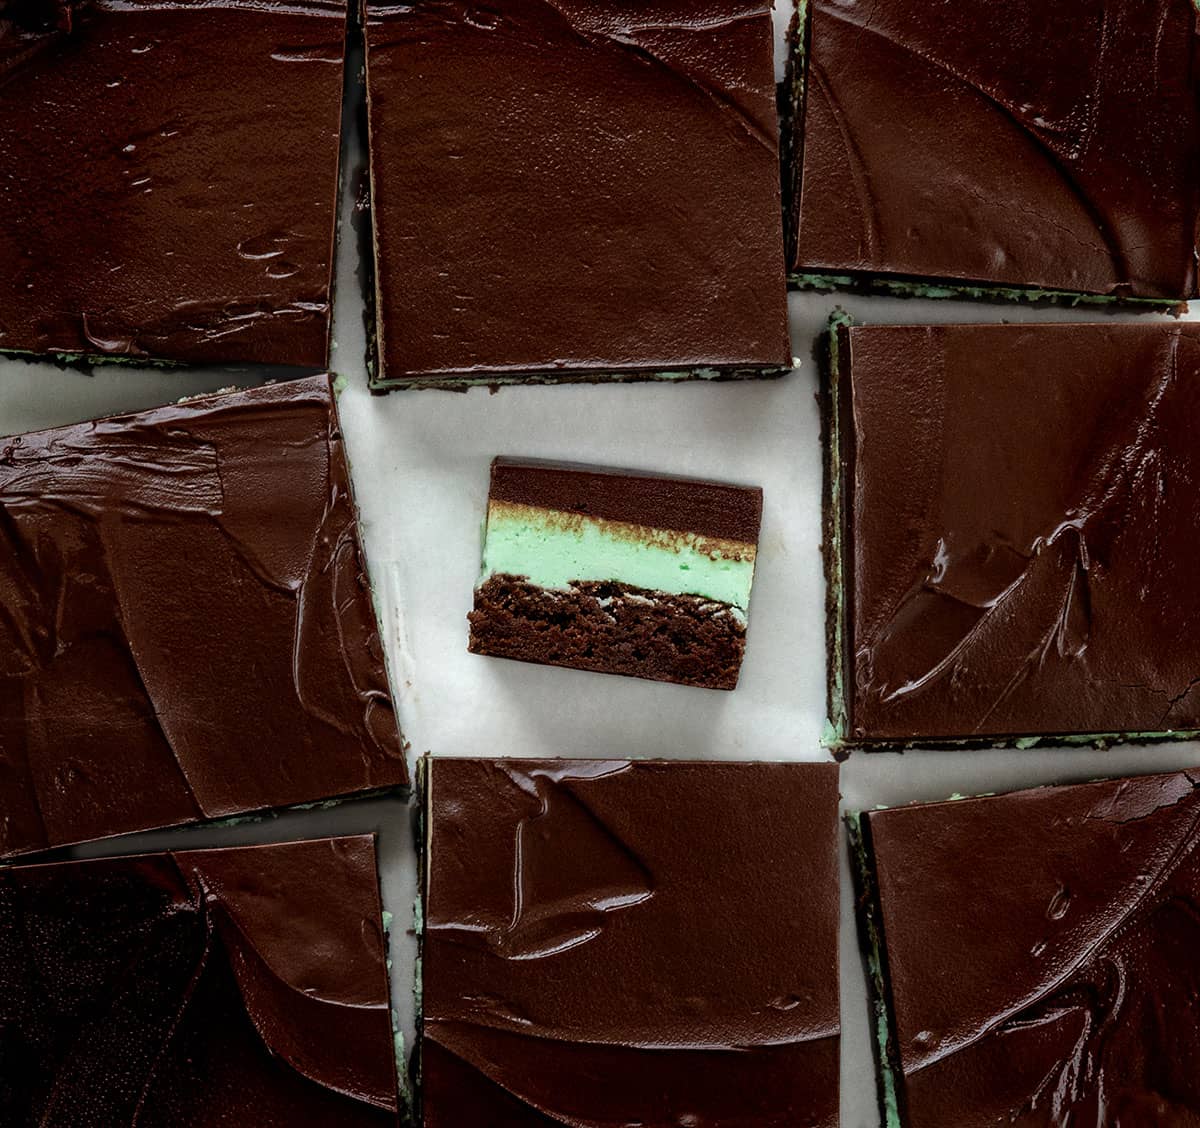
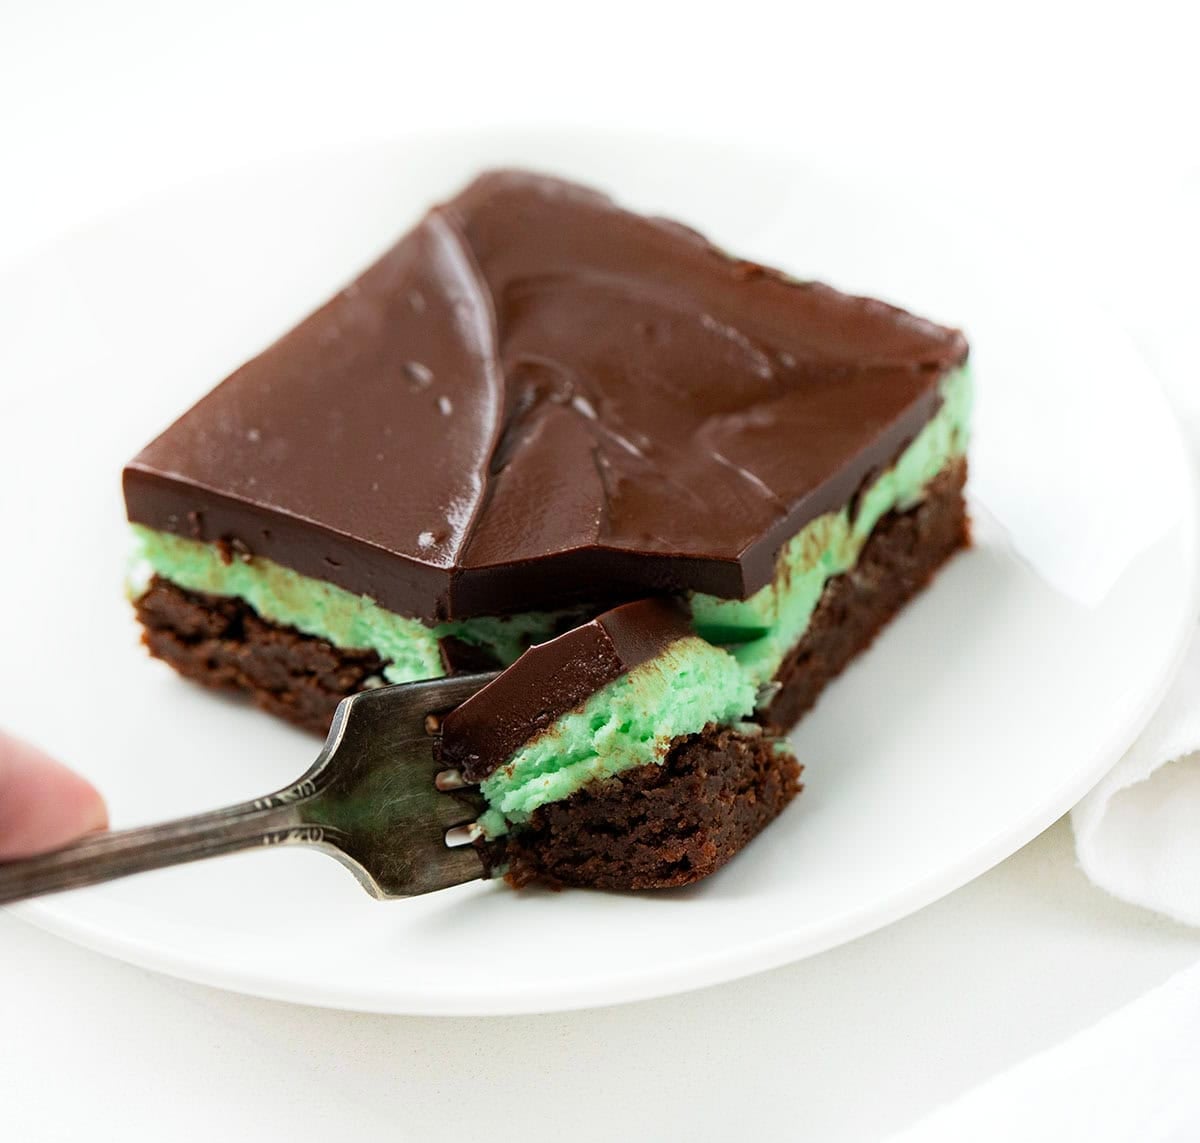
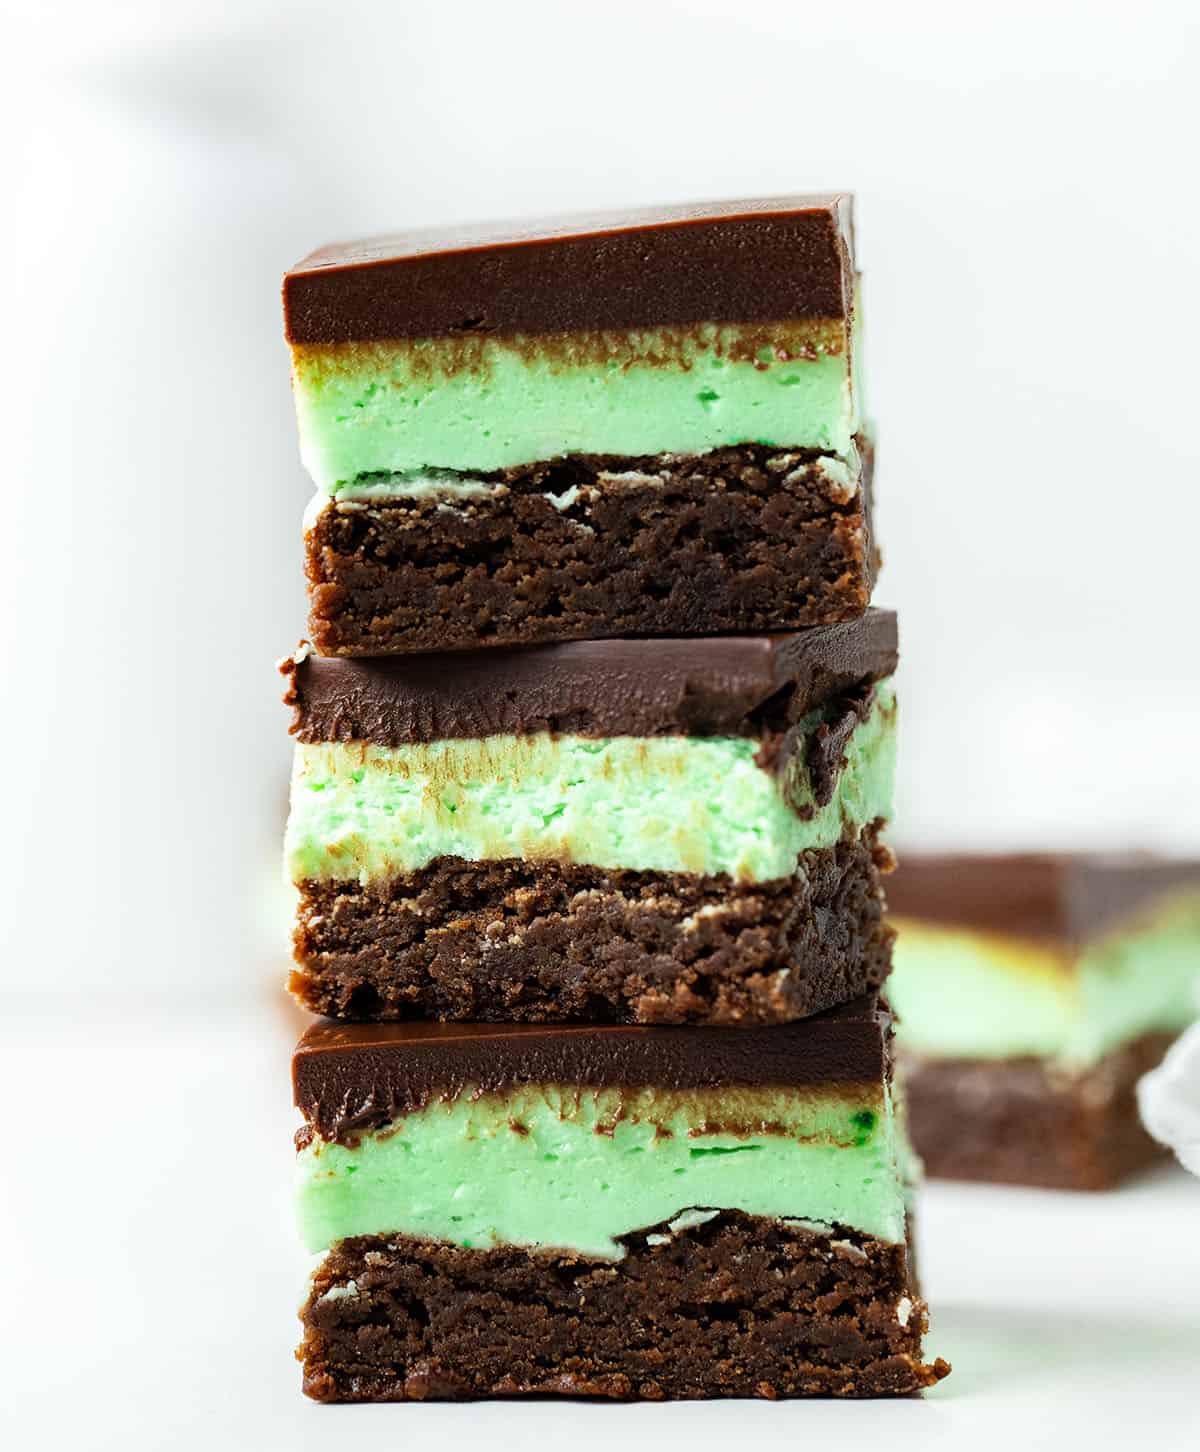
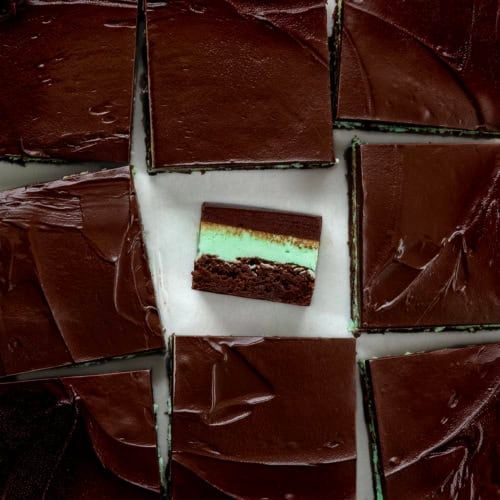
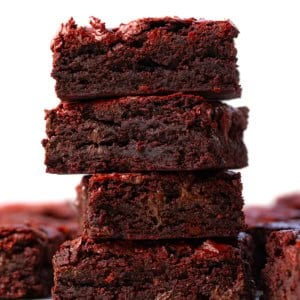
These rich, fudgy chocolate mint brownies have three irresistible layers: a from-scratch cocoa brownie base, a creamy peppermint buttercream filling with that signature green swirl, and a glossy chocolate ganache topping. They’re a crowd-pleasing classic that tastes just like an Andes mint candy bar in brownie form, perfect for holidays or anytime you want a decadent chocolate treat.
I first shared this recipe in 2019 using my go-to brownie base. Since then, I’ve updated and tested it again to scale it up to a 9×13 pan for more servings, refine the mint layer for extra creaminess, and add helpful tips for clean slices and picture-perfect results. It’s still simple to make, and every bite is just as irresistible.
Ingredients & Substitutions
- Unsalted Butter: Butter is used in all three layers for richness and structure. You can use salted butter if needed; just reduce the added kosher salt slightly in the brownie layer.
- Granulated Sugar: Sweetens the brownie base and helps create that classic fudgy texture. No direct substitute recommended for best results.
- Unsweetened Cocoa Powder: Gives the brownies their deep chocolate flavor. Use natural cocoa powder for a classic taste or Dutch-process for a smoother, richer flavor.
- All-Purpose Flour: Provides structure. For a gluten-free option, use a 1:1 gluten-free baking blend.
- Eggs: Help bind the brownie layer and create that rich, chewy texture. Room temperature eggs mix in more smoothly.
- Confectioners’ Sugar: Used in the mint layer for a smooth, creamy filling. No substitute recommended for texture.
- Peppermint Extract: Gives the mint layer its signature flavor. Start small; peppermint extract is strong. You can adjust slightly to taste.
- Green Food Coloring: Optional, just for color. The flavor stays the same without it.
- Milk or Heavy Cream: Helps loosen the mint filling. Use cream for a richer, smoother texture or milk for a lighter option.
- Semi-Sweet Chocolate Chips: Used for the butter ganache topping. You can also use chopped semi-sweet chocolate bars for a smoother melt.
FAQs
Can I use brownie mix?
Yes! You can use your favorite boxed brownie mix baked in a 9×13 pan. Once cooled, add the mint layer and ganache as directed.
Why do the brownies need to chill so much?
Chilling helps each layer set properly so they stay distinct and slice cleanly. It also gives the brownies their signature neat, bakery-style look.
Can I skip the green food coloring?
Absolutely. The mint layer will still taste the same without it, just less vibrant in color.
My ganache seized. Can I fix it?
Yes. Stir in a small amount of melted butter and mix until smooth again. Go slowly, and it should come back together.
Holiday & Flavor Variations
These brownies are easy to customize for any season or celebration:
- Holiday twist: Use red food coloring for Valentine’s Day or add crushed candy canes on top for Christmas.
- Andes mint style: Stir 1/2 cup to 3/4 cup chopped Andes mints into the brownie batter for extra mint-chocolate flavor.
- Brownie mix shortcut: Use your favorite boxed brownie mix for the base, then add the mint filling and ganache layers as written.
- Gluten-free option: Swap the all-purpose flour for a 1:1 gluten-free baking blend.
How To Store Chocolate Mint Brownies
Room Temperature: Store the brownies in an airtight container at room temperature for up to 1 day. Because of the buttercream and ganache layers, they’re best kept cool.
Refrigerator: Store in an airtight container in the refrigerator for up to 5 days. Let the brownies sit at room temperature for 10 to 15 minutes before serving for the best texture and flavor.
Freezer: Freeze brownies (cut into squares or as a whole slab) in an airtight, freezer-safe container for up to 2 months. For best results, place parchment between layers. Thaw in the refrigerator overnight before serving.
Chocolate Mint Brownies
Ingredients
Brownie Layer
- ¾ cup (1 ½ sticks / 170 g) unsalted butter, melted, slightly cooled
- 1 ½ cups (300 g) granulated sugar
- 3 large eggs, room temperature
- 2 teaspoons vanilla extract
- ¾ cup (94 g) all-purpose flour
- ½ cup (50 g) unsweetened cocoa powder
- ¼ teaspoon kosher salt
- ¼ teaspoon baking powder
Peppermint Filling (Mint Layer)
- 3 cups (375 g) confectioners’ sugar
- ¾ cup (1 ½ sticks / 170 g) unsalted butter, softened
- 1 teaspoon peppermint extract
- 3 drops green food coloring, or more for vibrant color
- 2 tablespoons whole milk, or heavy cream for extra richness
Chocolate Ganache Topping
- 12 ounces (340 g) semi-sweet chocolate chips, or chopped chocolate
- 8 tablespoons unsalted butter, diced into tablespoons
Instructions
- Preheat oven to 350°F (177°C). Line a 9×13-inch baking pan with parchment paper, leaving an overhang on the sides for easy removal. Lightly spray the parchment with nonstick cooking spray.
Brownie Layer
- In a large bowl, whisk together the melted butter and granulated sugar until combined.
- Add the eggs and vanilla extract. Mix until smooth.
- Add the flour, cocoa powder, salt, and baking powder. Stir gently until just combined. Do not overmix.
- Spread the batter evenly into the prepared pan.
- Bake for 25 to 30 minutes, or until a toothpick inserted in the center comes out with a few moist crumbs, but no wet batter.
- Let the brownies cool completely in the pan on a wire rack, about 1 hour.
Peppermint Filling
- In a medium bowl, beat the confectioners’ sugar, softened butter, peppermint extract, food coloring, and 2 tablespoons of milk with an electric mixer until smooth and spreadable. If needed, add an extra tablespoon of milk for a softer, creamy consistency.
- Spread the filling evenly over the cooled brownies using an offset spatula.
- Refrigerate for 15 to 30 minutes, or until the mint layer is firm.
Chocolate Ganache
- Place the chocolate chips and butter in a microwave-safe bowl.
- Microwave in 20 to 30 second intervals, stirring after each, until the mixture is glossy and mostly melted.
- Stir until completely smooth. If needed, microwave for an additional 10 seconds. Watch closely so the chocolate does not overheat.
- Let the ganache cool slightly, about 5 to 10 minutes.
- Pour over the chilled mint layer and spread into an even layer.
Chill, Slice, & Serve
- Refrigerate chocolate mint brownies for at least 1 to 2 hours, or until the ganache is fully set. For the cleanest slices, chill longer or overnight.
- Use the parchment overhang to lift the brownies out of the pan.
- For neat squares, run a sharp knife under hot water, wipe dry, and press straight down to cut. Clean and rewarm the knife between slices.
Video
Did you make this recipe?
Thank you for making my recipe! You took pictures, right? Well go ahead and post them on Instagram! Be sure to mention me @iambaker and use the hashtag #YouAreBaker.


This is very close to the mint brownie recipe I have used for over 40 years. One big difference is that I use mint extract instead of vanilla in the brownies themselves and 1 cube of butter to one cup of chocolate chips for the glaze on top. Also it takes a little more green food coloring for the green color we like. The brownies have put all other mint brownies to shame according to everyone we have given then to which is a lot over two states.
Sounds wonderful Beth!
These mint brownies look fabulous! I have a question: if all you have is sweetened cocoa, would you decrease the amount of granular sugar that the recipe calls for? if so, by how much/
I have not made these with sweetened cocoa, but yes, I would decrease some of the sugar. You may want to taste test as you go as the results will be quite different. 🙂
Happy, happy Birthday – May it be as wonderful as you! Enjoy your special day!
Hugs,
EL
Happy birthday! I hope your day is very special!
Thanks for the recipe. Will make today.
Sounds divinely deeelish! Love your baking and cooking blogs!
HAPPY BIRTHDAY 🎈 AMANDA 🎉!!!
Happy Belated Birthday.
Hope your day was Special.
Thanks for the recipe,will definitely make soon.Love your blogs.Have a great Tuesday…
I’m so excited to be reunited with a similar recipe I made many years ago. This is it! I can’t wait to make them!
Do you have to use the butter in the icing ?
I am not a. If fan of butter
Definitely going to try your recipes.
I just made these for St. Patrick’s Day and they were amazing! I increased the recipe 1.5x to fit a 9×13 pan and it was perfect! I’m planning on repeating the recipe with a cherry filling soon 🙂