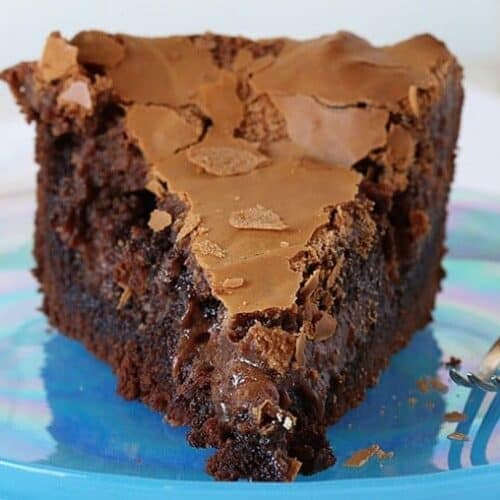
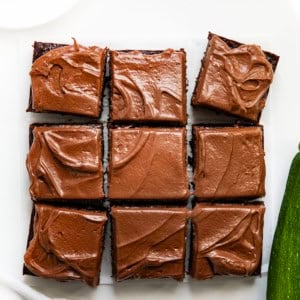
Chocolate Ooey Gooey Cake is a delicious and decadent chocolate cake that is made with the help of a cake mix and a few simple ingredients for a chocolate treat you can enjoy in no time! The thin top layer of delicate chocolate flakiness resting precariously over the ooey-gooey molten cocoa-flavored lava lusciousness is pretty darn amazing. After making my Ooey Gooey Butter Cake, I knew I had to make it in chocolate!

Ingredients & Substitutions
GOOP: I prefer to prepare my cake pans with GOOP, or homemade pan release, but you could also spray the pan with nonstick cooking spray and line it with parchment paper.
Chocolate Cake Mix: There is no shame in using a box of chocolate cake mix! You will still end up with a cake that will satisfy even the biggest chocolate lovers!
Butter: Use unsalted butter for the best results in this cake.
Cream Cheese: Be sure to set out your cream cheese an hour or two before making the cake; when it’s at room temperature, it blends more easily with other ingredients and helps the cake have a better texture after baking.
Cocoa Powder: Look for high-quality unsweetened cocoa powder. You could substitute Dutch-processed cocoa powder if that is what you have on hand.

Can I Use a Different Sized Pan?
I recommend baking this Chocolate Ooey Gooey Cake in a 9×3-inch round cake pan or 9×3 springform pan to achieve a cake with a very gooey center and thicker edges, which is how I prefer it. However, if you don’t have these types of pans, you can still use a 9×13-inch pan, but the cake will be thinner than what you see in my pictures. You can also use a 9×9-inch or 8×8-inch square pan. Just ensure that your oven is calibrated correctly to avoid hot spots that could cause uneven baking. (Hint: Use bake strips around your pan!)
‘Magic’ Chocolate Ooey-Gooey Cake
Want to know a trick to make this a ‘Magic’ Ooey Gooey Cake? You simply mix all the ingredients in one bowl, pour the batter into the prepared pan, and then bake. There is no layer separation, but the flavor and texture are still amazing!

Variations to Chocolate Ooey Gooey Cake
You are not limited by the flavors in this recipe! Try adapting the Ooey Gooey cake recipe to create any flavor combination. Here are a few of my favorite modifications:
- Use vanilla cake in the base and lemon extract for the cream cheese topping.
- Add coffee extract in the base and cherry flavoring to the cream cheese layer.
- Try lemon in the base and lemon zest in the topping.
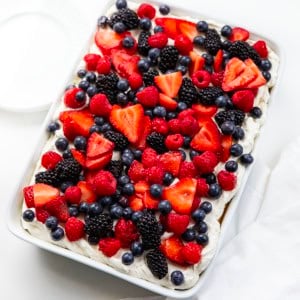
- Add fruit to the top to help cut the sweetness.
- Try adding chocolate chips to the base and/or the cream cheese layer.
- Add chopped pecans to the base layer.
How to Store Chocolate Ooey Gooey Cake
To store chocolate ooey gooey cake, first, let the cake cool to room temperature. Next, wrap the cake tightly in plastic wrap and aluminum foil. It can be stored at room temperature for up to 2 days. For a longer shelf-life, store it in the refrigerator for up to 4-5 days, letting it come to room temperature before serving. You can also freeze the cake for up to 3 months. If freezing it, let the cake thaw in the refrigerator overnight before serving. The texture may change slightly after freezing and thawing, but the cake will still be delicious!

Ooey Gooey Desserts

Chocolate Ooey Gooey Cake
Ingredients
- 1 box (15.25 ounces) chocolate cake mix
- 3 large eggs, one egg for bottom cake layer, then two eggs for filling layer, room temperature
- 1 cup (2 sticks / 227 g) unsalted butter, melted, divided
- 1 package (8 ounces) cream cheese, softened
- ¼ cup (31 g) unsweetened cocoa powder
- 16 ounces confectioners' sugar
- 1 teaspoon vanilla extract
Instructions
- Preheat oven to 350°F. Grease a 9×3-inch round cake pan; then, line the pan with parchment paper. (You could also use GOOP*, a homemade pan release.)
- In a large bowl, combine the cake mix, 1 egg (reserving the other 2 eggs for later), and 1 stick of melted butter. Stir until well blended.
- Pour the mixture into the prepared pan, gently patting it down, and set aside.
- In the bowl of a stand mixer on medium speed (or using a hand-held mixer), beat the cream cheese until smooth. Add the remaining 2 eggs and the cocoa powder.
- Reducing the mixer to low speed, add the confectioners' sugar. Slowly add the remaining stick of melted butter. Add vanilla and continue to beat the mixture until smooth.
- Pour the filling into the pan, over the cake mixture. Bake for 40-50 minutes, being careful not to overbake the cake. The center should still be a little gooey when finished baking.
- Let the cake partially cool on a wire rack before cutting and serving.
Notes
Did you make this recipe?
Thank you for making my recipe! You took pictures, right? Well go ahead and post them on Instagram! Be sure to mention me @iambaker and use the hashtag #YouAreBaker.


Absolutely love this recipe ! Best with scoop of vanilla ice cream. Please keep the delicious recipes coming. Blessings!
If this is made the day before will it still be good and good?
Did you try this the day before? That’s what I’m trying to do and am wondering if it’s still good?
What would be the bake time in a Bundt pan?
I have made this 3 times recently. 50 minutes in my oven didn’t hack it-it will still so jiggly and a knife came out with pure liquid! I tried 10 more minutes and knife came out a little gooey, but 5 more minutes came out perfect! This 3rd time, I added a middle layer of Andes mints and it is delicious!
Is the cocoa powder the unsweetened kind or the hot chocolate mix kind?
The recipe says unsweetened
It’s unsweetened.
This cake looks delicious. The picture looks like there is a thin icing on top. Is there an icing and, if so, what is the recipe?
No icing. I’ve made this. This wonderful top as you see it is the result of the gooey part that you make that has the cream cheese, cocoa powder, powdered sugar, etc ..
Think you have a typo-pan size is noted as 9×3. I assume it’s 9×23
No. It’s a 9 inch springform pan or a 9 x 13 sheet cake pan.
Hi. this looks soooo good! I have a question. Could this be baked in a 9×13″? I was confused by the 9×3 round pan. Thanks
I’ve made this for years. I made a wonderful mistake when I first made this and it was using a box of brownie mix instead if chocolate cake mix. Whenever I make this now I always use brownie mix. Follow same directions as for box cake mix. The bottom layer(brownie mix) will be thick when mixing but ohhh sooo delicious!
I’ve made this before with a slight change. Instead of putting cocoa in the filling I put peanut butter in it. It was absolutely delicious! I’ve also made the regular one, but used a carrot cake mix. That is my family’s favorite so far. Well, that and the red velvet version. I had never thought about putting strawberries in the filling, I will be trying that one as soon as strawberry season hits! Thank you for the recipe, it sounds absolutely divine, as my whole family loves fresh strawberries.
I just made this for Easter and it was marvelous!( A side of ice cream didn’t do it any harm) but since I am not a fan of ice cream, I preferred it without. I made one mistake and grabbed my 1/3 measure for the unsweetened chocolate instead of the 1/4 but honestly I would do it again. No one knew. The bake timing was tricky but if you’re diligent you’ll be fine. I overbaked a bit but still amazing and I will do better the next time. I used the springform pan. Thank you for this recipe. A true chocolate lovers delight.