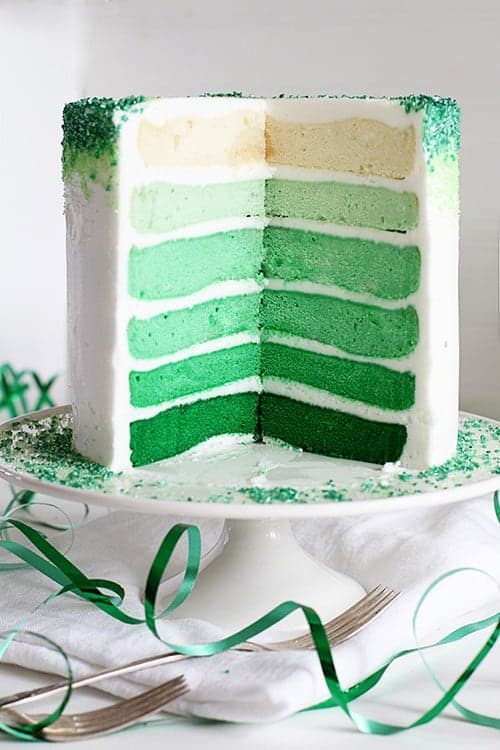
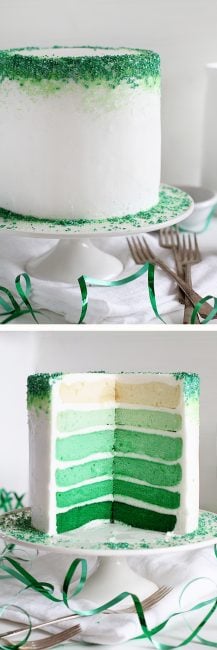
Back in 2010, I made a green ombre cake (although I called it a graduated layer cake because I didn’t know the word ‘ombre’ existed and it was before the trend started). I happen to think this version is perfect for St. Patrick’s Day or for anyone who loves the color green!
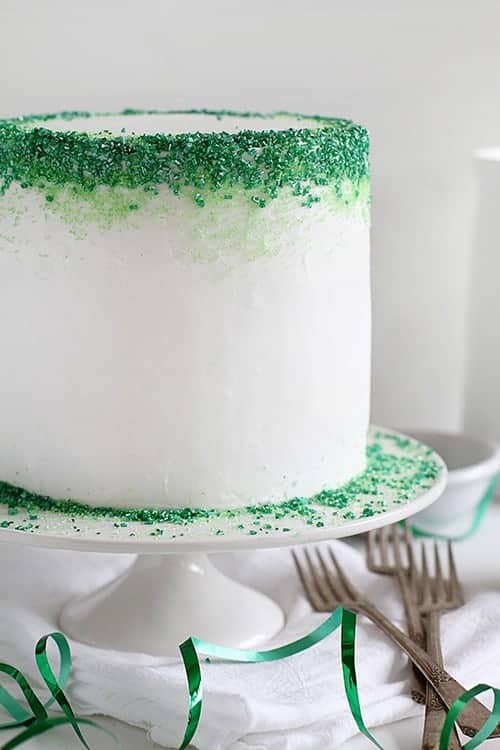
Ombre Cake
Wouldn’t you know, it’s one of my post popular posts to this day. So today I am offering up a new and improved model. The same general idea, but slightly better photography.
I also switched things up and used McCormick Green Food Coloring.
How to Make a Green Ombre Cake
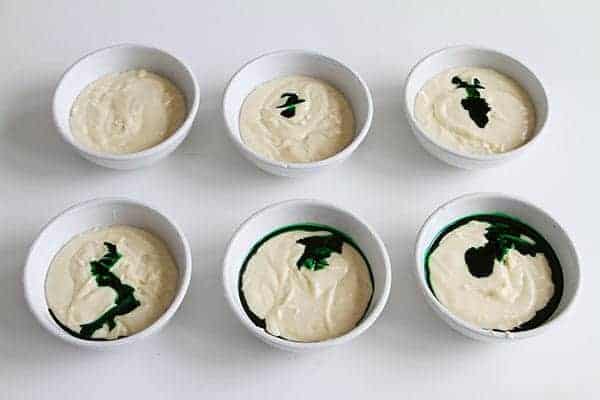
I made one white cake recipe (you can certainly use a box mix here!) and divided it into six bowls.
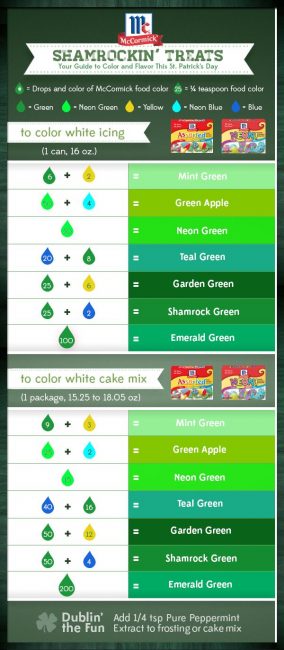
The first bowl I left plain, the second I used 2-3 drops, the third was 4-5 drops, the fourth was 1/4 teaspoon, the fifth was 1/2 teaspoon, and the sixth was about 1 teaspoon. (I just poured out the rest of the bottle.) However, McCormick has this amazing Green Tinting Guide that is the perfect way to know exactly what colors you are making!
I love this great chart! You really can’t go wrong when it’s laid out so simply and beautifully.
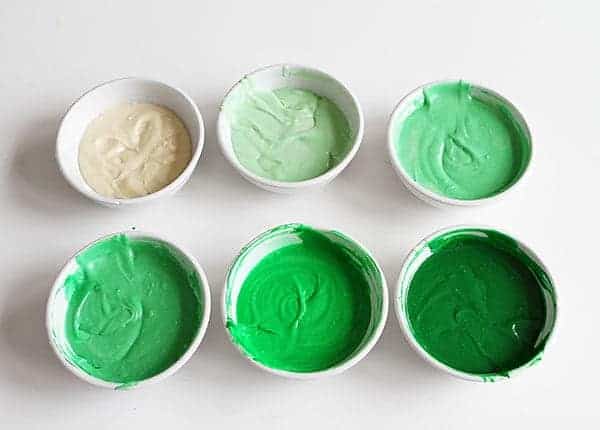
It should look roughly like this after you have added food coloring and thoroughly mixed the coloring into the cake batter.
I then poured the batter into prepared 6-inch round cake pans. I only have three, so I baked the cakes three at a time for about 18 minutes at 350°F. Be sure to start checking your cakes at 15 minutes and remove when an inserted toothpick is removed mostly clean.
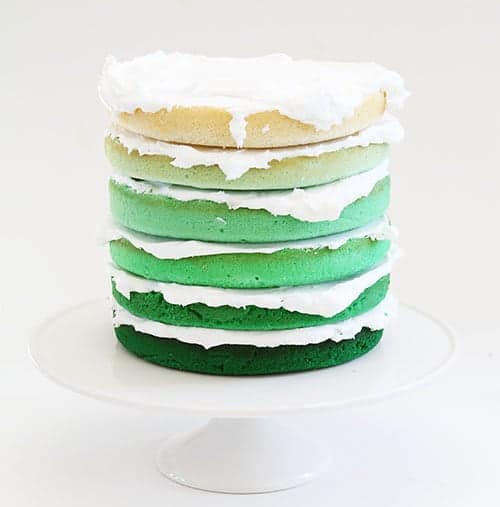
After the cakes have cooked and cooled, I stack them on my cake stand. Start with the darkest layer, and cover it in about 1/4 cup of white frosting. (This buttercream recipe works well because it is so white)
Place the next darkest layer on top and add more frosting. Repeat until you have stacked every layer and be sure to end with the white layer on top.
Cover the cake in a crumb coat of buttercream, chill for about 30 minutes in the fridge, and then cover in a final smooth coat of buttercream.
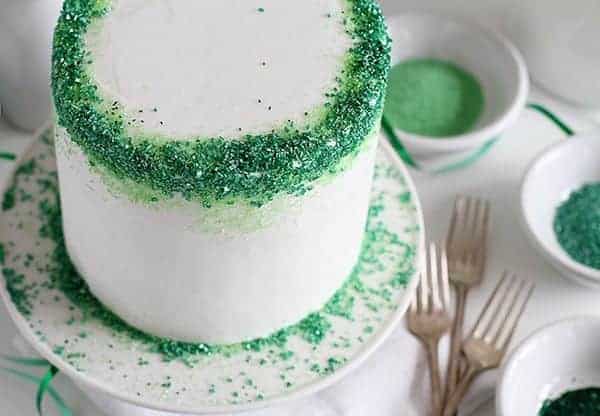
For the outside decoration, I pressed three different color green sprinkles into the upper edge of the cake. I tried to get the darkest color at the very edge, then the medium green in the middle, then a lightest green trickling down a bit.
A nod to the ombre interior.
PRO TIP:
Do you ever want to get really clean cuts when presenting a cake? Here is my trick.
VERY chilled cake. VERY hot knife.
I will freeze my cake for at least 2 hours before serving. I will then place a very sharp knife into a glass of boiling water. Remove the knife, wipe dry and make your first cut, then dip back into the boiling water to clean and re-heat.
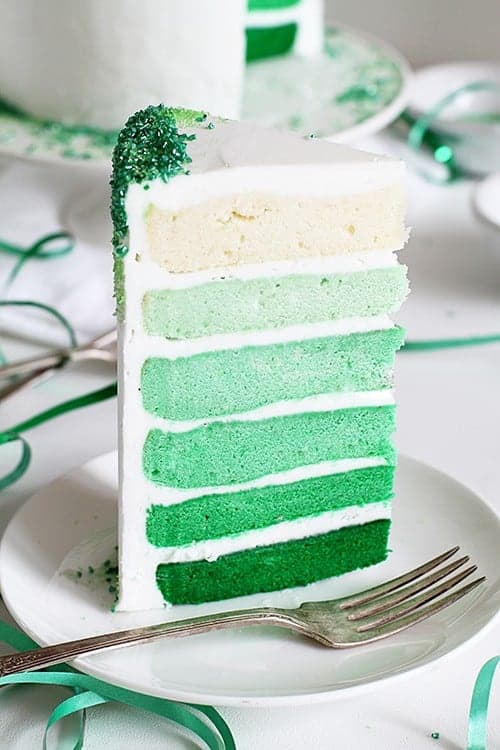
When the cake is kept chilled it also decreases the chances of color bleeding.
Don’t you love fun tips that make our lives easier???
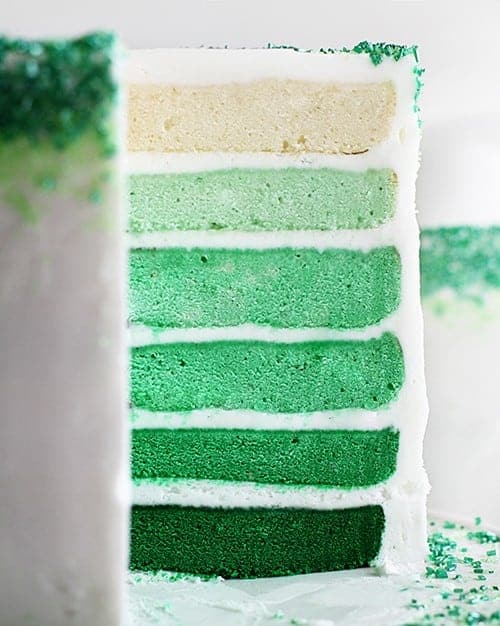
This cake is perfect for St. Patrick’s Day celebrations. Wouldn’t it be fun covered in rainbow sprinkles??
It was an absolute delight to create this Green Ombre Cake with McCormick. Thank you so, so much for supporting the brands that support this blog. I only work with the best, and am thankful that McCormick is willing to partner with me! <3


This cake is such a stunner Amanda! I love how the outside is really simple – so you can focus on the awesome inside!!
Thank you sweet friend!!!
This is beautiful Amanda! How do you get your cake layers to turn out so even? How much of the batter did you measure into each of the 6 bowls? Thanks!
Hi Lauren! Its right around 3/4 cup of batter per bowl. Thanks!
Gasp, that is STUNNING. Gorgeous Amanda!
Thank you Christi!!
LOVE it!!! You’re the cake queen – seriously 🙂
Ah shucks. Thanks girl. 🙂
This is the most beautiful cake I’ve seen in a while! Stunning!!
Such high praise Angelyn! Thank you!
I always enjoy looking through your neat tricks 🙂 They teach me a ton! Lovely as always. Best wishes!
So glad Madara!! That makes it all worth it. 🙂
Man oh man you are my cake inspiration! This is absolutely positively gorgeous!
Thank you beautiful lady!!
Amanda, this cake is a show stopper. Seriously, it’s gorgeous. I made one ombre cake in the past. They’re fun and vibrant. You make it look so easy. Pinned!
Thank you!!! That is so sweet… especially since I know what a talented baker you are!!
How do you keep your layers from sliding when it’s this tall? If I don’t use skewers, mine slip and slide all over the place. 🙁 Adorable cake!
Thanks! I have used skewers once in all my years of baking. I think the trick is to get the layers secured with frosting (like glue) then make sure they are level. Adding more/less frosting to high/low spots can help!
That might be the tallest cake I’ve ever seen and I freaking love it. Also loving the green ombre and the way you decorated the outside. Simple yet beautiful.
Ha!! Cool! And thanks, you are the best!