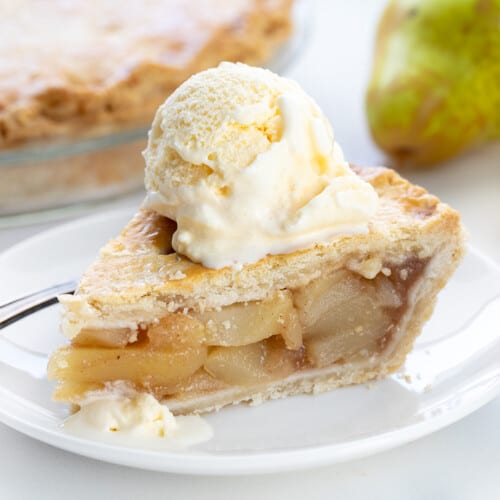
Homemade Pear Pie offers a mouthwatering combination of sweet, tender pears, a buttery, flaky crust, and a medley of warm, comforting spices. It’s a slice of homemade goodness that’s perfect for any occasion, whether it’s served warm with a scoop of vanilla ice cream or enjoyed on its own! I highly recommend making the pear pie filling for other desserts, too!

Ingredients & Substitutions
Crust: For this recipe and all of your pie recipes, try my no-fail pie crust! It will be your go-to crust and the recipe is the perfect amount for a bottom and top crust. Of course, you can also use a package of store-bought pie crusts (which come with 2 crusts, which you will need).
Pears: When choosing pears for the pear pie filling, look for pears that are ripe, but not overly ripe (not too soft). You will need 5-6 large pears or 8-9 small pears. Slice the pears about 1/4-inch thick to make the homemade pie filling. A few varieties of pears that are commonly recommended are bosc, anjou (red or green), or firm Bartlett (red or green) pears, just to name a few. Or, consider using a mix of pear varieties! If substituting frozen pears, let them thaw and then drain any excess liquid before using. Be aware that the texture may be slightly different if using frozen pears.
Cornstarch: Cornstarch is commonly used in pie fillings because it is an excellent thickening agent. It also helps create a smooth and consistent texture.
Spices: Ground cinnamon and ground nutmeg are a classic combination of spices that go well with the natural sweetness of the pears.

Can I Make Pear Pie With Canned Pears?
Yes! If using canned pears, you will need about 4 cans (15 ounces each) of pears. Drain the pears, and then slice them to about 1/2 inch (if they are not already sliced). Add the pears to a large bowl. Then, coat them with granulated sugar, brown sugar, cornstarch, cinnamon, nutmeg, salt, lemon juice, and vanilla. Once coated, assemble and bake the pie as instructed.

How To Make A Lattice Crust
If you want to take the venting of the top pie crust a little further with more detail, create a lattice pie crust. The open areas from the latticework allow any excess moisture to evaporate, which keeps the pear pie filling from becoming soupy. To create a lattice crust:
- Set out an 18-inch piece of parchment paper and roll out the second pie crust to a 14-inch circle, about ⅛-inch thick. Using a pizza cutter, slice into 2 to 2 ½-inch strips.
- Cover the pie filling with a latticework crust by arranging half the strips over the pie, in parallel lines, leaving space in between.
- Fold every other strip up to about the mid-line of the pie. Lay another strip over the middle of the pie, perpendicular to the others. Fold the parallel strips back down, then fold up all the other strips. Lay another perpendicular strip down, and repeat until all the strips have been used.
- Trim any excess dough and press to adhere to the bottom crust. Using a fork, crimp the edge of the pie to seal.
If you do use the traditional top, be sure to cut a few slits in the top crust to vent steam.

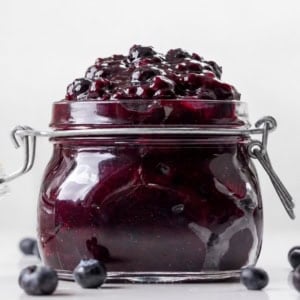
Can I Make Pear Pie Filling In Advance?
Absolutely! If you would like to make the pear pie filling ahead of time, go for it! Once it has been made and cooled, store it in an airtight container in the refrigerator for up to a week. Or, for longer storage, freeze it in a freezer-safe resealable bag that has been labeled and dated. Leave a little room at the top for expansion. It will last up to 3 months. When ready to use, let the filling thaw in the refrigerator overnight. Once thawed, use it immediately. Do not refreeze thawed pie filling.

How To Store Pear Pie
Pear pie can be stored at room temperature, covered, for a couple of days. You could also store it, loosely covered, in the refrigerator for the same amount of time, but that may affect the texture and result in a soggy crust. If freezing the pie, first, let it cool completely. Then, wrap the pie in plastic wrap and store it in a freezer-safe container for up to three months. Let it thaw in the refrigerator overnight.
Pear Pie
Ingredients
- 1 recipe homemade pie crust, or 2 unbaked store-bought pie crusts
- 8-9 small (5-6 large) ripe pears, peeled, cored, and thinly sliced about ¼-inch thick (about 5 cups)
- ½ cup (100 g) granulated sugar
- ¼ cup (50 g) light brown sugar, packed
- 2 tablespoons cornstarch
- 1 teaspoon ground cinnamon
- ¼ teaspoon ground nutmeg
- ¼ teaspoon kosher salt
- 1 tablespoon lemon juice
- 1 teaspoon vanilla extract
- 1 large egg, room temperature, beaten
Instructions
Filling
- In a medium-sized mixing bowl, whisk together sugar, brown sugar, cornstarch, cinnamon, nutmeg, and salt. Add the sliced pears and gently toss until they are well coated.
- Transfer the pears to a medium saucepan over medium heat.
- Cook, stirring occasionally, until the pears release their juices and the mixture begins to thicken (about 5-7 minutes).
- Once the mixture has thickened, remove the saucepan from the heat. Stir in the lemon juice and vanilla extract. Set aside.
Assembly
- Preheat oven to 375°F.
- Onto a lightly floured surface, roll out one of the pie crusts into a 12-inch circle. Place into a 9-inch pie pan, overlapping the sides.
- Spoon the pear pie filling into the prepared crust.
- Roll out the second pie crust into a 12-inch circle and place it over the filled pie. Seal the edges and trim excess dough. Crimp the edges with your fingers or a fork. To use your fingers, hold your thumb and index finger together on one hand and place them on the edge of the crust. With the thumb and index finger of your other hand, press the dough in between your thumb and index finger, creating a decorative pattern. Continue this motion around the entire perimeter of the pie. Alternatively, you can use a fork to crimp the edges. Press the tines of the fork gently into the edge of the crust, creating a series of evenly spaced indentations.
- Brush the top crust with the beaten egg.
- Use a sharp knife to cut small slits into the pie crust for venting. Venting ensures proper baking and prevents issues like a soggy crust or filling overflow.
- Bake for 50-55 minutes, until the top is golden brown.
- Allow the pie to cool completely before serving.
Did you make this recipe?
Thank you for making my recipe! You took pictures, right? Well go ahead and post them on Instagram! Be sure to mention me @iambaker and use the hashtag #YouAreBaker.
What the Test Kitchen had to say about this recipe:
I had no idea how much I would like Pear Pie. It definitely reminds me of apple pie, but with a slightly softer texture. Make it fast, while the pears are in season!

Elizabeth
I really enjoyed this pie, which tasted a little bit like apple pie! The pear pie filling is something I could eat on its own, it's so good!

Rachael
This is delicious! The pears mirror an apple pie flavor with the spices but the texture is different and it is a fantastic flavor!

Bella
This is super good. The pears soften beautifully when baked. They are juicy and subtly sweet. The flavors are similar to an apple pie!


I made this excellent pie with canned pears. Best pie I have ever made and I am almost 75! Thanks very much for the recipe.