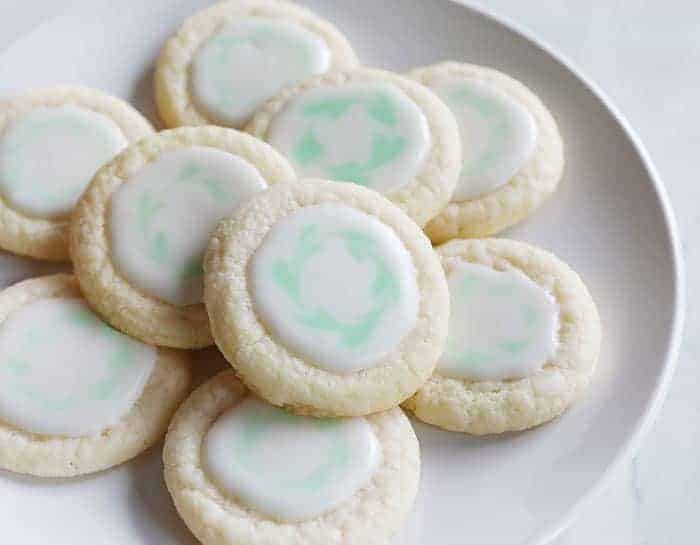
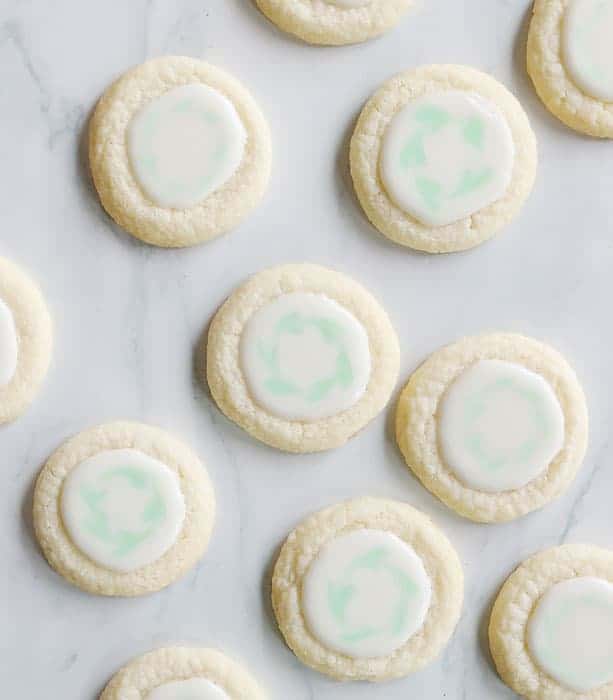
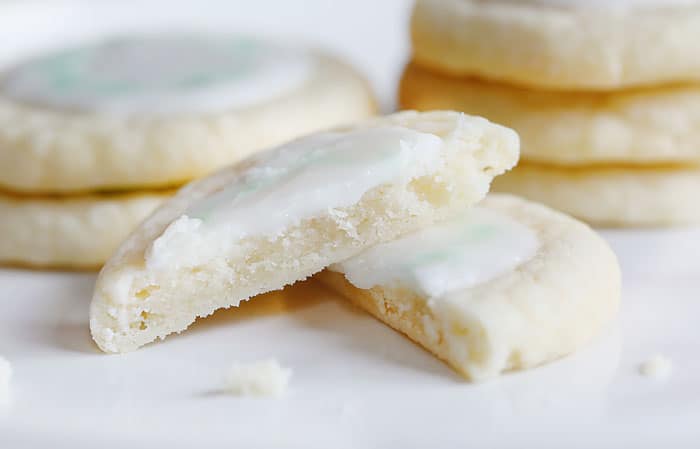
These Peppermint Meltways truly melt-in-your-mouth! A soft, delicate cookie with the most amazing subtle peppermint flavor. A must make! Don’t miss my 50 Best Cookie Recipes if you want more ideas!
Peppermint Meltaways
Although Peppermint Meltaways are one of my favorite cookies growing up, I really had to adapt them to fit my grown-up tastes. Every peppermint meltaway cookie I have had has crushed candy canes on it, and something about that never sat right with me. See, I love the texture of a meltaway cookie but do NOT love that texture combined with a hard and crunchy candy cane. So I made my own version and you know what? It gets RAVE reviews.
I also did pretty extensive testing with the basic recipe itself. I made batch after batch, testing every factor I could and trying to determine what I could improve.
For instance, why does every meltaway recipe involve chilling the dough? Does the benefit the final product? My results might surprise you!
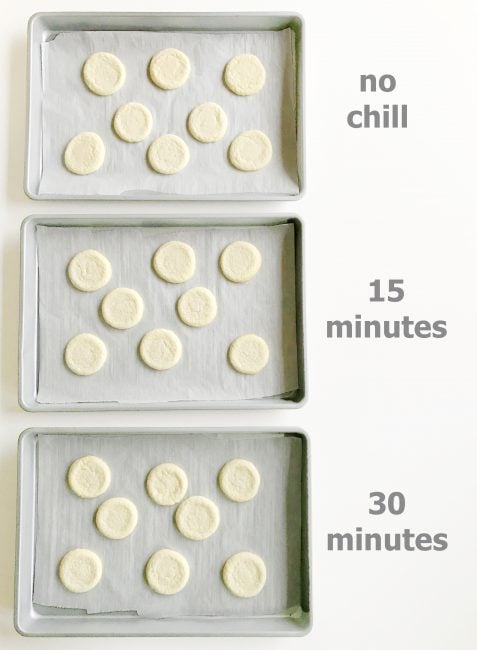
I did a little test to determine what was the optimum chilling amount for my recipe.
I saw no visible difference between chilling and not chilling the dough. I did detect a difference in texture though! The cookies that were NOT chilled seemed to be softer and have more of that “melt in your mouth” factor. The cookie that was chilled for 15 minutes was still good, but almost a bit flakey in my mouth. The cookie chilled for 30 minutes was noticeably less “melty” and more of a crispy cookie. Now, having grown up with these cookies the one that was chilled for 30 minutes was definitely what I was used to, so I can’t blame anyone who loves that best! But my preference now is the UNCHILLED cookie dough.
What is the best time and temperature to bake a meltaway cookie? For my recipe, I found the optimum time to be 9 minutes at 350°F. I have a convection oven so normally reduce the temperature by 25° degrees when baking. That was not necessary for this cookie. You will DEFINITELY want to play around with this recipe in your kitchen to determine your best baking time and temperature.
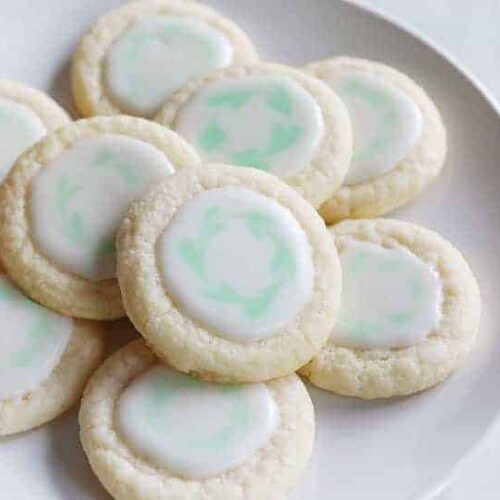
How to Make Design in Glaze Icing
Prepare the peppermint glaze and place it in a disposable piping bag. If you are creating the green “wreath” design, prepare the green glaze now and place it in a disposable pastry bag.
Cut off a small tip from the white peppermint glaze and pipe out a small circle on top of the cookie, then let the glaze flood in. Cut off a small tip from the green glaze and pipe dots around the edge. Run a toothpick through the green dots around the cookie to create a “wreath” of connecting hearts.
I only work with 3 cookies at a time. Pipe 3 cookies with the white peppermint glaze, then add the green dots, then use the toothpick. This glaze will start to harden quickly so it is best to work with 2-3 at a time.
The glaze will harden enough to stack cookies in about 12 hours, 24 hours is best.
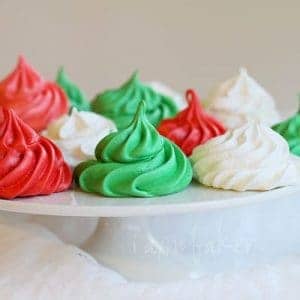
Red & Green Delight

Christmas M&M Cookies
Christmas M&M Cookies are cookies that are loaded with red and green colored M&M’s to satisfy your sweet tooth and get you in the holiday spirit!
Christmas Meringue Cookies
These festive cookies are one of the easiest you’ll ever make and always make a beautiful presentation on your table! If you love meringue cookies, you will definitely want to try this festive version! Christmas Meringue Cookies I have been wanting to try a meringue cookie forever now… I never have before! If there is…
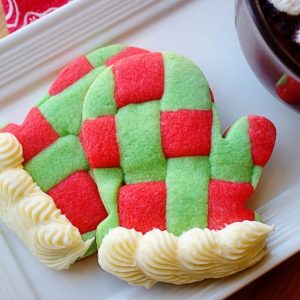
Mitten Cookies
A fun, festive Christmas cookie! These Basket Weave Mitten Cookies are a soft and crispy sugar cookie perfect for the holidays and your next cookie exchange! I love to make these cookies for a Christmas Cookie Exchange. Folks love the flavor and the design! Sugar Cookie Mitten Cookies Christmas is right around the corner so…
Peppermint Meltaways
Ingredients
Cookies
- 1 cup (2 sticks, 226g) unsalted butter, room temperature
- ¾ cup (96g) cornstarch
- ¾ cup (96g) confectioners sugar
- 1 teaspoon McCormick pure peppermint extract
- 1 cup (128g) all-purpose flour
Glaze
- 2 cups confectioners' sugar, divided
- 6 -8 teaspoons whole milk, divided
- ¼ -1 teaspoon McCormick pure peppermint extract
- McCormick green food color, optional
Instructions
Cookies
- Preheat oven to 350 degrees F.
- In the bowl of a stand mixer or using a hand-held mixer, mix the butter and cornstarch until well combined and lighter in color.
- Turn mixer off and add in confectioners sugar.
- With the mixer on low, and the peppermint extract and mix until ingredients are fully incorporated.
- Turn mixer off and add flour. With the mixer on low to medium-low, mix until the dough comes together (pulls away from sides of the bowl).
- Using a 1 tablespoon cookie scoop, (you can also use a tablespoon measuring spoon) remove about a tablespoon of dough. Place on parchment lined cookie sheet at least 2 inches apart. (for a standard cookie sheet you can fit at least 8 cookies, a larger cookie sheet can hold about 14)
- Once the cookie sheet is full, gently roll each between your hands until it is a smooth ball.
- Bake 9 minutes.
- Right out of the oven take a glass with a flat bottom (that is smaller than the cookie) and gently press into the cookie.
- 10. Allow cookies to cool for about 5 minutes and then move to a cooling rack. Make sure cookies are completely cool before adding glaze.
Glaze
- In a medium bowl add 1 cup confectioners sugar, 3 teaspoons of milk, and 1/4 teaspoon peppermint extract. It’s best to start with 1/4 teaspoon of the extract and sample as you go. (Some prefer less, some folks prefer more intense flavor.)
- Stir until smooth. Place in a piping bag and seal with a rubber band.
- In another bowl add 1 cup confections sugar, 3 teaspoons milk, and 1 drop of green food color. Stir until smooth. I wrote optional in the recipe because it is not necessary to add the green “wreath” design, that is just for looks.
Did you make this recipe?
Thank you for making my recipe! You took pictures, right? Well go ahead and post them on Instagram! Be sure to mention me @iambaker and use the hashtag #YouAreBaker.


Made this recipe exactly as written. Then I made this recipe using orange extract, and anise extract too. Absolutely amazing. My entire family thanks you, as does the entire radiology department where my husband works. This recipe is now part of our family Christmas (and whenever) cookie trays! Many, many thanks!!!
Can I use regular butter or do I have to use unsalted?
You can use salted.
I don’t have a piping bag. May I just use the back of a spoon to spread the glaze with?
I am not a big peppermint fan but these were amazing. I made them for my Christmas cookie trays, dyed the frosting red and sprinkled candy cane pieces on top. Everyone loved these! This will now be on my cookie list every year!
Huge compliment, thank you!
Looks so delicious 😋 be making them for Christmas this year😋✌️🤟🌹😋
I followed the recipe to a T. And I am an advent cookie maker and mine came out strange and melted. I make a whipped short bread every year basically same recipe with no issue