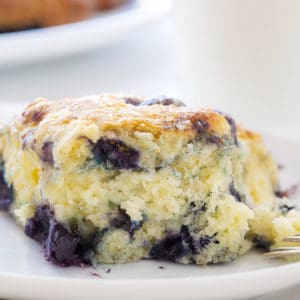
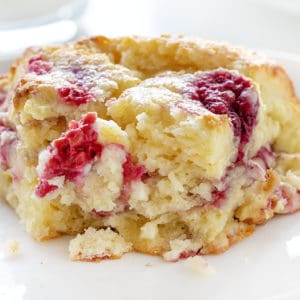
Don’t let baking scones intimidate you! My Scones recipe is easy to follow, and with a little patience, proper prep, and tools, you got this! You may also like my White Chocolate Raspberry Scones or Blueberry Lemon Scones!
Scones Recipe
I have been making King Arthur’s classic scones recipe for a long time but realized I had made a few changes over the years. For one, I like to use heavy whipping cream brushed on the scones before baking as well as in the dough. I also started making my scones with grated butter, a technique I use all the time with my buttermilk biscuits. The last thing I do a bit differently is freezing my scones for an hour before baking. This is an important step (more on that below) and one that makes a big difference in the final product!

Ingredients
- COLD Grated butter–This no-fail approach to baking scones is easy to do and a MUST! Use the fine side of the grater and grate over a plate. Be sure to spray the grater with non-stick spray before grating. Then pop in the freezer. Grated butter only needs a few minutes in the freezer to firm up, so it really makes prep time much easier. You can also take a big block of butter and freeze portions so you always have some cold, grated butter for your next recipe! The frozen butter stays cold until baking time, which will keep the scones from spreading out, which makes them lose that flaky and moist texture.
- Flour–For gluten-free scones, simply substitute gluten-free flour for all-purpose flour. I have also used Bread Flour in this recipe and quite frankly, I prefer it. However, bread flour is not a common ingredient in most kitchens and also changes the texture of the scones, making them a bit lighter. This might confuse someone who is used to the traditional version of scones, so I only recommend trying it after you have mastered this recipe!
- Eggs– This is one of the very few recipes where I will NOT stress room-temperature eggs. I have used eggs directly out of the refrigerator for this recipe and it still works fine.

What is the difference between turbinado sugar and granulated sugar?
Turbinado Sugar is a sugar that falls between white sugar and light brown sugar in both color and flavor. It has a yellowish-brown color and with some molasses content left in the turbinado sugar (which gives it the color), it will provide a slight butterscotch flavor. White sugar is simply sweet, with no added flavors. Another big difference between the sugars is their size. Turbinado sugar has larger and coarser grains than white sugar.
Most of the time, the two sugars can be substituted, especially if the tint of color is not an issue. When baking, you need to be aware of the extra moisture in turbinado sugar, but in my scones recipe, feel free to use either one, since it is only used as the topping of the scones (not in the batter). I prefer turbinado sugar for my scones because it gives them that extra shot of flavor and a bit more texture.

Why Freeze The Dough?
Why freeze, you ask? Freezing the dough relaxes the gluten in the flour, which makes the scones rise higher. Freezing also chills the fat which gives the scones their signature flaky texture. What’s nice about freezing the dough is that you don’t have to bake the scones after 60 minutes if you change your mind or just want to be prepared. In fact, once the dough has chilled for 60 minutes, put it in a sealable freezer bag and store it for up to a month! Then, just bake as directed, from the freezer, with maybe a few minutes added to the bake time. Pretty cool (get it?), huh?!

How to Bake the Scones
Once the scone dough has been chilling for about an hour, take the dough out of the freezer, get out your trusty tools, and get ready to bake the scones. First, cut the dough into 6-8 wedges with a bench scraper or a sharp knife. I recommend a bench scraper, and you can learn all about this dough-cutting tool, and which is best for your needs, here, on Amazon’s site.
Another tool I recommend is a pastry brush to brush the whipping cream over each scone and all the sides. Sprinkle each scone with the turbinado (or granulated) sugar, and bake for 18-23 minutes. The scones will be golden brown. They are best served warm and are delicious plain, but adding butter or jam is a tasty option as well!

How To Store Scones
Although best enjoyed fresh, scones can be stored in an airtight container at room temperature. They will last about a day or two. To reheat the room-temperature scones, just bake them, covered with aluminum foil, in the oven for about 10 minutes at 350°F.
Freezing Scones
To freeze the baked scones, first, let them cool completely. Then, wrap them in plastic wrap or aluminum foil. Finally, store them in the freezer for up to 3 months. When ready to enjoy, reheat them for about 15 minutes at 350°F in the oven.
More Scone Recipes


Scones Recipe
Ingredients
- ½ cup (1 stick / 113 g) unsalted cold butter, grated
- 2 ½ cups (312.5 g) all-purpose flour
- ½ cup (100 g) granulated sugar
- ½ teaspoon kosher salt
- 1 tablespoon baking powder
- 2 large eggs
- 2 teaspoons vanilla extract
- ½ cup (119 g) heavy whipping cream
Topping
- 2 tablespoons heavy whipping cream
- 2 tablespoons turbinado sugar, or granulated sugar
Instructions
- Using the fine edge of your grater, grate butter onto parchment paper. Then place it in the freezer while you prepare the remaining ingredients.
- In a large bowl, whisk together flour, sugar, salt, and baking powder.
- Remove the grated butter from the freezer and, using a fork, incorporate it into the dry ingredients.
- In a small mixing bowl, whisk together eggs, vanilla, and heavy whipping cream. Pour this mixture into the dry ingredients and stir until combined.
- Line a baking sheet with parchment paper.
- Scoop the dough out onto the lined baking sheet. Use your hands to form a circle that is about ¾-inch thick. (Add a bit of flour to your hands to prevent sticking.)
- Chill the dough in the freezer for no less than 30 minutes, preferably an hour.
- Preheat the oven to 425°F.
- Using a bench scraper or a large knife, slice the circle into 6-8 wedges. Using your hands, gently separate the edges of each scone, creating a space of about ½ inch between each.
- Use a pastry brush to brush each scone with heavy whipping cream on all exposed sides.
- Sprinkle each scone with 1 teaspoon of turbinado sugar.
- Bake for 18-23 minutes or until golden brown.
Video
Did you make this recipe?
Thank you for making my recipe! You took pictures, right? Well go ahead and post them on Instagram! Be sure to mention me @iambaker and use the hashtag #YouAreBaker.


I have always made my scone exactly as your recipe states, except for freezing before baking. That is a great tip for an even flakier scone. All your recipes are now stored in my file. Making scones again today. Thanks
I LOVE this recipe! I have been baking this recipe for the past few years. Everyone raves about these scones. They can be changed up by adding blueberries to the recipe or other fruit, or putting homemade jam or sliced fruit on the side. So incredibly yummy! Thank you for sharing your tested recipes, they never go wrong.
I followed the recipe exactly, I did find it needed a bit longer than 23 minutes in the oven, could be my oven!
I was unsure how it would taste at it didn’t look like the picture in the recipe BUT, it tasted gorgeous, will be making again in the future.
How would I make lemon- ginger scones….your recipe sounds great
One stick of butter is not 1/2 cup. No baking soda, cream is overkill and wasteful. Hard as rocks
One stick of butter is 8 tablespoons or 1/2 cup.
I have made this recipe and also your white chocolate raspberry scone recipe which is to die for!!. Both were delicious. I did make an adjustment after setting my oven to 425 degrees, and found that the bottoms were burning so I am sticking to 400 degrees and alternating trays half way if baking two racks at the same time.
I love your site.
Thank you for sharing all your delicious receipes!!
I have just made scones from your recipe. Yum, melt in your mouth! I have never made scones that were as good. My go-to recipe from now on. Thank you.
Love love fresh baked scones!