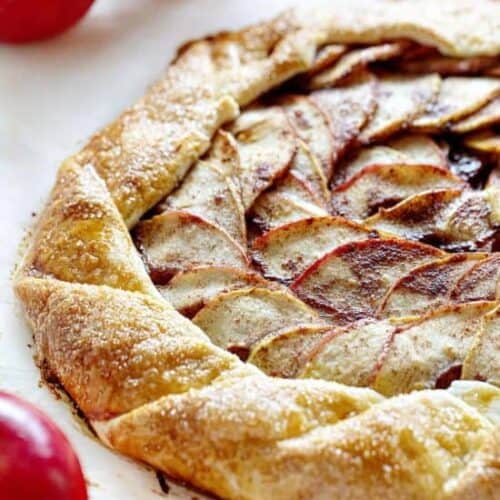
Apple Galette gives you all the comfort and flavor of an apple pie without a lot of the hassle of making an apple pie. This can be a dessert or even a morning pastry. Once you discover how easy a galette is to make, you might want to try my Blueberry Galette.

Apple Galette
I absolutely LOVE apple pie, but sometimes I don’t love it enough to make a homemade pie. When I started making galettes, I knew I had to try it with apples. Galettes are traditionally filled with fruit, and an apple is a fruit, last time I checked! Now, I will offer to bring dessert more often!

What is a Galette?
Simply put, it’s pastry dough wrapped around fresh fruit. We love easy, delicious desserts!
Galettes are French pastries and are similar to a pie or tart. They are free-form and rustic in design. You don’t need any special tools or pans to make a galette and it truly is one of those desserts that anyone can make. The fruit is important, no frozen substitutions here! Although galettes are more associated with fruit fillings, I have made (and loved) a Tomato Galette, which you have to try!

Apple Galette Ingredients
Apples: I used Honeycrisp apples for this recipe. It is important to use tart apples in order to get that tang that contrasts well with the buttery crust of a galette. A few other options you could try would be Granny Smith, Braeburn, or Pink Lady apples.
Crust: Feel free to use storebought or homemade pie crust for this recipe.

Helpful Tips for the Best Galette
- Try to make sure your apple rounds are the same thickness. A mandolin is a very useful tool to help with consistent-sized apple rounds.
- If you only have a variety of apples available, feel free to mix and match. Different colors and textures can be beautiful in a galette.
- You might be thinking of tossing the apple rounds in the filling mixture to coat them. However, we tested that method and found that the apple rounds tend to break when they are tossed, rather than laid onto the baking sheet.

Apple Galette Variations
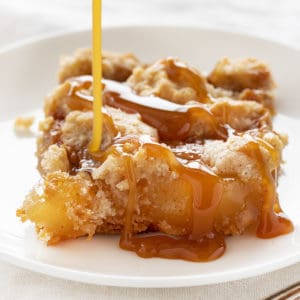
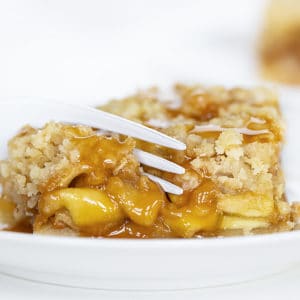
- Caramel sauce: Adding a drizzle over top can be beautiful and tasty!
- Different Fruit: Pears would be lovely as well as peaches. Both have different levels of juiciness, so be mindful of that.
- Be messy: While a lovely perfectly layered galette is pleasing to the eyes, it really doesn’t affect flavor. If you want you can simply add the apples to the pie crust in an even layer.

How to Store Apple Galette
Any leftover apple galette can be stored covered, at room temperature for up to two days, or in the refrigerator for up to 5 days. To reheat, place the galette in an oven at 350°F for 5 to 10 minutes.

More Apple Desserts


Apple Galette
Ingredients
- 2 unbaked pie crusts, homemade or store-bought (if making my homemade pie crust, only use half)
FILLING
- 3 large Honeycrisp apples, cored and cut into ⅛-inch thick rounds
- ⅓ cup (67 g) granulated sugar
- 2 tablespoons unsalted butter, melted
- 1 teaspoon vanilla extract
- 1 teaspoon cinnamon
- ⅛ teaspoon kosher salt
TOPPING
- 1 tablespoon all-purpose flour
- 1 large egg, room temperature, beaten
- 1 tablespoon turbinado sugar
Instructions
- Preheat the oven to 350°F. Lay out an 18-inch piece of parchment paper on your work surface.
- On the sheet of parchment, stack the the two pie crusts on top of another. Roll the crusts out to create a 14-inch circle.
- Place the parchment with the pie crust on a large baking sheet. Set aside.
Filling
- Lay the apple rounds on a large baking sheet in a single layer.
- In a medium bowl combine the sugar, butter, vanilla, cinnamon, and salt. Spread half of the mixture over the top half of the apples. Flip the apples and repeat with the remaining mixture, making sure to evenly coat all sides of the apples.
Topping
- Sprinkle the flour evenly over the pie crust.
- Starting in the middle, arrange the apple slices in overlapping circles leaving 2-3 inches empty towards the edge.
- Fold the edges of the crust over the apples, working your way around and creating pleats as you go.
- Brush the pleated crust evenly with the beaten egg.
- Sprinkle the turbinado sugar evenly over the entire galette.
- Chill the galette in the refrigerator for 15-20 minutes.
- Bake for 55-65 minutes, or until the apples are tender and the crust is golden brown and cooked through.
- Allow the dish to cool slightly before slicing and serving.
Did you make this recipe?
Thank you for making my recipe! You took pictures, right? Well go ahead and post them on Instagram! Be sure to mention me @iambaker and use the hashtag #YouAreBaker.


Do you have a mailing service?
Could you make this the day before and refrigerate it? Then bake it the next morning?
First off, I used store bought pie crust because I was short on time. But I am sure it would be better if I had made the dough myself. It was pretty good. I think I would peel the apples next time. The cinnamon, sugar mixture was goopy and didn’t spread evenly over the sliced apples. So next time I would sprinkle the cinnamon, sugar and melted butter on separately. It’s a very easy recipe. My kids really loved this galette served with vanilla ice cream.
Fantastic!
Thank you for this delicious recipe!
You are amazing!
I thought this was actually quite a bit more work than a pie would have been, due to the prep work with the apples and having to lay them out in a circle. I agree with one of the other reviews… the cinnamon sugar butter mixture was goopy and I don’t understand how that was supposed to be spread over the apples. I ended up drizzling it on the crust before I arranged the apples and then drizzling more on top. This was pretty good, but I probably won’t make it again.