I have something very serious to talk with you about today. There is a great travesty occurring in our nation. A great injustice! And I cannot, no I WILL NOT sit idly by for one moment longer.
And please forgive my boldness as I callously divert from the true spirit of this blog. I try so very hard to have fun here. To keep things light. But enough is enough. This has to stop.

I am taking a stand.
There is the little tiny candy that I hold near and dear to my heart. I have loved it from the moment I tried it.
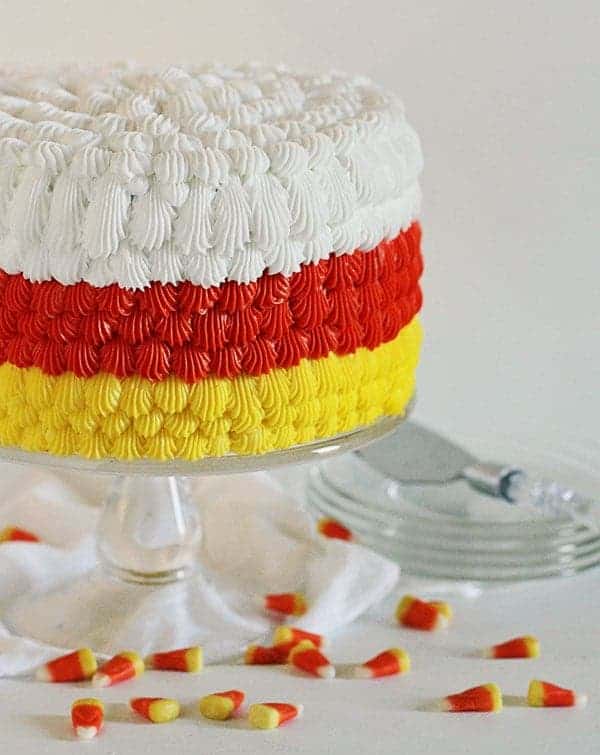
Its candy corn. To be more specific Brach’s Candy Corn. The REAL stuff.
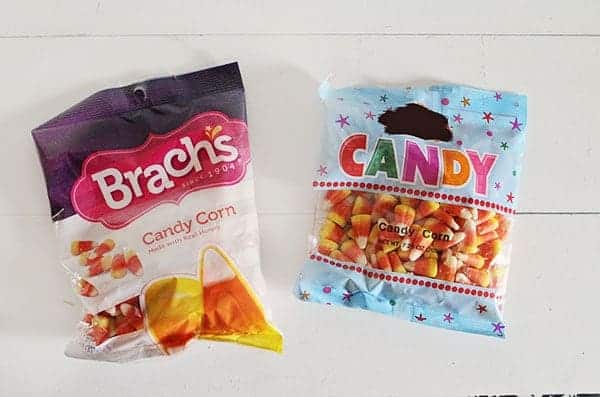
That stuff? Over on the right? IMPOSTOR. I dislike them very much. I dislike them on a crutch. I dislike them on a spoon. I dislike them under the moon. I dislike them all the way to mars and back! I would not eat them, not for all the money in a sack!
Why oh why are the grocery stores carrying them? Why do companies even try to replicate the awesomeness that is Brach’s Candy Corn? It must be stopped!!
(Brach’s has never heard of me, I am seriously just a big -weird- obsessed fan.)
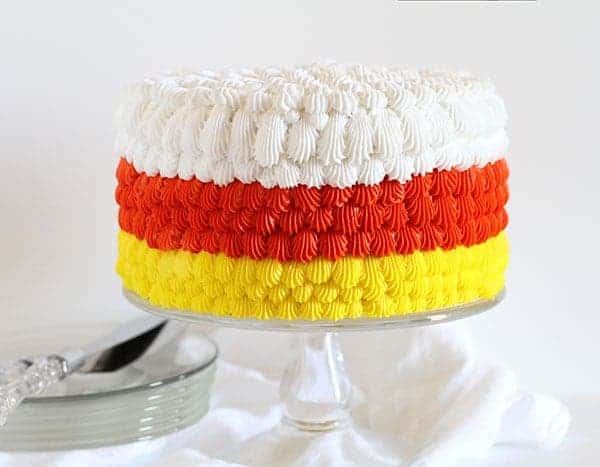
So anyway. While I dislike the fake version, I have intense adoration for the real stuff. Hence this cake. Which I am pretty sure has been made a million times before. Except this is kinda new way to frost a cake. At least I haven’t seen much of it around, so I figured why not a tutorial?
(A word of warning, this post has numerous images. Many more than I usually post, so I apologize for any slow loading times!)
CANDY CORN CAKE {cake decorating tutorial}
You will need: (please feel free to substitute a box mix here!)
Yellow and orange gel food coloring (I use Ateco or Americolor)
9 inch cake pans
#32 tip, pastry bags, coupler set
Rotating Cake Stand (optional)
Prepare cake batter. Tint one recipe cake batter yellow and place in a prepared 9-inch cake pan. Prepare another white cake and tint orange; place in prepared 9 inch cake pan. Make last white cake and place in prepared 9 inch cake pan. Bake for approximately 10 minutes longer than the recipe directions call for. When cakes are done baking remove from oven and allow to cool to room temperature in pan. Carefully remove cake from pan and determine which is the shortest cake. Level all the cakes to that level.
Next came frosting. There are two full buttercream recipes here, which is a lot of frosting. Divide one batch equally into two parts then tint one yellow and one orange, trying to match the shade of your cooked cake. Leave remaining batch of buttercream white. Cover with plastic wrap until ready to use.
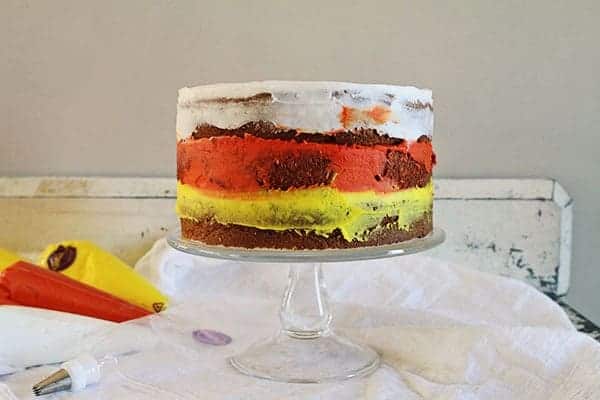
Start by placing your yellow cake on the cake stand. Cover in approximately 1/2 cup of yellow buttercream. Carefully place orange cake on top. Cover with approximately 1/2 cup of orange buttercream. Place white cake on top. Smooth out an excess frosting.
As you can see above, I chose not to do a crumb coat. I wanted to be sure I had enough frosting! With the two recipes of buttercream it turns out I did, so I would recommend covering your cake in a crumb coat of white buttercream.
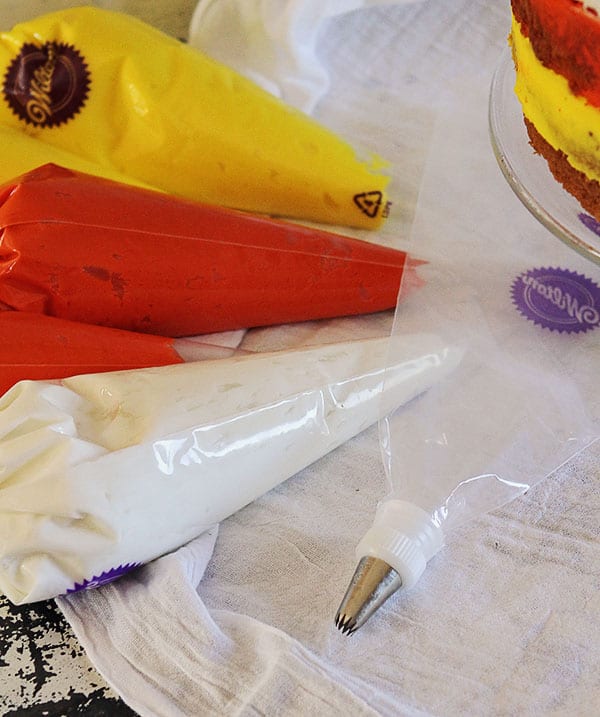
For the frosting. My trick is this: (this is a life changer, seriously)
I place ALL my frosting into plastic disposable pastry bags.
I then get a new clean bag with the tip I am using, in this case a #32 tip, and coupler set.
Cut off about 2 inches from the tip of the bag with your first color and place the frosting into the bag with the couple set and #32 tip.
Pipe out decoration and then when the frosting runs out, remove empty frosting bag from bag with tip and coupler.
Grab new frosting bag, cut off tip and drop into bag with tip and coupler. When you have a new color change out your frosting tip.

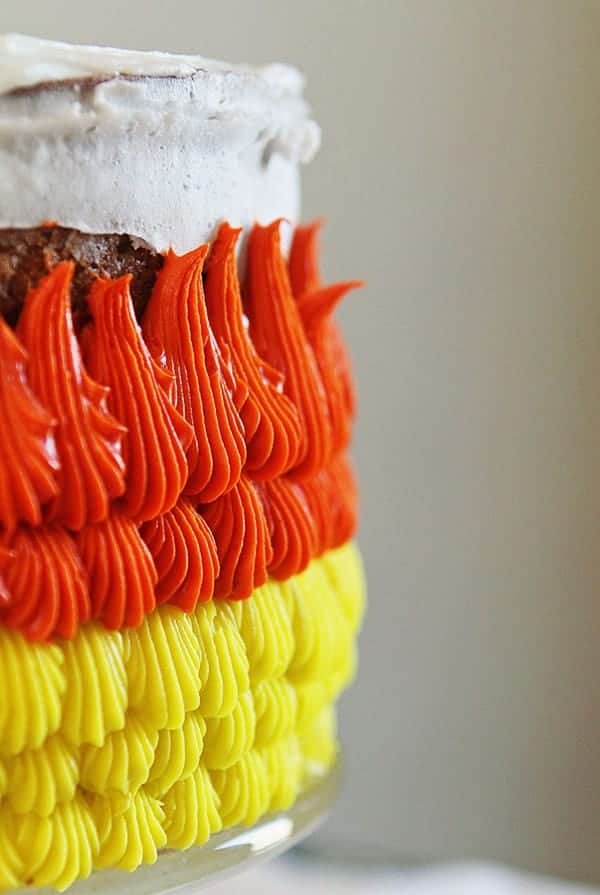
Starting with the yellow frosting in the bag with the #32 tip; place your tip at the very base of the cake. Apply pressure and then swoop UP. If you are at all uncomfortable with the motion, practice on a piece of parchment paper until it feels right.
At this point you can determine how big you want each dab to be; just try to remain consistent around the entire cake. Continue this motion around cake until you have completely covered the bottom of the cake.
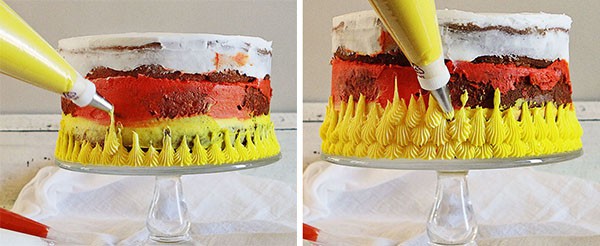
For the next row, place your frosting tip right in between the dabs from the bottom row. Repeat the same motion as you did above and do this around the entire cake until you have two full rows of mini scallops.
You will be doing three full rows of yellow, so once you have completed the second row, go back in and do a third in the exact same way.
Remove yellow frosting from your bag with the coupler set. Change out to a clean #32 tip and then add orange frosting.
Just a note: I pipe one handed and was able to turn my cake around with the other hand. If you want to make the piping even easier, place cake on a rotating cake stand.
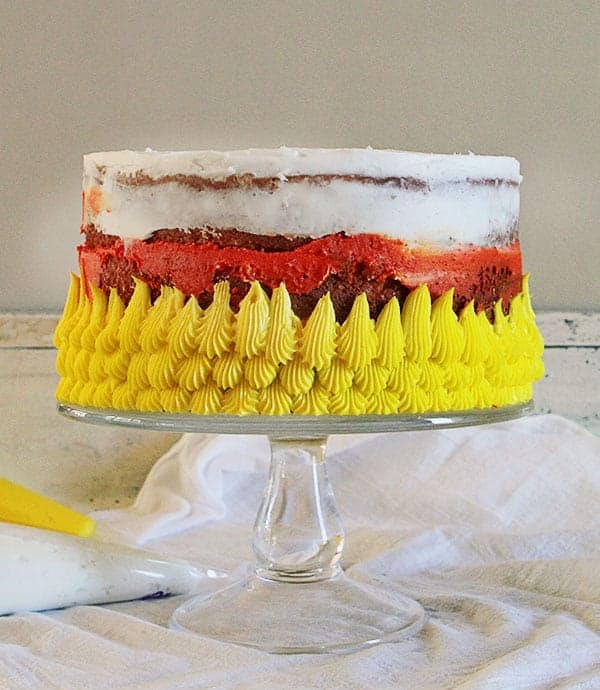
This is how the cake should look at this point. (Of course, yours will be neater since you did a beautiful crumb coat!)
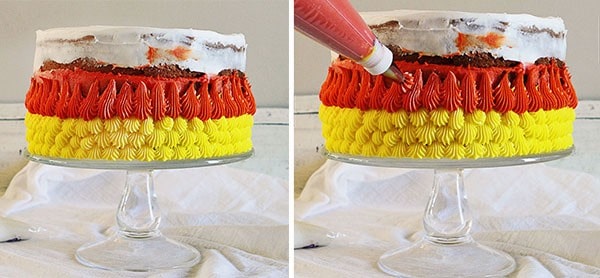
The orange dabs are done in the exact same way as the yellow. Do one row, go back in and add another row, then finish with a third row.

This is how the orange layer looks when done. You can see it will overlap onto the white layer of cake and that is great.
If you are anything like me you will want every single dabs to be perfectly uniform and placed just right. Well, I got over that pretty quick! In my humble opinion, imperfections are beautiful too. If you have a dab you dont like, simply remove it carefully then go back in and pipe another one. This cake is very forgiving!
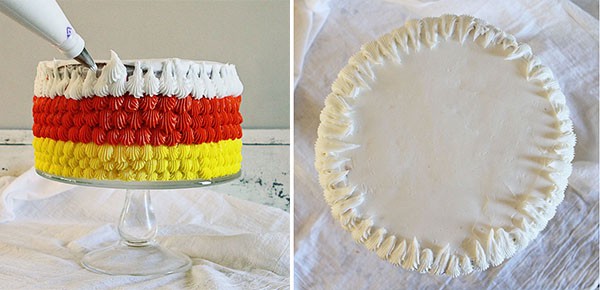
For the white layer, do the dabs exactly as you have done wit the yellow and orange. I did two rows of white dabs around the cake. Looking back at the finished cake I could have fit three in, but didnt. Be sure to carefully look at your cake and see what will work best.
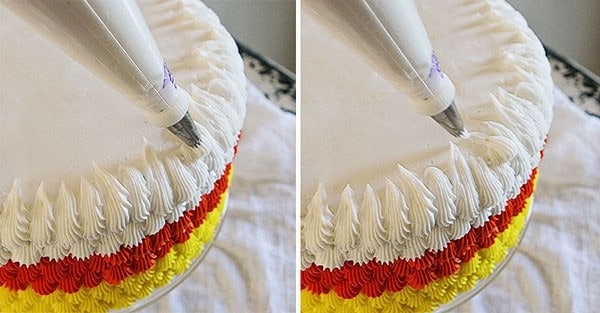
The third row I started at the very edge of the cake then swooped IN, towards the center of the cake. I went around the cake until I reached the center.
If you are a faithful iambaker reader you will recognize this technique from this Mini Heart Surprise Inside Cake I did!
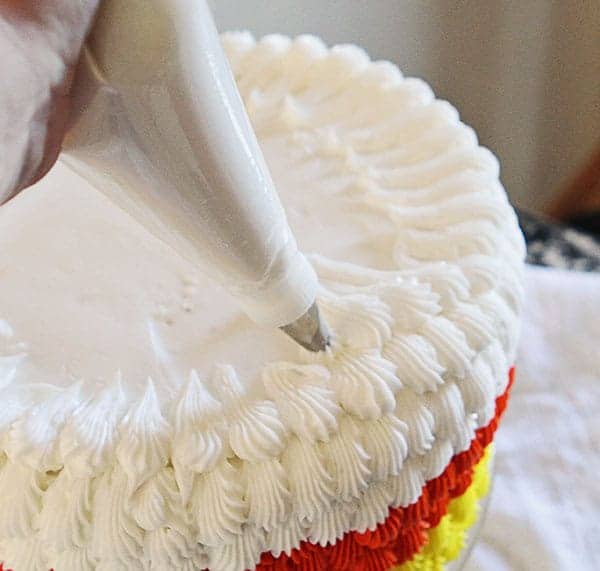
Keep going around and around the cake until you reach the center.
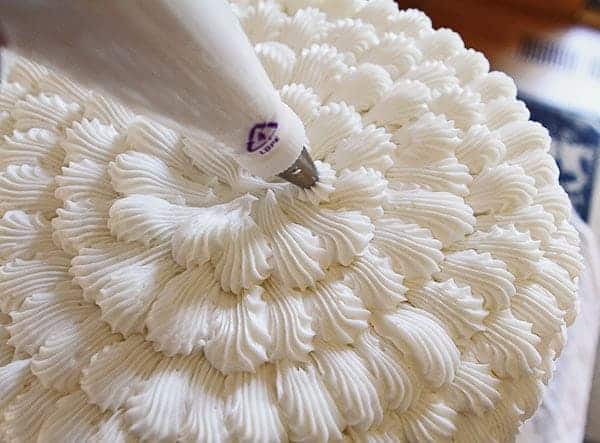
When you get to the center just take extra cake to make your final dabs as uniform as you can. Even if they are not its ok, the over effect is still quite lovely.
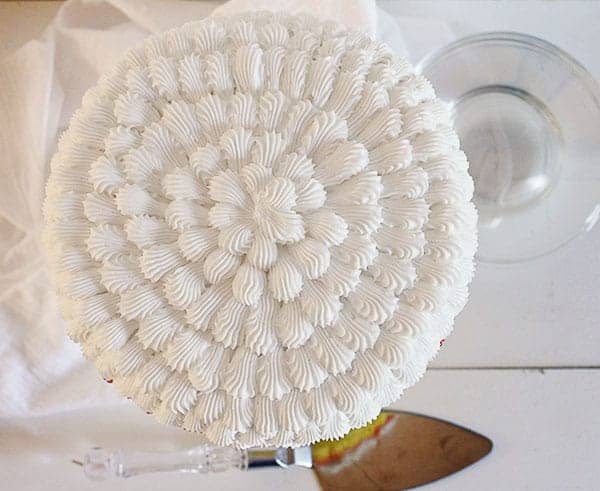
And this is how the top looks all completed! Can you see the reflection of the yellow and orange in the cake server? I totally planned that. #totalydidnotplanthat
So lets re-cap. All impostor candy corn is wretchedly bad. Brach’s candy corn is the real, the best, and the only candy corn allowed in this house!
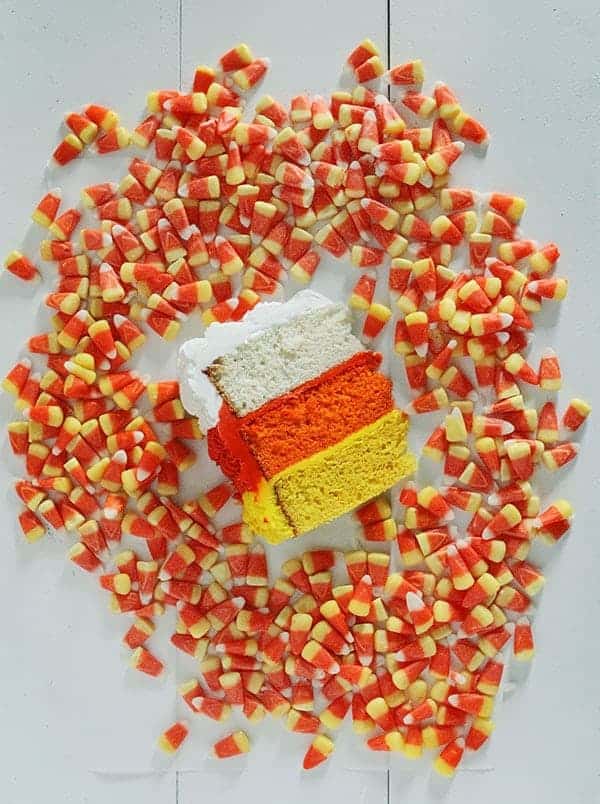
As you can see, I may have a small obsession with them. It is my understanding that some people even add peanuts to theirs. And M&M’s or some such nonsense. I am afraid this is the dividing line between us. Difference in political and religious beliefs? I can handle that. Nuts in my candy corn? Get outta here.
No nuts! No M&M’s!

Just candy corn. Lots and lots and lots and lots of CANDY CORN!
And cake. Always lots of cake.
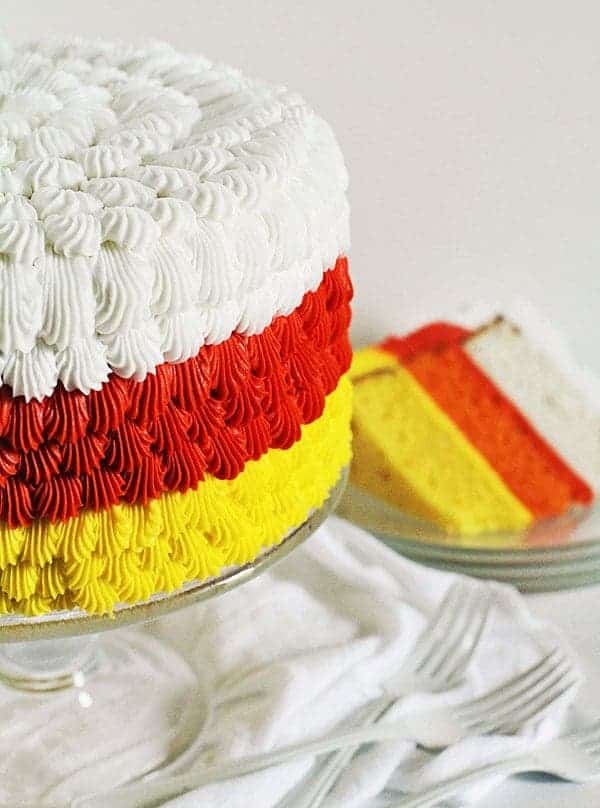
My apologies for this longest and most picture heavy post I have ever had the pleasure of assembling. Please do let me know if you have any questions.
And lets brainstorm for the next cake! Should we tackle this one for Christmas? Red, white and green? Should we take on New Years and make it black, white and gold? How about Fourth of July with red, white and blue? How about a rainbow with all the beautiful colors?? The possibilities are endless! Cant wait for the next one, which you are sure to see very soon!

For the record, I have enjoyed candy corn with salty peanuts before and they were ok. I may have gotten a little intense up there.;)
Feel free to check out my other Candy Corn Cake! Its based off of the Indian Candy Corn.


I miss Brachs candy corn. It is the best flavored, unfortunately for those with peanut allergies… it’s not safe so it’s a no go here 🙁 Maybe someday… until then I’ll enjoy your pretty cake as a nice substitute! 🙂
Bummer! Sorry about that. 🙁
I feel your pain, Rachel! My daughter has a peanut allergy and we haven’t had Brach’s candy corn in ages!
I love the real candy corn! I have been giving away it for Halloween for about 6 years…I always keep an eye open for the prepacked bags in the stores. Kids love it!!
I wanna come to your house. 🙂
🙂
I wish I had your beautiful skills at decorating cakes- definitely something on my bucket list to work on! Maybe you can give me lessons sometime 🙂 Beautiful cake!
IF giving lessons means we would have to hang out then YES. I am in. 🙂
I agree! Brach’s all the way! I think it’s the sesame oil they mix in there!
I also love the details in the cake. Beautiful!
Thank you so much!
I too, can ALWAYS spot an impostor!
lol I hear ya! You make such beautiful beautiful candy corn treats my friend. 🙂
I thought I was the only one!!! I ONLY like Brach’s candy corn!!! I am a candy corn snob in that respect. : )
If preferring superior taste over fake impostors qualifies us as candy corn snobs… I am ok with that label. 🙂
Love this cake and your passion 😉
Ha! Thanks. 🙂
You are a riot! But I do agree about the candy corn. There is only 1!
And the cake came out beautiful~
😉
Beautiful job as always 🙂
Thank you!