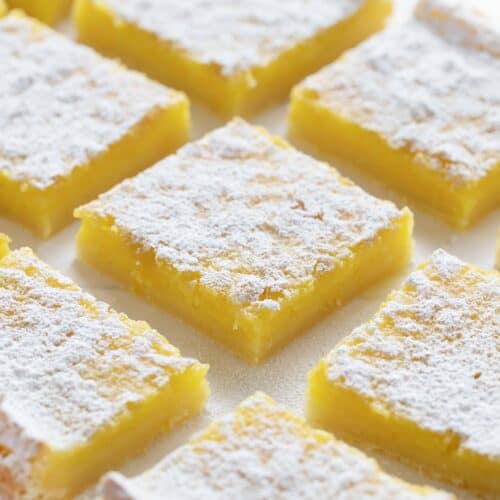
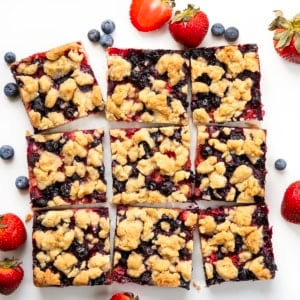
Orange Bars are the perfect dessert for anyone who loves oranges! Packed with flavor and seriously sweet, these bars are the perfect summertime treat! Don’t miss my Lemon Bars and Strawberry Bars for more great hot weather desserts!

Orange Bars Recipe
What is an orange bar? They are loaded with real orange and are sweet, buttery perfection. Fresh orange juice paired with orange zest creates a wonderful flavor that is only amplified by the rich butter crust. Orange bars are exactly like Lemon Bars, only not as tart or acidic.

How to Make Orange Bars
Cut up the cold butter into cubes. In a large bowl add the sugar and flour and then better. Using your hands (my preferred method, you can also use a pastry cutter or food processor) break up the butter until each piece is coated with the flour and sugar mixture and no bigger than the size of a pea. I have made this crust with room temperature butter and while it was faster (the butter is much easier to incorporate) it does make quite a mess!


Tips for Perfect Orange Bars
Room temperature ingredients are key! I teach you how to quickly warm up butter and eggs here.
Lining your pan with parchment is optional, but it does help for easy removal.
Do you want to get as much juice as possible from the orange? Take the orange and roll it on the counter roughly, pressing hard. This will help to loosen up the juices before extraction. Another tip I heard was to pop it in the microwave for 10-15 seconds and then juice.

Can You Make Gluten-Free Orange Bars?
Make these bars Gluten-Free simply by using an interchangeable Gluten-Free flour. I used a good 1:1 Gluten-Free flour blend and it worked beautifully.

How to Store Orange Bars
While these bars can be kept out at room temperature for several hours, they should be refrigerated if you can’t finish off the pan the same day you make it. If you know that you are going to be storing them, try to only cut off the pieces you need, not cutting up the entire pan into bars. (Hint: This also means nice crisp cuts when you serve them cold!) I usually place a piece of plastic wrap directly on top of the bars and then cover with foil. Orange bars can be stored for several days in the refrigerator.
If you are freezing the orange bars I like to cut them into individual size portions and then wrap each bar with plastic wrap. Date and stack in your freezer. To thaw, either place bars in the refrigerator the night before using or leave them on the counter to come to room temperature.
Orange Bars
Ingredients
CRUST
- 1 cup (2 sticks or 226g) butter, cold
- 1 cup (126g) confectioners sugar
- 2 cups (252g) all-purpose flour
FILLING
- 4 large eggs, room temperature
- 1 cup (200g) granulated sugar
- 1/4 cup (32g) all-purpose flour
- 2/3 cup (160ml) freshly squeezed orange juice
- 2 teaspoons orange zest (up to 1 tablespoon, but zest can be strong so start with less)
- confectioners sugar, for dusting
Instructions
CRUST
- Preheat oven to 350°F.
- In a medium bowl, blend together cubed butter, flour and sugar with a pastry cutter, a food processor, or your hands. Press into the bottom of a 9×13 inch pan lined with parchment paper.
- Bake for 15 minutes in the preheated oven, or until the edges are just starting to brown.
FILLING
- In a large bowl, crack eggs and whisk them.
- To the eggs, add sugar, flour, orange juice, and orange zest. Whisk well, until no clumps remain. Pour over the baked crust after it is done baking.
- Once the filling has been added, bake for an additional 20 minutes. (Do not cover.)
- Remove from oven and let bars cool to room temperature. Place in the refrigerator for at 2 hours then dust with confectioners sugar before serving.
- Cut into squares and serve.
Did you make this recipe?
Thank you for making my recipe! You took pictures, right? Well go ahead and post them on Instagram! Be sure to mention me @iambaker and use the hashtag #YouAreBaker.
Want More Amazing Dessert Recipes?


I don’t have an oven, so I’m trying these stovetop. Wish me luck. I adore lemon squares, never tried orange ones. I’ll let you know the verdict.
Ever make them?
Baking soda / powder not required??
Yes, the recipe is correct as written.
When do you put the orange zest on?
These were SO good. Couple notes – I made them gluten free subbing the bob’s red mill 1×1 flour and they turned out great.
-I think i missed where i was supposed to use orange zest – it was listed on the ingredients but no where in the instructions.
-I had to bake mine for almost 30 minutes before it set. Not sure if it had to do with how long i had to mix – it took quite a while to get the lumps out, so i may try dissolving the dry ingredients with some of the wet first so there weren’t so many lumps. Maybe it was the GF flour.
Thank you!
Hi, Heather! I work with iambaker and am happy to help with questions. I am glad you enjoyed the bars. A couple of reasons your bars took a little longer to bake could be humidity or differences in ovens. We have not made these bars with gluten-free flour, so we have not been able to replicate a longer mixing time. Have a great day!
why are my bars soupy still and i followed directions correctly? i’ve had them in the oven for about 25 mins now.
They may just need to bake a little longer.
If oranges are sweet why would the recipe need a cup and and a half sugar ?
I was skeptical at first, but these blew me away. I love them and I highly recommend!
I dont have orange zest I have dried orangpeel can I use thst
So good! I used gluten free (1-1) flour and they turned out awesome ( I did add like two extra table spoons of butter to the crust because I always add some extra liquids when working with gf flour) and they were awesome! Mine are not quite as vibrant in color but def delish!
Great! Taste good, but they in my northern climate didn’t bake fully with the filling on in just 20 minutes. I’d go for an extra 15 if you struggle with this, and if not then, go for maybe a 10 or 5. Anyways, delish!