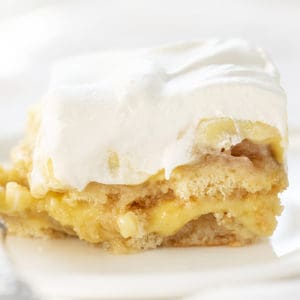
Walk past the cookie aisle and make your own Vanilla Wafers from scratch. They look the same as the ones you would get from the box, but are made with fresh ingredients and a better taste if you ask me! They are most commonly used in banana pudding recipes like my Ultimate Banana Pudding recipe,

Vanilla Wafers
Vanilla wafers, or sugar wafers, have been around for over 100 years. They are fun to use as a crust or just a snack! With all the ways you can use vanilla wafers (or Nilla wafers as they are now called), it’s nice to have a recipe for this popular cookie.
Wafers Recipe
With all the processed foods and snacks out there, it’s refreshing to have options to make our favorite treats from scratch. Plus, you know there will be no artificial ingredients in homemade batches of these Vanilla Wafers.

How to Make Vanilla Wafers
With just a mixer and a parchment-lined baking sheet, you can whip up some of these fun cookies in no time! Of course, you will also need the oven preheated to 350°F.
- In a medium bowl, sift together the flour, baking powder, and salt. Set this bowl aside.
- In the bowl of your stand mixer, cream together butter and sugar on medium speed for at least two minutes, scraping down the sides as needed. (You can also use a hand-held mixer for this recipe if you don’t have a stand mixer.)
- Next, add the egg, vanilla, and milk to the stand mixer bowl and blend these ingredients for about 30 seconds.
- Then, add the flour mixture and mix on low until all the ingredients are fully incorporated.
- Chill the batter for 10-15 minutes. (You can take this time to chill, too!)
- Use a 1/2 teaspoon to scoop out dollops of the batter and place them on the baking sheet. Leave each dollop about one inch apart.
- Bake the wafers for 12-15 minutes, or until golden brown.
- Allow the cookies to cool before serving.

How to Store Vanilla Wafers
If you want to keep Vanilla Wafers at room temperature, be sure to keep them in an air-tight container. They will last for up to five days. Freezing them is another option. Store them in a zipped plastic bag, making sure to write the date on the bag. The wafers will keep up to a month in the freezer.

Banana Desserts

Vanilla Wafers
Ingredients
- 1 ½ cups all-purpose flour
- ¾ teaspoon baking powder
- ½ teaspoon Kosher salt
- ½ cup unsalted butter, room temperature
- ½ cup confectioners' sugar
- ¼ cup granulated sugar
- 1 large egg, room temperature
- 1 tablespoon vanilla extract
- 1 tablespoon whole milk
Instructions
- Preheat oven to 350°F.
- In a medium bowl, sift together the flour, baking powder, and salt. Set aside.
- In the bowl of a stand mixer, cream together butter, confectioners' sugar, and granulated sugar on medium speed for at least 2 minutes, scraping down the sides as needed.
- Add the egg, vanilla, and milk and blend until smooth and fluffy (about 30 seconds).
- Add the flour mixture and mix on low until fully incorporated.
- Chill the batter for 10-15 minutes.
- Scoop 1/2 teaspoon-sized dollops of the batter (about 1 inch apart) onto a baking sheet lined with parchment.
- Bake 12-15 minutes, rotating pan halfway through baking. Cookies will be golden brown.
- Allow to cool completely before serving.
Did you make this recipe?
Thank you for making my recipe! You took pictures, right? Well go ahead and post them on Instagram! Be sure to mention me @iambaker and use the hashtag #YouAreBaker.


Will using 2% milk change the end result?
This recipe is excellent… It tweeked it a little and the tasters were impressed…
These were delicious. I followed the directions exactly (room temperature egg and butter). However, like another commenter mentioned, mine stayed in the same shape and were like little vanilla wafer scones. They still tasted great with banana pudding but we’re not the crispy cookies I was trying for.
I spoke a little too soon on my last review. For the second batch I cut the amount of dough I used on each cookie in half and formed them into flattened discs about 1/4″ tall. Then pressed them lightly into a spoon so they got the ‘wafer’ shape. They came out crispy and wonderful.
What about a milk substitute? Allergic to all milk products, I can use vegetable shortening instead of butter but what about the whole milk? Almond milk doesn’t have the fat content that whole milk has. What do you think of using coconut milk?
Would this work with a gluten free flour?
Hi, Ayleen! I work with iambaker and am happy to help with questions. We have not tried this recipe with gluten-free flour, so I can’t speak to its effectiveness. Please let us know if you try it and how the wafers turned out. Have a wonderful day!
These are amazing! I’ve been looking for a good vanilla wafer recipe!
Can i do this without butter? Thanks
I like all your recipe and i thank you for sharing. I can use them to make cookies for my son. God bless you and more power
The recipes look delicious