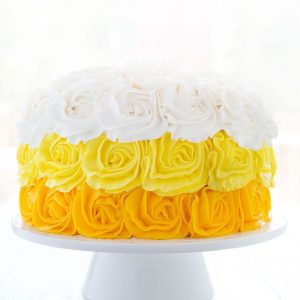
Did you know that the Rose is the National Flower?
“The rose was designated the official flower and floral emblem of the United States of America in 1986”


People have been asking for over a year now for a video tutorial for the Rose Cake. After posting the Neapolitan Rose Cake a week ago and getting a few more requests, I finally did it!
While I will probably still refer folks to my original tutorial, this little video shows you a couple fun things:
1. How to make it with different colors. (So this will apply to the Neapolitan Cake as well as any Ombre effect you might desire)
2. Just how quick and easy it is.
This video is mostly in real time. You really truly can frost a cake like this in less than 10 minutes. And if you are making all one color it is even quicker.
As you can tell, I made this cake in honor of patriotism… Memorial Day, the Fourth of July, Veterans Day, Flag Day, an Inauguration, basically any occasion that red white and blue is appropriate!

How I prepare to frost a Rose Cake:
I get all my frosting’s ready and place in plastic disposable pastry bags.
I then prepare a bag with a 1M tip in it for every color I am using. Here I used three colors, so I had three bags ready. You can go through a lot of frosting making those roses, and its good to have an extra bag ready to switch out.
Also, I really didn’t do a crumb coat. I have done it with and without a crumb coat and find they both work. The reason I can get away with not doing a crumb coat is because I tend to squish my roses together to avoid any dead space.
When making the bottom layer of blue roses around the cake, I tried to stop applying pressure at the top of my rose, where the next layer would be covering. Then simply go right over that edge on your next row. Overlapping is a very good thing with this cake!
As you can see in the video, I went fast and didn’t worry about perfection with each individual rosette.
If you didn’t like how one of your roses looked, simply wipe it off the cake and re-pipe it. Easy peasy! 🙂
There is no editing (other than exposure/color) done to the pictures I have posted. (The pictures were actually taken with my phone.) It’s the same cake in the pictures and video.
The ending cake is still pretty good, even though you saw many errors throughout the video. That is just a testimony to how forgiving the Rose Technique is!
A few have asked, so here is a link to the gel food coloring I use to achieve such deep colors!


You make it look so easy! Your cakes are the most beautiful cakes EVER!
I love this technique, and I love this cake in any color! Thanks for the video tutorial.
Gorgeous. Gorgeous cake!
Hi Amanda !
Just a quick question. Do you think this frosting technique would work with a cream cheese frosting ?
It depends on the frosting consistency. You need a frosting that will retain its shape… cream cheese is generally sot by nature, but I have seen (and used!) some recipes that use shortening in them as well. You can also add more sugar to stiffen it up a bit. Happy baking!
Thanks for the quick response 🙂 love your work by the way ! Your first rise cake was honestly one of the reasons I started decorating cakes . Thanks for the inspiration 🙂
Love the video – but it would be even better if Aunt Inga had come to visit and share her tips! 😉 Hope you are wonderful…I almost e-mailed you yesterday b/c you were on my mind…and then I didn’t just do it. 🙁 Boo on me! Anyways I hope you are wonderful!! 🙂
This cake is vibrant and completely fascinating!! You are such a PRO 🙂
I hope my daughter does not see this cake; she is hosting a 4th of July bash and I KNOW she would expect it of me…but I don’t have your experience. Can I just place an order. 🙂
I can never get enough of your rose cakes. They are absolutely perfect
I have been admiring your cakes for quite some time. I pin them all the time!! LOL Now that I seen this video I think I can do it!!! I can’t wait to try and make a rose cake. Thanks you so much your the best to share like you do….all the details.
that’s gorgeous!!!! 😀 so simple but so elegant looking