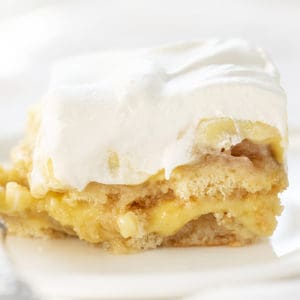
Walk past the cookie aisle and make your own Vanilla Wafers from scratch. They look the same as the ones you would get from the box, but are made with fresh ingredients and a better taste if you ask me! They are most commonly used in banana pudding recipes like my Ultimate Banana Pudding recipe,

Vanilla Wafers
Vanilla wafers, or sugar wafers, have been around for over 100 years. They are fun to use as a crust or just a snack! With all the ways you can use vanilla wafers (or Nilla wafers as they are now called), it’s nice to have a recipe for this popular cookie.
Wafers Recipe
With all the processed foods and snacks out there, it’s refreshing to have options to make our favorite treats from scratch. Plus, you know there will be no artificial ingredients in homemade batches of these Vanilla Wafers.

How to Make Vanilla Wafers
With just a mixer and a parchment-lined baking sheet, you can whip up some of these fun cookies in no time! Of course, you will also need the oven preheated to 350°F.
- In a medium bowl, sift together the flour, baking powder, and salt. Set this bowl aside.
- In the bowl of your stand mixer, cream together butter and sugar on medium speed for at least two minutes, scraping down the sides as needed. (You can also use a hand-held mixer for this recipe if you don’t have a stand mixer.)
- Next, add the egg, vanilla, and milk to the stand mixer bowl and blend these ingredients for about 30 seconds.
- Then, add the flour mixture and mix on low until all the ingredients are fully incorporated.
- Chill the batter for 10-15 minutes. (You can take this time to chill, too!)
- Use a 1/2 teaspoon to scoop out dollops of the batter and place them on the baking sheet. Leave each dollop about one inch apart.
- Bake the wafers for 12-15 minutes, or until golden brown.
- Allow the cookies to cool before serving.

How to Store Vanilla Wafers
If you want to keep Vanilla Wafers at room temperature, be sure to keep them in an air-tight container. They will last for up to five days. Freezing them is another option. Store them in a zipped plastic bag, making sure to write the date on the bag. The wafers will keep up to a month in the freezer.

Banana Desserts

Vanilla Wafers
Ingredients
- 1 ½ cups all-purpose flour
- ¾ teaspoon baking powder
- ½ teaspoon Kosher salt
- ½ cup unsalted butter, room temperature
- ½ cup confectioners' sugar
- ¼ cup granulated sugar
- 1 large egg, room temperature
- 1 tablespoon vanilla extract
- 1 tablespoon whole milk
Instructions
- Preheat oven to 350°F.
- In a medium bowl, sift together the flour, baking powder, and salt. Set aside.
- In the bowl of a stand mixer, cream together butter, confectioners' sugar, and granulated sugar on medium speed for at least 2 minutes, scraping down the sides as needed.
- Add the egg, vanilla, and milk and blend until smooth and fluffy (about 30 seconds).
- Add the flour mixture and mix on low until fully incorporated.
- Chill the batter for 10-15 minutes.
- Scoop 1/2 teaspoon-sized dollops of the batter (about 1 inch apart) onto a baking sheet lined with parchment.
- Bake 12-15 minutes, rotating pan halfway through baking. Cookies will be golden brown.
- Allow to cool completely before serving.
Did you make this recipe?
Thank you for making my recipe! You took pictures, right? Well go ahead and post them on Instagram! Be sure to mention me @iambaker and use the hashtag #YouAreBaker.


While I definitely enjoyed the fruits of my labor, I found these to be quite difficult to make. It took me three or four batches to perfect my technique for putting them on the pan. I finally found that rolling my dough into tiny balls and then tapping it out with my finger into a small disc the size of a quarter worked best for me. I also had trouble getting them to a nice golden brown, so I ended up browning each batch for two minutes. By the end of the afternoon I had achieved the look of a store-bought wafer. They tasted much better than store bought.
The recipe looks fantastic! My daughter is dairy free. Do you think plant based butter and a dairy milk (either almond, oat or coconut) would work? I don’t have alot of experience cooking with any of it because she has only recently needed to get off dairy.
So I followed the recipe but my first batch of cookies came out as little blobs. I increased the size to 1 tsp and rolled into a ball and flattened. Flavor is EXCELLENT!
Have to make these. Want to make in lemon and almond to see the results
These turned out great. They are not as pretty as the photo but the taste is great. I will make them again and next time I am going to be using them for a crust on a cream cheese cake. Grandson approved.
I followed the recipe to the letter and mine turned out bigger (Fatter) looking. Not anything at all like in the photos. Are we supposed to press down on the batter to get them flat looking, like in the photo. They taste okay.
Looks delicious will try some soon
After a morning long quest to find Nila vanilla wafers I was told by clerk that they were no longer available. I had promised I’d make a batch of individual cherry cheese cakes for a gathering and was very frustrated but now I can offer these great little pastries once more. Thank you for the recipe.. I have definitely saved and printed it!!
Thank you so much. This recipe is the true thing. My husband keeps asking are you going to make more cookies today? I didn’t change a thing I can see me making these a lot. Thank again
I wanted to make an old fashion banana pudding for a church picnic but can’t find vanilla wafers that don’t contain boiengineered ingredients. I can use this recipe and use King Arthur organic flour and other organic ingredients. I’m always in search of a way to get around all the crap that our Gov. is trying to feed us.
👍🏻 Good for you avoiding all the crap in store bought foods! The FDA approves everything. 😠
I followed the recipe as best as possible, mine were a little more puffy, but they turned out amazing! My father was in the hospital and I remember him loving banana pudding with “nilla wafers” but couldn’t get to the store. Needless to say, mission accomplished!