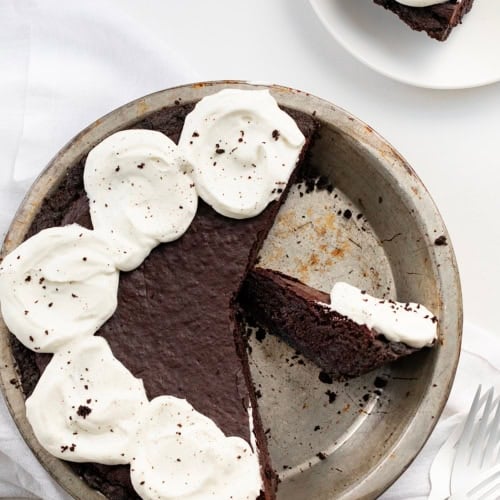
Brownie Pie combines the irresistible textures of a crisp Oreo cookie crust, dense and fudgy brownies, and fluffy whipped cream with a chocolate drizzle. It’s a perfect dessert for special occasions or anytime you’re craving a truly indulgent treat! Once you take a bite of this decadent dessert, you will definitely want to make a pan of the Double Fudge Brownies, too!

Ingredients & Substitutions
Crust: You will need about 20 Oreo cookies, crushed, for the crust of this pie. For the finest crumb, pulse the cookies in a food processor. This will be the best method when the crumbs are coated in butter. However, if you don’t have a food processor, you could place the cookies in a sealable plastic bag and use a rolling pin or wine bottle to crush the cookies. A store-bought Oreo crust would also work.
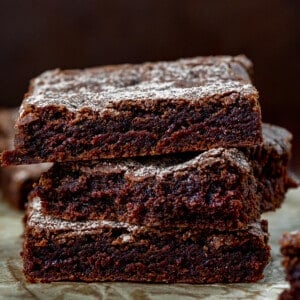
Brownies: There is a reason I used my double fudge brownie recipe in this pie! They are moist and fudgy with an intense chocolate flavor.
Espresso Powder: To the brownie layer, I added a half teaspoon of espresso powder. It enhances and intensifies the chocolate flavor without giving you a coffee taste. If you don’t have any on hand, you could leave it out. But, the brownies may not have as intense of a chocolate flavor.
Whipped Topping: Sure, you could get by using a store-bought cool whip! However, it’s easy to make your own homemade whipping cream. Using a lower-fat cream or milk will not whip as well when making this; the end result would be a more unstable form.
Chocolate Syrup: Storebought chocolate syrup like Hershey’s would work great. Or, I love to make my homemade chocolate syrup for drizzling over the whipped topping.

Quick Tip for a FAST Dessert
Want to make a fun dessert with little to no effort? This can easily be replicated with store-bought Oreo crust, brownie mix in a box, cool whip, Hershey’s syrup, and store-bought chocolate curls. Semi-homemade yet still really delicious!
Can I Make This Pie Ahead of Time?
Absolutely! You can make the crust and brownie portion ahead of time and store the pie in a sealed container on the counter for 1-2 days. When ready to serve, top it with the whipped topping and chocolate sauce. Enjoy!

Can I Use A Different Pan?
Sure! If you don’t have an 8-inch pie dish, you could substitute a cake pan or even a square baking dish. However, you will need to watch the brownies closely as baking times would need to be adjusted.
How To Store Brownie Pie
Brownie Pie can be stored at room temperature or in the refrigerator. Store it, covered, without the whipped topping or chocolate syrup; those can be added when serving the pie. It will last up to 2 days or so.
More Brownie Recipes


Brownie Pie
Ingredients
Crust
- 1 ½ cups (162 g) crushed Oreo cookies, about 20 cookies
- ¼ cup (½ stick / 57 g) unsalted butter, melted
Brownies
- ¾ cup (88.5 g) Dutch-processed cocoa powder, sifted
- ½ cup (62.5 g) all-purpose flour
- ½ teaspoon baking powder
- ¼ teaspoon kosher salt
- ½ teaspoon espresso powder
- ½ cup (1 stick / 113 g) unsalted butter
- 1 cup (200 g) granulated sugar
- ½ cup (91 g) semi-sweet chocolate chips
- 2 teaspoons vanilla extract
- 2 large eggs, room temperature
Homemade Whipped Topping
- 1 cup (238 g) heavy whipping cream
- 2 tablespoons confectioners' sugar
Topping
- chocolate syrup, for drizzling (optional)
Instructions
- Preheat oven to 350°F.
Crust
- In a medium bowl, combine the Oreo cookie crumbs with the melted butter, mixing well with a fork. (You want every crumb coated in the butter as this will be the glue that holds it together.)
- Pour the coated Oreo crumbs into an 8-inch pie dish. Pat them flat with your hand and then use a kitchen glass to press flatter. Start at the center and work out and up the sides. Set aside.
Brownies
- To a large bowl, add cocoa powder, flour, baking powder, salt, and espresso powder. Whisk to combine. Set aside.
- To a large saucepan over medium heat, add butter and sugar. Once the butter has melted, bring it to a low boil and cook for 2 more minutes, stirring occasionally or until it reaches 230°F on an instant-read thermometer.
- Remove from heat and stir in the chocolate chips and vanilla until completely melted. (The mixture may still be grainy.) Let cool for about 10 minutes.
- When ready, add eggs, one at a time, stirring constantly until smooth.
- To the flour mixture, add the chocolate mixture. Mix until JUST combined. The batter will be very thick.
- Spread the batter into the prepared pie crust and bake for 30-35 minutes, or until slightly puffed. Set aside to cool completely.
Homemade Whipped Topping
- Add heavy cream to a mixing bowl. Start mixing at the lowest speed, and then gradually increase speed to medium until the cream starts to get thicker. (The gradual progression prevents you from spraying yourself with cream.)
- When the cream starts to thicken, stop the mixer. Slowly add in the confectioners' sugar and then resume mixing again, starting with low speed and increasing to medium speed, and eventually moving to a high speed.
- The cream will thicken and start to peak. Mix on high until the cream is thick and stiff. This happens quickly, the stage between soft and stiff peaks, so watch it closely.
- Store the whipped topping in the refrigerator for up to 10 hours if not using right away.
- Top the brownies with the whipped topping and drizzle with chocolate syrup (optional) before cutting and serving.
Video
Did you make this recipe?
Thank you for making my recipe! You took pictures, right? Well go ahead and post them on Instagram! Be sure to mention me @iambaker and use the hashtag #YouAreBaker.


This is delicious! I made the brownies before for a different recipe, so I knew they were good. I entered this pie topped with chopped Snickers in a pie contest at work and won best tasting pie! I only used about half the whipped cream, so a cup would work instead of a pint. I also made the chocolate syrup from scratch and can’t wait to use the leftovers. Yummy! Thanks for this fun recipe!
Absolutely delicious!!
Terrific recipe. Thought it would be too sweet but it was not. Huge hit ! Great with vanilla ice cream also. A keeper recipe for sure.
Hi, Could I use a 9 inch pie plate instead? Or an 8 inch cake pan?
Where to buy the coffee powder?
The espresso powder is available at grocery stores.